这篇文章主要介绍Python + OpenCV如何实现LBP特征提取,文中介绍的非常详细,具有一定的参考价值,感兴趣的小伙伴们一定要看完!
背景
看了些许的纹理特征提取的paper,想自己实现其中部分算法,看看特征提取之后的效果是怎样
运行环境
Mac OS
Python3.0
Anaconda3(集成了很多包,浏览器界面编程,清爽)
步骤
导入包
from skimage.transform import rotate
from skimage.feature import local_binary_pattern
from skimage import data, io,data_dir,filters, feature
from skimage.color import label2rgb
import skimage
import numpy as np
import matplotlib.pyplot as plt
from PIL import Image
import cv2
参数设置
# settings for LBP
radius = 1 # LBP算法中范围半径的取值
n_points = 8 * radius # 领域像素点数
图像读取
# 读取图像
image = cv2.imread('img/logo.png')
#显示到plt中,需要从BGR转化到RGB,若是cv2.imshow(win_name, image),则不需要转化
image1 = cv2.cvtColor(image, cv2.COLOR_BGR2RGB)
plt.subplot(111)
plt.imshow(image1)
灰度转换
image = cv2.cvtColor(image1, cv2.COLOR_BGR2GRAY)
plt.subplot(111)
plt.imshow(image, plt.cm.gray)
LBP处理
lbp = local_binary_pattern(image, n_points, radius)
plt.subplot(111)
plt.imshow(lbp, plt.cm.gray)
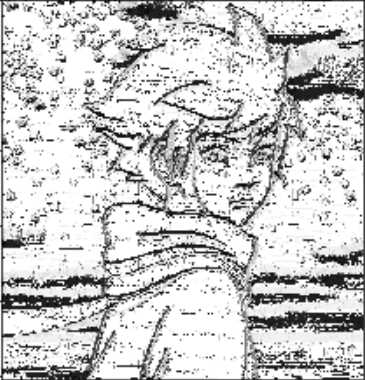
边缘提取
edges = filters.sobel(image)
plt.subplot(111)
plt.imshow(edges, plt.cm.gray)

以上是“Python + OpenCV如何实现LBP特征提取”这篇文章的所有内容,感谢各位的阅读!希望分享的内容对大家有帮助,更多相关知识,欢迎关注亿速云行业资讯频道!
免责声明:本站发布的内容(图片、视频和文字)以原创、转载和分享为主,文章观点不代表本网站立场,如果涉及侵权请联系站长邮箱:is@yisu.com进行举报,并提供相关证据,一经查实,将立刻删除涉嫌侵权内容。


