这篇文章给大家分享的是有关webpack4搭建vue项目的案例的内容。小编觉得挺实用的,因此分享给大家做个参考,一起跟随小编过来看看吧。
新建项目
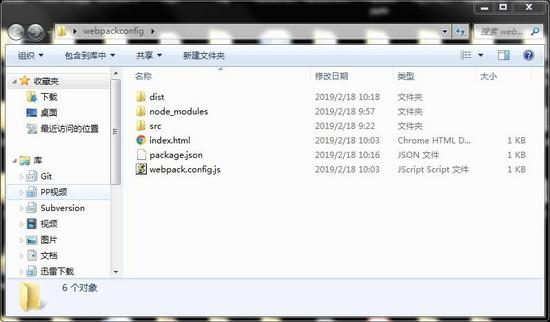
1.新建名为webpackconfig文件夹
2.使用命令
npm init -y
在webpackconfig文件夹中生成package.josn
3.下载依赖包
npm i webpack webpack-dev-server webpack-cli -D
4.新建src文件夹并在src中创建main.js文件
alert(1)
5.新建webpack.config.js文件
webpack.config.js文件
var path = require('path');
var config = {
    entry: './src/main.js',
    output: {
     path: path.resolve(__dirname + '/dist'),//打包生成文件地址
     filename: '[name].build.js',//生成文件ming
     publicPath: '/dist/'//文件输出的公共路径
 }
}
module.exports = config;
entry: 引入文件,对象写法可以引入多文件
 entry: {
 app: './src/app.js',
 vendors: './src/vendors.js'
 }
output:文件输出地址
path: 输出文件地址
filename:输出文件名
publicPath:文件输出路径
6.新建一个index.html文件并引入main.js
<!DOCTYPE html><html lang="en">
<head>
 <meta charset="UTF-8">
 <meta name="viewport" content="width=device-width, initial-scale=1.0">
 <meta http-equiv="X-UA-Compatible" content="ie=edge">
 <title>Document</title>
</head>
<body>
 <script src="/dist/main.build.js"></script>
</body>
</html>
7.配置package.json
"dev": "webpack-dev-server --open --hot",
"build": "webpack --mode=development --progress --hide-modules",
配置之后运行
npm run dev
会打开一个服务并弹出1
但是webpack会有一个警告,这个警告就是因为没有配置mode,就是没有配置相应模式
mode有两个参数,一个是开发模式development一个是生产模式production。
可以在package.json里直接配置
"dev": "webpack-dev-server --mode=development --open --hot"
这样就没有警告了
接下来运行
npm run build
会打包生成一个新的dist文件夹
8.引入loader兼容代码
npm i babel-loader babel-core babel-preset-env -D
babel-preset-env 帮助我们配置 babel。我们只需要告诉它我们要兼容的情况(目标运行环境),它就会自动把代码转换为兼容对应环境的代码。
更改webpack.config.js文件
module: {
 rules: [
  {
   test: '/\.js$/',
   include: path.resolve(__dirname + '/src'),
   exclude: /node_modules/,
   use: [
    {
     loader: 'babel-loader',
     options: ['env']
    }
   ]
  }
 ]
}
9.下载vue并在main.js引入
import Vue from 'vue';
new Vue({
 el: '#app',
 data: {
  msg: 'hello'
 }
})
运行项目发现报错
vue.runtime.esm.js:620 [Vue warn]: You are using the runtime-only build of Vue where the template compiler is not available. Either pre-compile the templates into render functions, or use the compiler-included build.
(found in <Root>)
报这个错误原因就是因为使用的是运行版本的vue,编译版本不能用,这时候在我们需要随后我们还要配置别名,将 resolve.alias 配置为如下对象
resolve: {
 alias: {
 'vue$': 'vue/dist/vue.esm.js',
 '@': path.resolve(__dirname, '/src')
 }
}
然后在运行项目,发现已经在页面上打印出了hello。
一个简单的基于webpack的vue项目已经搭建好了。
接下来就是一些配置
10.配置css
输入命令下载style-loader css-loader
npm i style-loader css-loader -D
配置module中的rules
{
 test: /\.css$/,
 use:['style-loader','css-loader'],
 include: path.resolve(__dirname + '/src/'),
 exclude: /node_modules/
}
测试引入css,新建index.css并在在main.js中引入
index.css
div{
 color:skyblue;
}
import './index.css';
可以看到文字颜色已经改变了

11.支持图片
输入命令下载file-loader url-loader
npm i file-loader url-loader -D
配置module中的rules
{
 test: /\.(jpg|png|gif|svg)$/,
 use: 'url-loader',
 include: path.resolve(__dirname + '/src/'),
 exclude: /node_modules/
}
测试引入图片,新建asset文件夹放一张图片并在在main.js中引入
import img from'./assets/a.png'
在html中显示
<img :src="img" alt="">

12.引入html-webpack-plugin
输入命令下载html-webpack-plugin
npm i html-webpack-plugin -D
设置plugins
var HtmlWebpackPlugin = require('html-webpack-plugin');
plugins: [
 new HtmlWebpackPlugin({
 template: './index.html',
 chunks: ['main']
 })
]
13.vue开发需要.vue文件只要引入vue-laoader和vue-template-compiler就行了
输入命令下载vue-loader vue-style-loader vue-template-compiler
npm i vue-loader vue-style-loader vue-template-compiler -D
配置vue-loader
{
 test: '/\.vue$/',
 loader: 'vue-loader'
}
还需要引入vue-loader/lib/plugin
var VueLoaderPlugin = require('vue-loader/lib/plugin');并在plugin实例化
new VueLoaderPlugin()
新建App.vue
<template> <h2>Hello World!</h2></template>
<script> export default { name: 'App' }</script>
<style></style>
更改main.js
import Vue from 'vue';import App from './App.vue';
new Vue({ el: '#app', render: h => h(App)});
运行项目

14.开启js热更新
因为 vue-style-loader 封装了 style-loader,热更新开箱即用,但是 js 热更新还不能用,每次修改代码我们都会刷新浏览器,所以我们需要继续配置。
const webpack = require('webpack');并在plugin中配置
new webpack.HotModuleReplacementPlugin()
热更新已静开启
到现在为止webpack构建的vue项目已经跑起来了。
接下来就是一些优化,
15.在resolve配置别名
resolve: {
 extensions: ['.js', '.jsx','.ts','.tsx', '.scss','.json','.css'],
 alias: {
 'vue$': 'vue/dist/vue.esm.js',
 "@": path.resolve(__dirname, 'src'),
 "components": path.resolve(__dirname, '/src/components'),
 "utils": path.resolve(__dirname + '/src/utils'),
 },
 modules: ['node_modules']
}
16.支持sass
输入命令下载sass-loader node-sass
npm i sass-loader node-sass -D
修改webpack.config.js的css
{
 test: /\.sass$/,
 use:['vue-style-loader',
  'css-loader', 'sass-loader'
 ],
 include: path.resolve(__dirname + '/src/'),
 exclude: /node_modules/
},
感谢各位的阅读!关于“webpack4搭建vue项目的案例”这篇文章就分享到这里了,希望以上内容可以对大家有一定的帮助,让大家可以学到更多知识,如果觉得文章不错,可以把它分享出去让更多的人看到吧!
免责声明:本站发布的内容(图片、视频和文字)以原创、转载和分享为主,文章观点不代表本网站立场,如果涉及侵权请联系站长邮箱:is@yisu.com进行举报,并提供相关证据,一经查实,将立刻删除涉嫌侵权内容。


