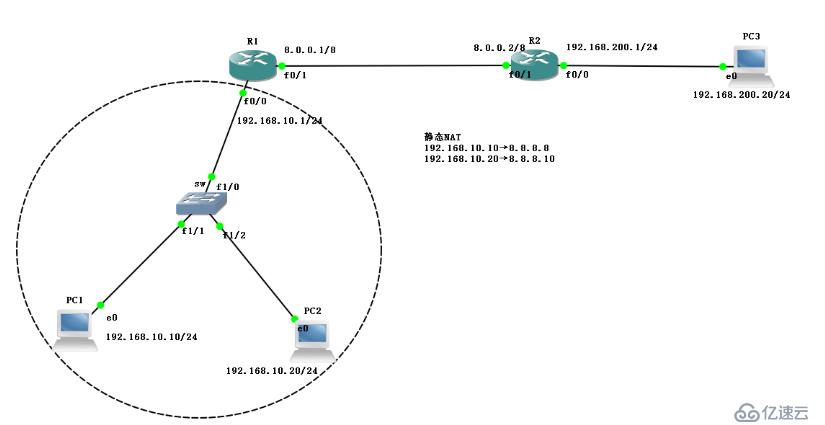
拓扑图如下:
1、设置sw三层交换机
sw#conf t
Enter configuration commands, one per line.  End with CNTL/Z.
sw(config)#no ip routing                    //关闭路由功能
sw(config)#
2、设置路由R1
R1#conf t
Enter configuration commands, one per line.  End with CNTL/Z.
R1(config)#int f0/0
R1(config-if)#ip add 192.168.10.1 255.255.255.0          //仅设定IP地址与子网掩码
R1(config-if)#no shut
*Mar  1 00:03:21.575: %LINK-3-UPDOWN: Interface FastEthernet0/0, changed state to up
*Mar  1 00:03:22.575: %LINEPROTO-5-UPDOWN: Line protocol on Interface FastEthernet0/0, changed state to up
R1(config-if)#int f 0/1
R1(config-if)#ip add 8.0.0.1 255.0.0.0                   //仅设定IP地址与字网掩码
R1(config-if)#no shut
*Mar  1 00:03:42.443: %LINK-3-UPDOWN: Interface FastEthernet0/1, changed state to up
*Mar  1 00:03:43.443: %LINEPROTO-5-UPDOWN: Line protocol on Interface FastEthernet0/1, changed state to up
R1(config-if)#ex
R1(config)#ip route 0.0.0.0 0.0.0.0 8.0.0.2             //设置默认路由
R1(config)#do show ip route                             //查看路由表
Codes: C - connected, S - static, R - RIP, M - mobile, B - BGP
       D - EIGRP, EX - EIGRP external, O - OSPF, IA - OSPF inter area
       N1 - OSPF NSSA external type 1, N2 - OSPF NSSA external type 2
       E1 - OSPF external type 1, E2 - OSPF external type 2
       i - IS-IS, su - IS-IS summary, L1 - IS-IS level-1, L2 - IS-IS level-2
       ia - IS-IS inter area, * - candidate default, U - per-user static route
       o - ODR, P - periodic downloaded static route

Gateway of last resort is 8.0.0.2 to network 0.0.0.0

C    192.168.10.0/24 is directly connected, FastEthernet0/0
C    8.0.0.0/8 is directly connected, FastEthernet0/1
S*   0.0.0.0/0 [1/0] via 8.0.0.2
R1(config)#
3、设置路由R2
R2#conf t
Enter configuration commands, one per line.  End with CNTL/Z.
R2(config)#int f 0/1
R2(config-if)#ip add 8.0.0.2 255.0.0.0                //仅设定IP地址与子网掩码
R2(config-if)#no shut
R2(config-if)#int f 0/0
R2(config-if)#
*Mar  1 00:05:13.815: %LINK-3-UPDOWN: Interface FastEthernet0/1, changed state to up
*Mar  1 00:05:14.815: %LINEPROTO-5-UPDOWN: Line protocol on Interface FastEthernet0/1, changed state to up
R2(config-if)#ip add 192.168.200.1 255.255.255.0          //仅设定IP地址与字网掩码
R2(config-if)#no shut
R2(config-if)#
*Mar  1 00:05:40.643: %LINK-3-UPDOWN: Interface FastEthernet0/0, changed state to up
*Mar  1 00:05:41.643: %LINEPROTO-5-UPDOWN: Line protocol on Interface FastEthernet0/0, changed state to up
R2(config-if)#ex
R2(config)#ip route 192.168.10.0 255.255.255.0 8.0.0.1       //设置静态路由
R2(config)#do show ip route                                  //查看路由表
Codes: C - connected, S - static, R - RIP, M - mobile, B - BGP
       D - EIGRP, EX - EIGRP external, O - OSPF, IA - OSPF inter area
       N1 - OSPF NSSA external type 1, N2 - OSPF NSSA external type 2
       E1 - OSPF external type 1, E2 - OSPF external type 2
       i - IS-IS, su - IS-IS summary, L1 - IS-IS level-1, L2 - IS-IS level-2
       ia - IS-IS inter area, * - candidate default, U - per-user static route
       o - ODR, P - periodic downloaded static route

Gateway of last resort is not set

S    192.168.10.0/24 [1/0] via 8.0.0.1
C    192.168.200.0/24 is directly connected, FastEthernet0/0
C    8.0.0.0/8 is directly connected, FastEthernet0/1
R2(config)#
4、设定三台PC机
PC1
PC1>
PC1> ip 192.168.10.10 192.168.10.1
Checking for duplicate address...
PC1 : 192.168.10.10 255.255.255.0 gateway 192.168.10.1

PC1>
PC2
PC2>
PC2> ip 192.168.10.20 192.168.10.1
Checking for duplicate address...
PC1 : 192.168.10.20 255.255.255.0 gateway 192.168.10.1

PC2>
PC3
PC3>
PC3> ip 192.168.200.20 192.168.200.1
Checking for duplicate address...
PC1 : 192.168.200.20 255.255.255.0 gateway 192.168.200.1

PC3> 
为满足实验目的,接下来将进行静态NAT的设置
在R1上设置静态NAT
R1(config)#ip nat source static 192.168.10.10 8.8.8.8            //静态NAT1

*Mar  1 00:13:12.995: %LINEPROTO-5-UPDOWN: Line protocol on Interface NVI0, changed state to up
R1(config)#ip nat source static 192.168.10.20 8.8.8.10           //静态NAT2

R1(config)#int f 0/0
R1(config-if)#ip nat inside                                      //启用外部NAT
R1(config-if)#int f 0/1
R1(config-if)#ip nat outside                                     //启用内部NAT
R1(config-if)#拓扑图如下:
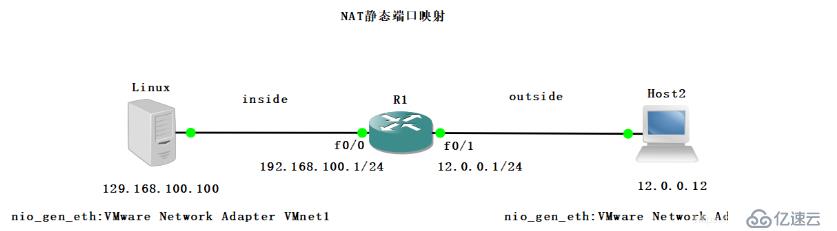
1、设置Linux服务器
将端口进行绑定,绑定在VMnet1上,并设置静态IP
[root@localhost ~]# vim /etc/sysconfig/network-scripts/ifcfg-ens33
改dhcp为static
在末行按o在下行插入
IPADDR=192.168.100.100
NETMASK=255.255.255.0
GATEWAY=192.168.100.1
[root@localhost ~]# service network restart
Restarting network (via systemctl):                        [  确定  ]
[root@localhost ~]# ifconfig
ens33: flags=4163<UP,BROADCAST,RUNNING,MULTICAST>  mtu 1500
        inet 192.168.100.100  netmask 255.255.255.0  broadcast 192.168.100.255
安装http服务并自定义首页
[root@localhost ~]# yum install httpd -y
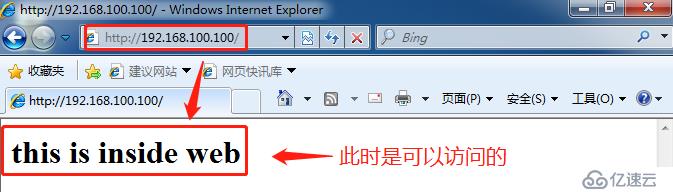
[root@localhost ~]# vim /var/www/html/index.html //写测试网页
<h2>this is inside web</h2>
[root@localhost ~]# systemctl start httpd
[root@localhost ~]# systemctl stop firewalld.service
[root@localhost ~]# setenforce 02、设置路由R1
R1#conf t
Enter configuration commands, one per line. End with CNTL/Z.
R1(config)#int f 0/0
R1(config-if)#ip add 192.168.10.1 255.255.255.0 //仅设置IP地址和子网掩码
R1(config-if)#no shut
*Mar 1 00:00:44.895: %LINK-3-UPDOWN: Interface FastEthernet0/0, changed state to up
*Mar 1 00:00:45.895: %LINEPROTO-5-UPDOWN: Line protocol on Interface FastEthernet0/0, changed state to up
R1(config-if)#int f 0/1
R1(config-if)#ip add 8.0.0.1 255.0.0.0 //仅设置IP地址和子网掩码
R1(config-if)#no shut
R1(config-if)#ex
*Mar 1 00:01:03.159: %LINK-3-UPDOWN: Interface FastEthernet0/1, changed state to up
*Mar 1 00:01:04.159: %LINEPROTO-5-UPDOWN: Line protocol on Interface FastEthernet0/1, changed state to up
R1(config-if)#ex
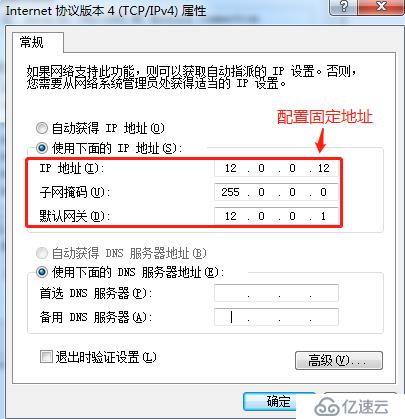
R1(config)#3、设置Host2主机
绑定VMnet2,并设置静态IP
为了满足实验要求,下面将进行端口映射
R1
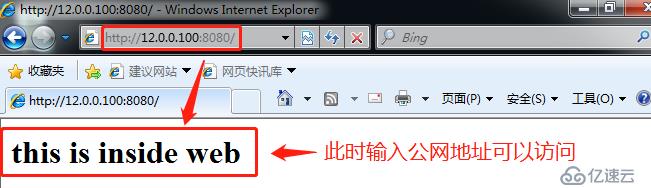
R1(config)#ip nat inside source static tcp 192.168.100.100 80 12.0.0.100 8080 extendable R1(config)#int f0/0
R1(config-if)#ip nat inside
R1(config-if)#int f0/1
R1(config-if)#ip nat outsid
R1(config-if)#end
R1#debug ip nat
IP NAT debugging is on

*Mar  1 00:36:59.327: NAT*: TCP s=49160, d=8080->80
*Mar  1 00:36:59.327: NAT*: s=12.0.0.12, d=12.0.0.100->192.168.100.100 [364]
//端口和地址都进行了转换使用Host2主机再次进行访问,输入http://12.0.0.100:8080同样可以访问。
免责声明:本站发布的内容(图片、视频和文字)以原创、转载和分享为主,文章观点不代表本网站立场,如果涉及侵权请联系站长邮箱:is@yisu.com进行举报,并提供相关证据,一经查实,将立刻删除涉嫌侵权内容。


