本文实例讲述了Android编程实现图片背景渐变切换与图层叠加效果。分享给大家供大家参考,具体如下:
本例要实现的目的:
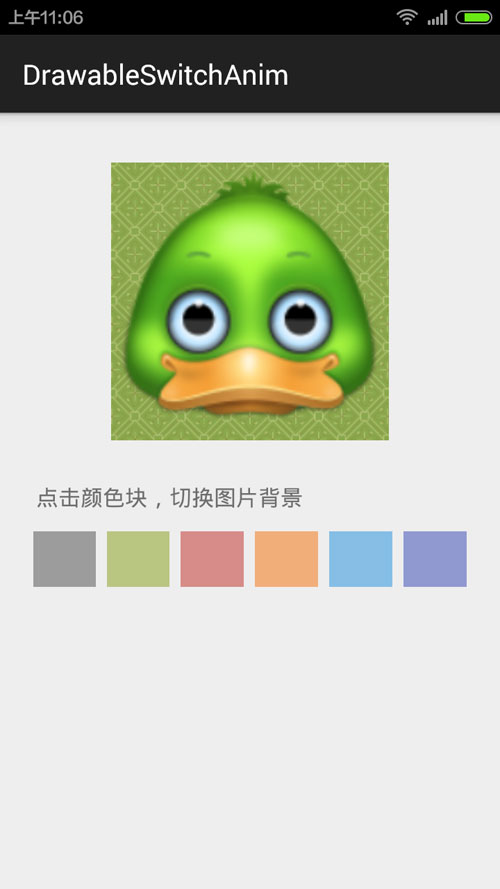
1.图片背景渐变的切换,例如渐变的从红色切换成绿色。
2.代码中进行图层叠加,即把多个Drawable叠加在一起显示在一个组件之上。
效果图:
代码很简单:
(1)布局文件:
<RelativeLayout xmlns:android="http://schemas.android.com/apk/res/android"
  xmlns:tools="http://schemas.android.com/tools"
  android:layout_width="match_parent"
  android:layout_height="match_parent"
  android:paddingLeft="@dimen/activity_horizontal_margin"
  android:paddingRight="@dimen/activity_horizontal_margin"
  android:paddingTop="@dimen/activity_vertical_margin"
  android:paddingBottom="@dimen/activity_vertical_margin"
  tools:ignore="ContentDescription"
  tools:context=".MainActivity">
  <ImageView
    android:id="@+id/color_iv"
    android:layout_width="200dp"
    android:layout_height="200dp"
    android:layout_centerHorizontal="true"
    android:src="@drawable/image_bg_2"
    android:layout_margin="20dp" />
  <TextView
    android:id="@+id/note_text"
    android:layout_below="@+id/color_iv"
    android:layout_width="wrap_content"
    android:layout_height="wrap_content"
    android:textSize="16sp"
    android:layout_margin="10dp"
    android:text="点击颜色块,切换图片背景" />
  <LinearLayout
    android:layout_width="match_parent"
    android:layout_height="48dip"
    android:layout_below="@+id/note_text"
    android:layout_marginBottom="8dip"
    android:layout_marginLeft="4dip"
    android:layout_marginRight="4dip"
    android:orientation="horizontal">
    <ImageView
      android:layout_width="0dip"
      android:layout_height="match_parent"
      android:layout_margin="4dip"
      android:layout_weight="1"
      android:background="#99666666"
      android:onClick="onColorClicked"
      android:tag="#99666666" />
    <ImageView
      android:layout_width="0dip"
      android:layout_height="match_parent"
      android:layout_margin="4dip"
      android:layout_weight="1"
      android:background="#9996AA39"
      android:onClick="onColorClicked"
      android:tag="#9996AA39" />
    <ImageView
      android:layout_width="0dip"
      android:layout_height="match_parent"
      android:layout_margin="4dip"
      android:layout_weight="1"
      android:background="#99C74B46"
      android:onClick="onColorClicked"
      android:tag="#99C74B46" />
    <ImageView
      android:layout_width="0dip"
      android:layout_height="match_parent"
      android:layout_margin="4dip"
      android:layout_weight="1"
      android:background="#99F4842D"
      android:onClick="onColorClicked"
      android:tag="#99F4842D" />
    <ImageView
      android:layout_width="0dip"
      android:layout_height="match_parent"
      android:layout_margin="4dip"
      android:layout_weight="1"
      android:background="#993F9FE0"
      android:onClick="onColorClicked"
      android:tag="#993F9FE0" />
    <ImageView
      android:layout_width="0dip"
      android:layout_height="match_parent"
      android:layout_margin="4dip"
      android:layout_weight="1"
      android:background="#995161BC"
      android:onClick="onColorClicked"
      android:tag="#995161BC" />
  </LinearLayout>
</RelativeLayout>
(2)Activity代码:
package com.sinatj.colorgradientanim;
import android.graphics.Color;
import android.graphics.drawable.ColorDrawable;
import android.graphics.drawable.Drawable;
import android.graphics.drawable.LayerDrawable;
import android.graphics.drawable.TransitionDrawable;
import android.os.Build;
import android.os.Handler;
import android.support.v7.app.ActionBarActivity;
import android.os.Bundle;
import android.view.View;
import android.widget.ImageView;
public class MainActivity extends ActionBarActivity {
  private ImageView imageView;
  private Drawable oldBackground = null;
  private Drawable bgDrawable;
  @Override
  protected void onCreate(Bundle savedInstanceState) {
    super.onCreate(savedInstanceState);
    setContentView(R.layout.activity_main);
    imageView = (ImageView) findViewById(R.id.color_iv);
    bgDrawable = getResources().getDrawable(R.drawable.image_bg_1);
    //初始颜色
    changeColor(Color.parseColor("#6696AA39"));
  }
  private void changeColor(int newColor) {
    Drawable colorDrawable = new ColorDrawable(newColor);
    //图层叠加
    LayerDrawable ld = new LayerDrawable(new Drawable[]{bgDrawable, colorDrawable});
    if (oldBackground == null) {
      imageView.setBackgroundDrawable(ld);
    } else {
      //渐变切换
      TransitionDrawable td = new TransitionDrawable(new Drawable[]{oldBackground, ld});
      imageView.setBackgroundDrawable(td);
      td.startTransition(300);
    }
    oldBackground = ld;
  }
  public void onColorClicked(View v) {
    int color = Color.parseColor(v.getTag().toString());
    changeColor(color);
  }
}
更多关于Android相关内容感兴趣的读者可查看本站专题:《Android图形与图像处理技巧总结》、《Android开发入门与进阶教程》、《Android调试技巧与常见问题解决方法汇总》、《Android基本组件用法总结》、《Android视图View技巧总结》、《Android布局layout技巧总结》及《Android控件用法总结》
希望本文所述对大家Android程序设计有所帮助。
免责声明:本站发布的内容(图片、视频和文字)以原创、转载和分享为主,文章观点不代表本网站立场,如果涉及侵权请联系站长邮箱:is@yisu.com进行举报,并提供相关证据,一经查实,将立刻删除涉嫌侵权内容。


