如何使用spring cloud Bus刷新配置,相信很多没有经验的人对此束手无策,为此本文总结了问题出现的原因和解决方法,通过这篇文章希望你能解决这个问题。
当我们的业务系统越来越庞大复杂的时候,各种配置也会随之增多。配置文件只要一修改,会对commonservice-config配置中心先停止服务,然后再重新启动,最后使配置生效。
如果服务少,我们可以手动方式来启动,但是对业务和系统的稳定性肯定有一定的影响。
针对以上问题,commonservice-config服务端和业务微服务分别做了相关的配置,服务端负责将git(svn或本地文件系统)中存储的配置文件进行配置化(我们使用的是本地配置方案,方便直接将配置文件更新到linux上),
业务微服务通过配置从服务端配置中心获取相关配置,如果配置文件变动了,通过刷新业务微服务的方式,将最新的配置信息获取。
spring cloud Bus通过一个轻量级消息代理连接分布式系统的节点。这可以用于广播状态更改(如配置更改)或其他管理指令。
接下来,我们就来实施通过spring cloud Bus方案,动态刷新服务端配置,具体步骤如下:
1. commonservice-config服务配置可以参考之前的链接:
2. 业务微服务配置(以honghu-member-servcie会员服务为例):
<span style="font-size: 16px;">        <dependency>
            <groupId>org.springframework.boot</groupId>
            <artifactId><span style="font-size: 16px;">spring-boot-starter-actuator</span></artifactId>
        </dependency>

    <dependency>
         <groupId>org.springframework.cloud</groupId>
             <artifactId><span style="font-size: 16px;">spring-cloud-starter-bus-amqp</span></artifactId>
    </dependency></span>
yml文件配置:
span style="font-size: 16px;">server:
  port: 5012  spring:
  application:
    name: honghu-member-client
  profiles:
    active: dev,discoveryClient
  cloud:
    config:
      discovery:
        enabled: true
        service-id: commonservice-config-server
      <span style="font-size: 16px;"><strong>name: honghu-member
      profile: dev
    bus:
      trace:
        enabled: true  #开启消息跟踪  </strong>
  <strong>rabbitmq:
    host: 192.168.1.254
    port: 5672
    username: honghu
    password: honghu</strong>  </span>
eureka:
  client:
    serviceUrl:
      defaultZone: http://honghu:123456@localhost:8761/eureka/
  instance:
    prefer-ip-address: true  logging:
  level:
    root: INFO
    org.springframework.security: INFO
management:
  security:
    enabled: false  security:
  basic:
    enabled: false</span>
编写一个测试类(MemberController.java),用来获取配置项
<span style="font-size: 16px;">package com.honghu.cloud.controller;
import org.springframework.beans.factory.annotation.Value; import org.springframework.cloud.context.config.annotation.RefreshScope; import org.springframework.web.bind.annotation.GetMapping; import org.springframework.web.bind.annotation.RestController;
<strong>@RefreshScope</strong> @RestController public class MemberController {
@Value("${profile}")
private String profile;
@GetMapping("/profile")
public String getProfile() {
return this.profile;
}
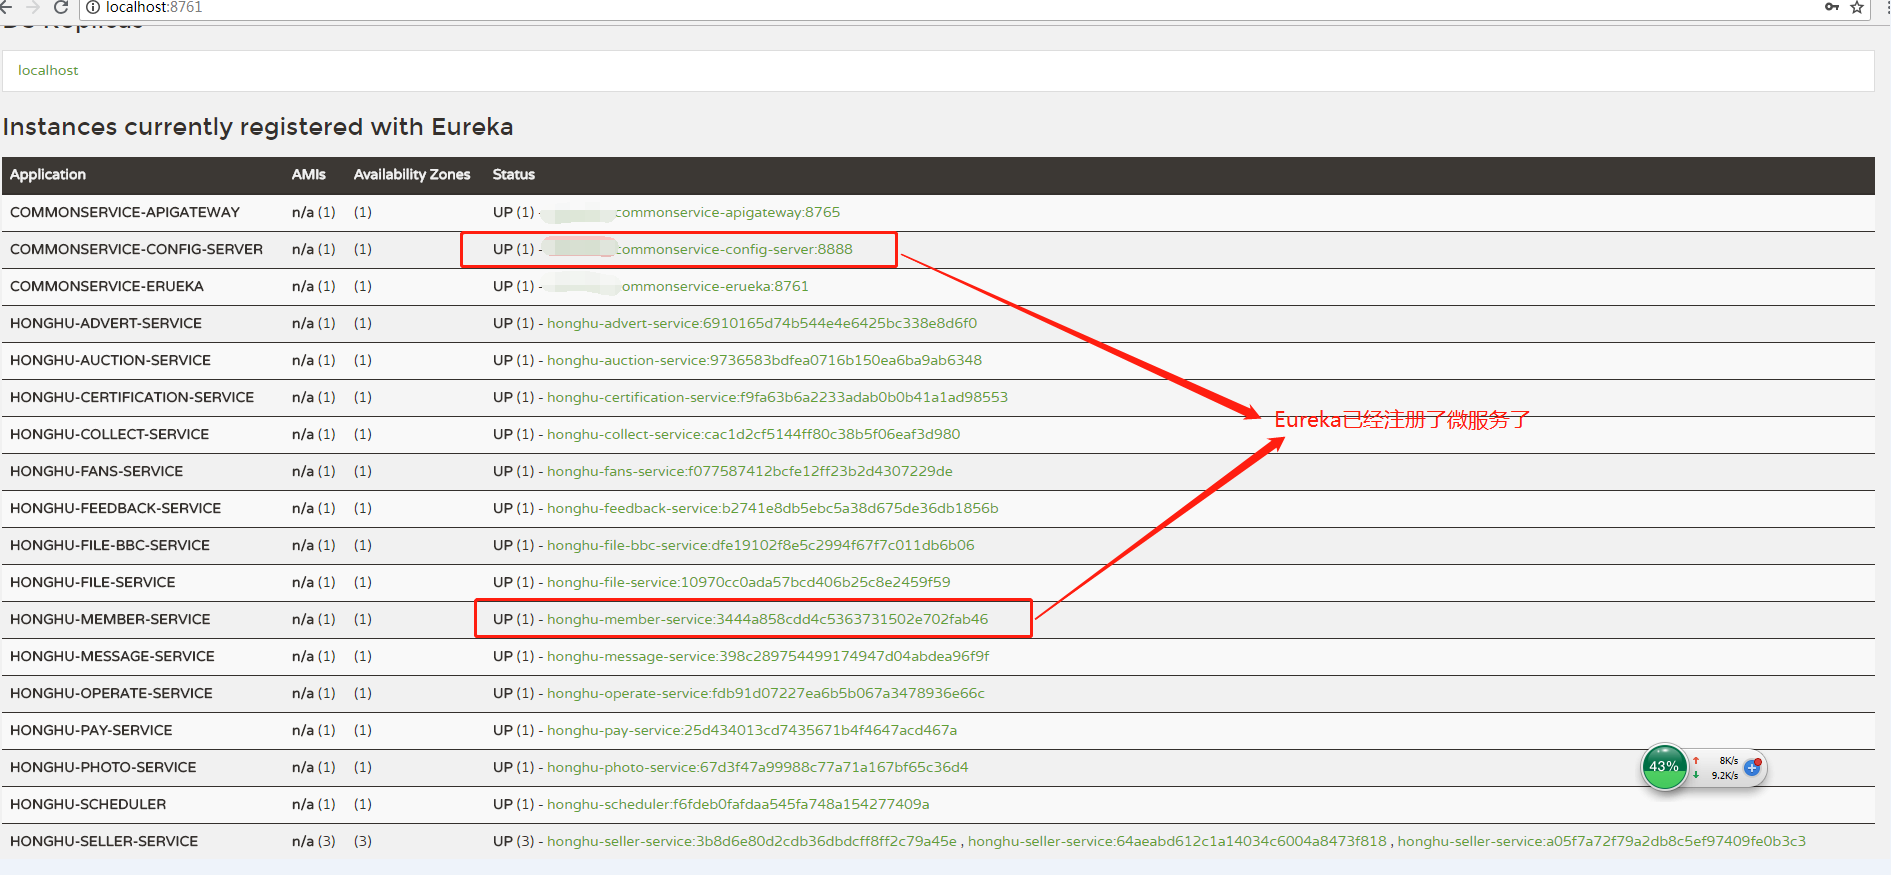
}</span>3. 查看注册中心,commonservice-config、honghu-member-service服务是否已经注册
4. 访问一下profile,获取profile对应的配置信息(原配置):
访问http://localhost:7071/profile ==》 访问结果:123456
5. 修改config配置中心的配置文件,将profile=123456修改为honghu123456
再次访问http://localhost:7071/profile ==》 访问结果:123456
6. 使用spring cloud bus 刷新方案(使用post man测试工具进行测试)
再次访问http://localhost:7071/profile ==》 访问结果:honghu123456
到此,整个commonservice-config配置中心动态刷新方案整理完毕
看完上述内容,你们掌握如何使用spring cloud Bus刷新配置的方法了吗?如果还想学到更多技能或想了解更多相关内容,欢迎关注亿速云行业资讯频道,感谢各位的阅读!
免责声明:本站发布的内容(图片、视频和文字)以原创、转载和分享为主,文章观点不代表本网站立场,如果涉及侵权请联系站长邮箱:is@yisu.com进行举报,并提供相关证据,一经查实,将立刻删除涉嫌侵权内容。


