本篇文章给大家分享的是有关Centos6.5中怎么安装 Xen4.2,小编觉得挺实用的,因此分享给大家学习,希望大家阅读完这篇文章后可以有所收获,话不多说,跟着小编一起来看看吧。
[root@localhost ~]# cat /etc/redhat-release
CentOS release 6.5 (Final)
安装xen
[root@localhost ~]# yum install centos-release-xen.x86_64 配置xen的yum仓库
[root@localhost ~]# yum install xen -y
[root@localhost ~]# yum install kernel-xen
[root@localhost ~]# yum install bridge-utils
执行
[root@localhost yum.repos.d]# /usr/bin/grub-bootxen.sh
查看grub.conf
[root@localhost yum.repos.d]# cat /etc/grub.conf
# grub.conf generated by anaconda
#
# Note that you do not have to rerun grub after making changes to this file
# NOTICE:  You have a /boot partition.  This means that
#          all kernel and initrd paths are relative to /boot/, eg.
#          root (hd0,0)
#          kernel /vmlinuz-version ro root=/dev/mapper/vol0-root
#          initrd /initrd-[generic-]version.img
#boot=/dev/sda
default=0
timeout=5
splashimage=(hd0,0)/grub/splash.xpm.gz
hiddenmenu
title CentOS (3.10.55-11.el6.centos.alt.x86_64)
	root (hd0,0)
	kernel /xen.gz dom0_mem=1024M,max:1024M loglvl=all guest_loglvl=all
	module /vmlinuz-3.10.55-11.el6.centos.alt.x86_64 ro root=/dev/mapper/vol0-root rd_NO_LUKS rd_LVM_LV=vol0/root rd_NO_MD crashkernel=auto LANG=zh_CN.UTF-8  KEYBOARDTYPE=pc KEYTABLE=us rd_NO_DM rhgb quiet
	module /initramfs-3.10.55-11.el6.centos.alt.x86_64.img
title CentOS (2.6.32-431.el6.x86_64)
	root (hd0,0)
	kernel /vmlinuz-2.6.32-431.el6.x86_64 ro root=/dev/mapper/vol0-root rd_NO_LUKS rd_LVM_LV=vol0/root rd_NO_MD crashkernel=auto LANG=zh_CN.UTF-8  KEYBOARDTYPE=pc KEYTABLE=us rd_NO_DM rhgb quiet
	initrd /initramfs-2.6.32-431.el6.x86_64.img
设置xend开机自动启动
[root@localhost yum.repos.d]# chkconfig xend on
重启
重启系统后,默认应该进入 Xen 内核,可以通过 uname -r 和 xm info 确认是否安装成功:
[root@localhost ~]# cd  /proc/xen/
[root@localhost xen]# ls
capabilities  privcmd  xenbus  xsd_kva  xsd_port
[root@localhost xen]# cat capabilities
control_d                       看有没有关键字出现
启动xend
[root@localhost xen]# /etc/init.d/xend start
启动 xend 守护进程:                                       [确定]
[root@localhost xen]# chkconfig xend on
#reboot
[root@kcw 桌面]# uname -r
3.10.55-11.el6.centos.alt.x86_64
[root@kcw 桌面]# xm info
host                   : kcw
release                : 3.10.55-11.el6.centos.alt.x86_64
version                : #1 SMP Fri Sep 26 19:08:24 UTC 2014
machine                : x86_64
nr_cpus                : 4
nr_nodes               : 1
cores_per_socket       : 4
threads_per_core       : 1
cpu_mhz                : 3093
hw_caps                : bfebfbff:28100800:00000000:00003f40:17bae3ff:00000000:00000001:00000000
virt_caps              : hvm hvm_directio
total_memory           : 4069
free_memory            : 2983
free_cpus              : 0
xen_major              : 4
xen_minor              : 2
xen_extra              : .5-34.el6
xen_caps               : xen-3.0-x86_64 xen-3.0-x86_32p hvm-3.0-x86_32 hvm-3.0-x86_32p hvm-3.0-x86_64
xen_scheduler          : credit
xen_pagesize           : 4096
platform_params        : virt_start=0xffff800000000000
xen_changeset          : unavailable
xen_commandline        : dom0_mem=1024M,max:1024M loglvl=all guest_loglvl=all
cc_compiler            : gcc (GCC) 4.4.7 20120313 (Red Hat 4.4.7-4)
cc_compile_by          : mockbuild
cc_compile_domain      : centos.org
cc_compile_date        : Fri Sep 26 17:27:55 CDT 2014
xend_config_format     : 4
Xen比较特殊必须有一个主机管理硬件Xen里叫Domain-0
[root@kcw 桌面]# xm list
Name                                        ID   Mem VCPUs      State   Time(s)
Domain-0                                     0  1024     4     r-----    160.8
                                            ID号 内存    虚拟cpu个数  r表示running  运行时间
创建虚拟机先创建虚拟磁盘镜像
创建虚拟机的工具有很多,比如 virt-manager, virt-install, virsh, xen-create-image 等等,不过这些工具都要每次重头安装虚拟机的操作系统,需要人机交互、速度慢、不自动,不利于写成脚本。有什么快速的创建/部署/克隆虚拟机的办法呢?可 以先做一个模版,然后通过拷贝模版的办法。我们只需要两个步骤:1、创建一个空白文件镜像;2、然后把一个打包好的 Linux 系统模版拷贝过去。通常一个打包好的最小 Linux 系统只要200MB 左右,在高配置的服务器上拷贝基本能瞬间完成,比起拷贝整个虚拟机镜像文件(比如 10GB)要快得多。具体步骤:
我这里用virt-install 创建一个虚拟机
创建虚拟磁盘
dd if=/dev/zero of=/home/vm01 bs=4096 seek=1024k count=0
 mkfs -t ext4 /home/vm01
/etc/init.d/iptables stop
[root@localhost ~]# mount -o loop CentOS-6.5-x86_64-bin-DVD1.iso /tmp/os/  首先要把光盘文件复制到物理机上在挂在
[root@localhost ~]# cat /etc/exports  nfs输出
/tmp/os     192.168.1.*(ro)
[root@localhost ~]# exportfs -rv
exporting 192.168.1.*:/tmp/os
安装虚拟机
virt-install --name=domadin01 --ram=512 --vcpus=2 --graphics none --file=/home/vm01 --location /tmp/os/
--graphics none不使用图形界面
回车后如下
Welcome to CentOS for x86_64

                    ┌────────┤ Choose a Language ├────────┐
                    │                                     │
                    │ What language would you like to use │
                    │ during the installation process?    │
                    │                                     │
                    │      Catalan                ↑       │
                    │      Chinese(Simplified)    ▒       │
                    │      Chinese(Traditional)   ▮       │
                    │      Croatian               ▒       │
                    │      Czech                  ▒       │
                    │      Danish                 ▒       │
                    │      Dutch                  ▒       │
                    │      English                ↓       │
                    │                                     │
                    │               ┌────┐                │
                    │               │ OK │                │
                    │               └────┘                │
                    │                                     │
                    │                                     │
                    └─────────────────────────────────────┘
创建桥接网络
[root@kcw ~]# rpm -qf /usr/sbin/brctl
bridge-utils-1.2-10.el6.x86_64
[root@kcw network-scripts]# cat ifcfg-br0  ####
DEVICE=br0
TYPE=Bridge
BOOTPROTO=dhcp
ONBOOT=yes
#IPADDR=192.168.0.222
#PREFIX=24
#GATEWAY=192.168.0.1
#DNS1=192.168.0.1
#DNS2=61.134.1.4
#DEFROUTE=yes

###################################################
[root@kcw network-scripts]# cat ifcfg-eth0
DEVICE=eth0
TYPE=Ethernet
BOOTPROTO=none
ONBOOT=yes
BRIDGE=br0
####################################################
[root@kcw network-scripts]# /etc/init.d/network restar
#
[root@kcw network-scripts]# ifconfig
br0       Link encap:Ethernet  HWaddr 78:24:AF:45:1C:7E
          inet addr:192.168.0.100  Bcast:255.255.255.255  Mask:255.255.255.0
          inet6 addr: fe80::7a24:afff:fe45:1c7e/64 Scope:Link
          UP BROADCAST RUNNING MULTICAST  MTU:1500  Metric:1
          RX packets:2399 errors:0 dropped:0 overruns:0 frame:0
          TX packets:1934 errors:0 dropped:0 overruns:0 carrier:0
          collisions:0 txqueuelen:0
          RX bytes:1303859 (1.2 MiB)  TX bytes:232667 (227.2 KiB)

eth0      Link encap:Ethernet  HWaddr 78:24:AF:45:1C:7E
          inet6 addr: fe80::7a24:afff:fe45:1c7e/64 Scope:Link
          UP BROADCAST RUNNING MULTICAST  MTU:1500  Metric:1
          RX packets:8629 errors:0 dropped:3 overruns:0 frame:0
          TX packets:3422 errors:0 dropped:0 overruns:0 carrier:0
          collisions:0 txqueuelen:1000
          RX bytes:2094791 (1.9 MiB)  TX bytes:336619 (328.7 KiB)
搭建ftp服务器安装
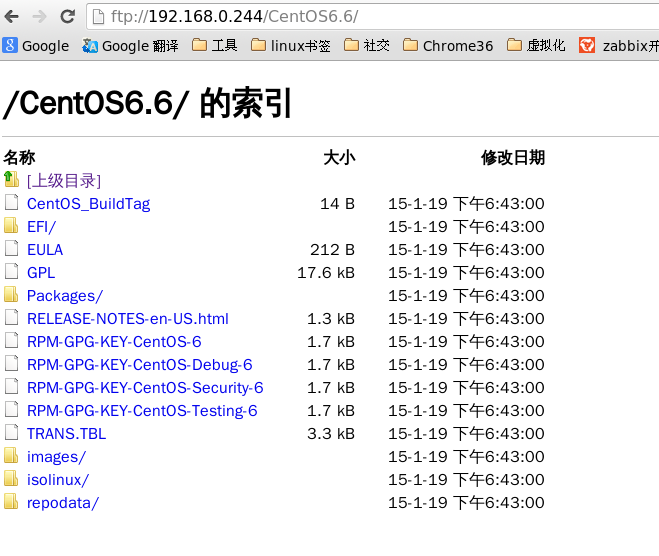
[root@e3 ~]# yum install vsftpd #安装ftp
[root@e3 ~]# /etc/init.d/vsftpd #启动ftp
 [root@e3 ~]# chkconfig vsftpd  on #开机自启动
[root@e3 tmp]#wget http://mirrors.sohu.com/centos/6/isos/x86_64/CentOS-6.6-x86_64-minimal.iso  #下载Centos6.6 MINI安装盘
[root@e3 tmp]# mkdir /mnt/cdrom/
[root@e3 tmp]# mount CentOS-6.6-x86_64-minimal.iso /mnt/cdrom/ #挂载
[root@e3 tmp]# cp -r /mnt/cdrom /var/ftp/
[root@e3 tmp]# cd /root/centos/cdrom/
[root@e3 cdrom]# vim .treeinfo
#修改如下
[general]
family = CentOS
timestamp = 1414159790.06
variant =
totaldiscs = 1
version = 6.6
discnum = 1
packagedir =
arch = x86_64

[images-xen]
kernel = isolinux/vmlinuz
initrd = isolinux/initrd.img


[images-x86_64]
initrd = images/pxeboot/initrd.img

[stage2]
mainimage = images/install.img
#完了保存的时候强制保存 :wq!
然后重启你的vftpd。
测试:看能不能访问
开始安装
virt-install -n vm01 -r 512 --vcpus=2 --disk /data/vm01.img,size=10 --nographics -p -l "ftp://192.168.0.244/CentOS6.6/" -w bridge:br0 --extra-args="text console=com1 utf8 console=hvc0"
-n 表示guest机器名字
-r 表示分配内存大小
--vcpus 表示虚拟几颗CPU
--disk 磁盘路径
-p 半虚拟化
-l 指定安装源
-vnc 使用vnc
-c 指定cdrom
-s --file-size 指定磁盘大小,单位GB
-f --file 指定磁盘使用file
--disk= 指定不同的磁盘文件
安装过程参考这篇博文http://my.oschina.net/kcw/blog/369627
[root@kcw ~]# xm list
Name                                        ID   Mem VCPUs      State   Time(s)
Domain-0                                     0  2048     4     r-----  10258.8
vm01                                         9   512     2     -b----      9.3
[root@kcw ~]# xm console vm01
用virt-install --promat 安装的虚拟机需要安装 vnc-vncview
装完后用xm console centos 不能连接需要在内核加参数 --console=hvc0
以上就是Centos6.5中怎么安装 Xen4.2,小编相信有部分知识点可能是我们日常工作会见到或用到的。希望你能通过这篇文章学到更多知识。更多详情敬请关注亿速云行业资讯频道。
免责声明:本站发布的内容(图片、视频和文字)以原创、转载和分享为主,文章观点不代表本网站立场,如果涉及侵权请联系站长邮箱:is@yisu.com进行举报,并提供相关证据,一经查实,将立刻删除涉嫌侵权内容。


