这篇文章主要介绍“CentOS7怎么安装Splunk”,在日常操作中,相信很多人在CentOS7怎么安装Splunk问题上存在疑惑,小编查阅了各式资料,整理出简单好用的操作方法,希望对大家解答”CentOS7怎么安装Splunk”的疑惑有所帮助!接下来,请跟着小编一起来学习吧!
Splunk 是机器数据的引擎。使用 Splunk 可收集、索引和利用所有应用程序、服务器和设备生成的快速移动型计算机数据 。 使用 Splunking 处理计算机数据,可让您在几分钟内解决问题和调查安全事件。

Splunk总是建议使用专用用户为此应用程序运行,而不是根用户。我创建了一个用户运行该应用程序,并创建了一个文件夹安装应用程序。
[root@server1 tmp]# groupadd splunk[root@server1 tmp]# useradd -d /opt/splunk -m -g splunk splunk[root@server1 tmp]# su - splunk[splunk@server1 ~]$ id
uid=1001(splunk) gid=1001(splunk) groups=1001(splunk)

Confirm the server architecture

[splunk@server1 ~]$ getconf LONG_BIT
64
从Splunk官方网站下载Splunk软件,创建一个账户。 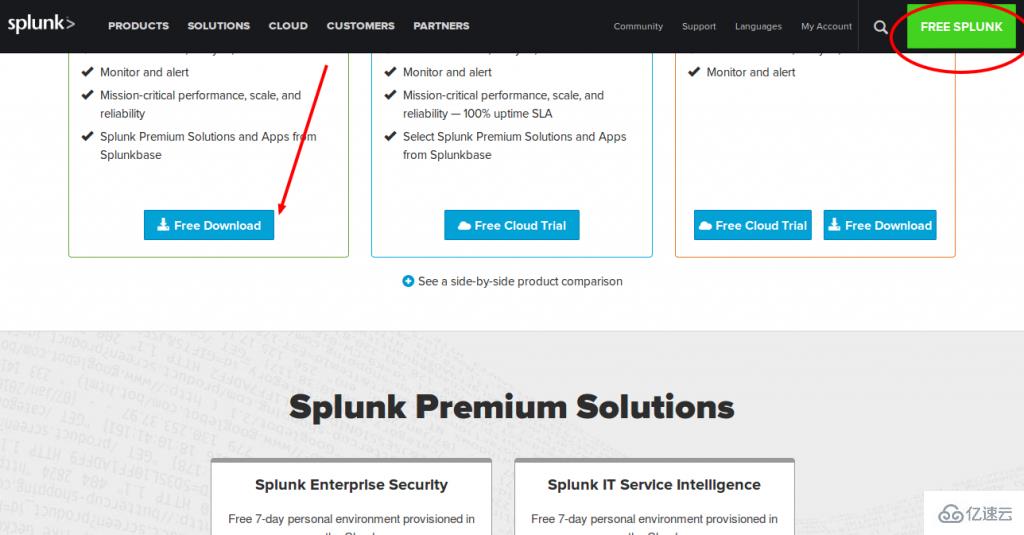 现在解压tar文件,将文件复制到/opt/splunk下已经创建splunk的应用程序文件夹下面。
root@server1 tmp]# tar -xvf splunk-6.4.0-f2c836328108-Linux-x86_64.tgz[root@server1 tmp]# cp -rp splunk/* /opt/splunk/[root@server1 tmp]# chown -R splunk: /opt/splunk/
Splunk软件下载之后,您可以用您的Splunk用户登录运行安装脚本。我选择试用许可证,所以它会默认。
root@server1 tmp]# su - splunkLast login: Fri Apr 29 08:14:12 UTC 2016 on pts/0

[splunk@server1 ~]$ cd bin/
[splunk@server1 bin]$ ./splunk start --accept-license

This appears to be your first time running this version of Splunk.

Copying '/opt/splunk/etc/openldap/ldap.conf.default' to '/opt/splunk/etc/openldap/ldap.conf'.
Generating RSA private key, 1024 bit long modulus
.++++++
..................++++++
e is 65537 (0x10001)
writing RSA key

Generating RSA private key, 1024 bit long modulus
................++++++
..++++++
e is 65537 (0x10001)
writing RSA key

Moving '/opt/splunk/share/splunk/search_mrsparkle/modules.new' to '/opt/splunk/share/splunk/search_mrsparkle/modules'.

Splunk> Australian for grep.

Checking prerequisites...
Checking http port [8000]: open
Checking mgmt port [8089]: open
Checking appserver port [127.0.0.1:8065]: open
Checking kvstore port [8191]: open
Checking configuration... Done.
Creating: /opt/splunk/var/lib/splunk
Creating: /opt/splunk/var/run/splunk
Creating: /opt/splunk/var/run/splunk/appserver/i18n
Creating: /opt/splunk/var/run/splunk/appserver/modules/static/css
Creating: /opt/splunk/var/run/splunk/upload
Creating: /opt/splunk/var/spool/splunk
Creating: /opt/splunk/var/spool/dirmoncache
Creating: /opt/splunk/var/lib/splunk/authDb
Creating: /opt/splunk/var/lib/splunk/hashDb
Checking critical directories... Done
Checking indexes...
Validated: _audit _internal _introspection _thefishbucket history main summary
Done
New certs have been generated in '/opt/splunk/etc/auth'.
Checking filesystem compatibility... Done
Checking conf files for problems...
Done
Checking default conf files for edits...
Validating installed files against hashes from '/opt/splunk/splunk-6.4.0-f2c836328108-linux-2.6-x86_64-manifest'All installed files intact.
Done
All preliminary checks passed.

Starting splunk server daemon (splunkd)...
Generating a 1024 bit RSA private key
.....................++++++
...........................++++++
writing new private key to 'privKeySecure.pem'-----
Signature ok
subject=/CN=server1.centos7-test.com/O=SplunkUser
Getting CA Private Key
writing RSA key
Done
[ OK ]

Waiting for web server at http://127.0.0.1:8000 to be available.... Done
If you get stuck, we're here to help.
Look for answers here: http://docs.splunk.com

The Splunk web interface is at http://server1.centos7-test.com:8000
现在您可以访问您的Splunk Web界面http://IP:8000 /或http://hostname:8000,您需要确保这个端口8000在您服务器防火墙上面开放。
我已经完成Splunk的安装,Splunk服务在我的服务器中正常运行。现在我需要设置我Splunk Web界面,使用我设置的管理员密码访问Splunk web界面。 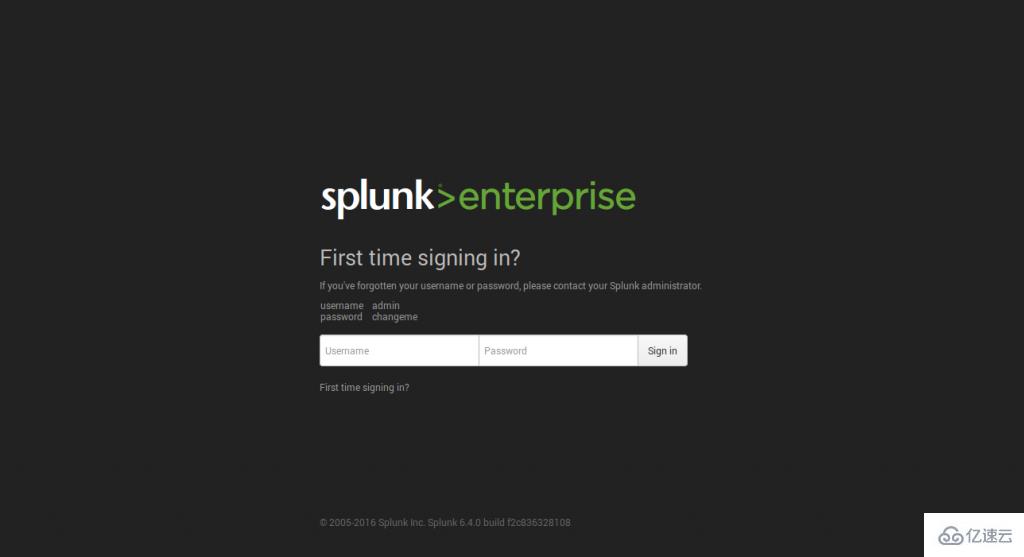 第一次当您访问Splunk的界面,你在页面中使用的是管理员用户和密码。一旦登录,就在下一页,它会要求更改和确认您的新密码。
 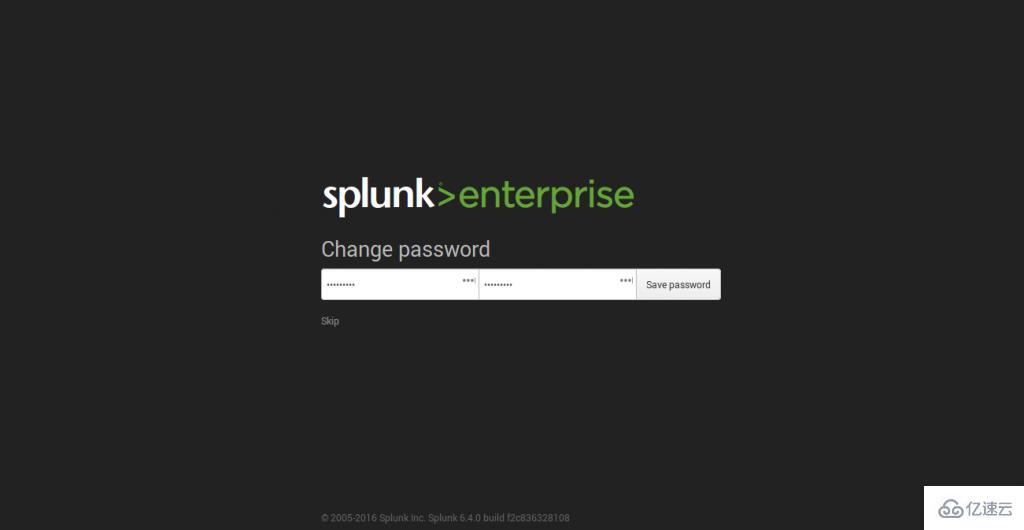 现在,您已经设置新的管理员密码。一旦您使用新密码登录,您将有准备使用的Splunk仪表板。
 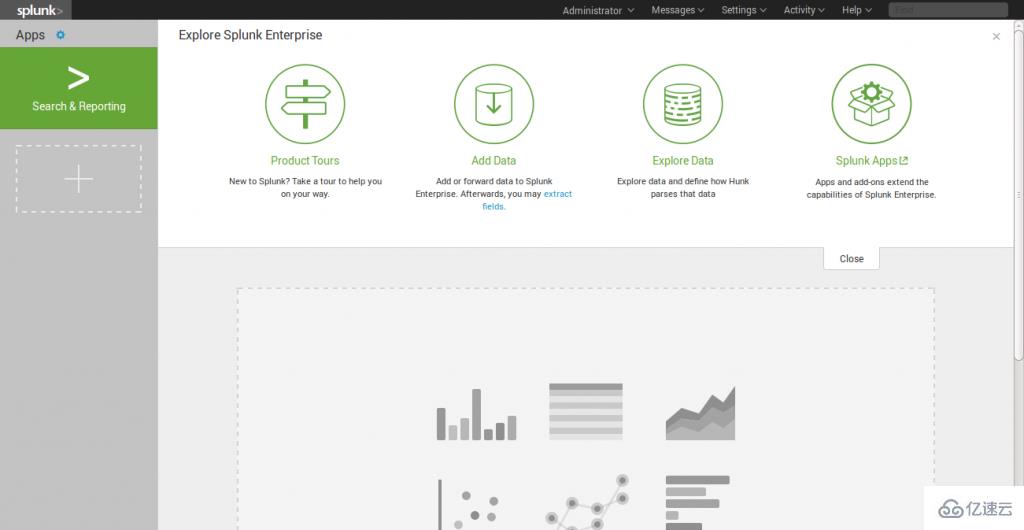 在主页上列出了不同的类别,您可以选择所需的一个开始splunking。
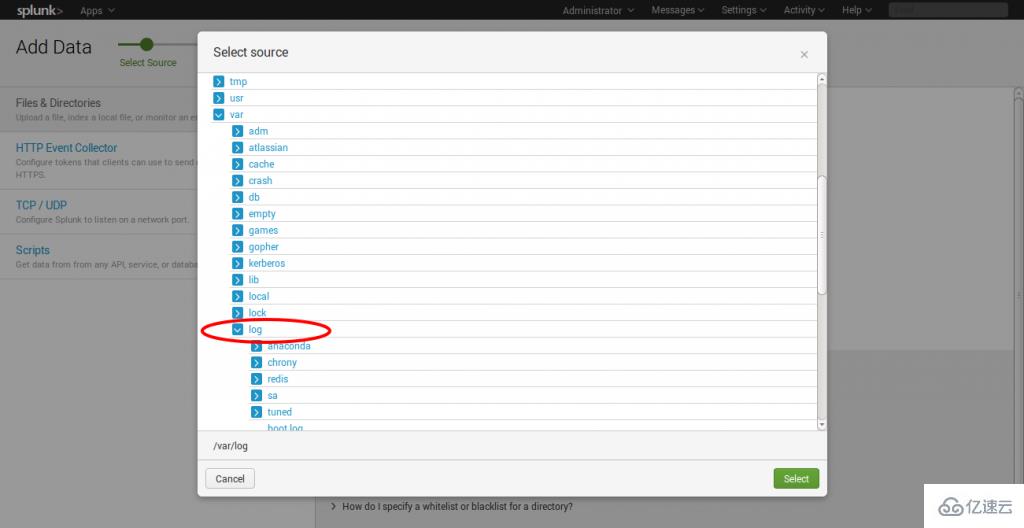
我要加入一个例子为一个简单的任务,它被添加到 Splunk 系统。只是看到我的快照,以了解我将如何添加它。我的任务是将 /var/log文件夹添加到Splunk系统的监测。
1.打开Splunk Web界面,并在设置选项卡上单击 > > 选择添加数据选项
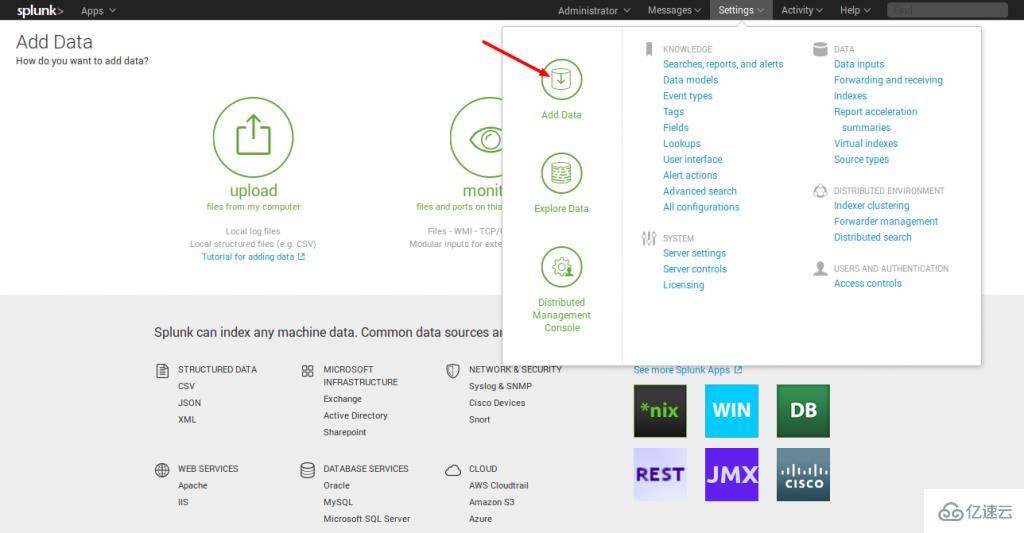
2.在这里我们的任务是监视文件夹,所以我们继续监视。
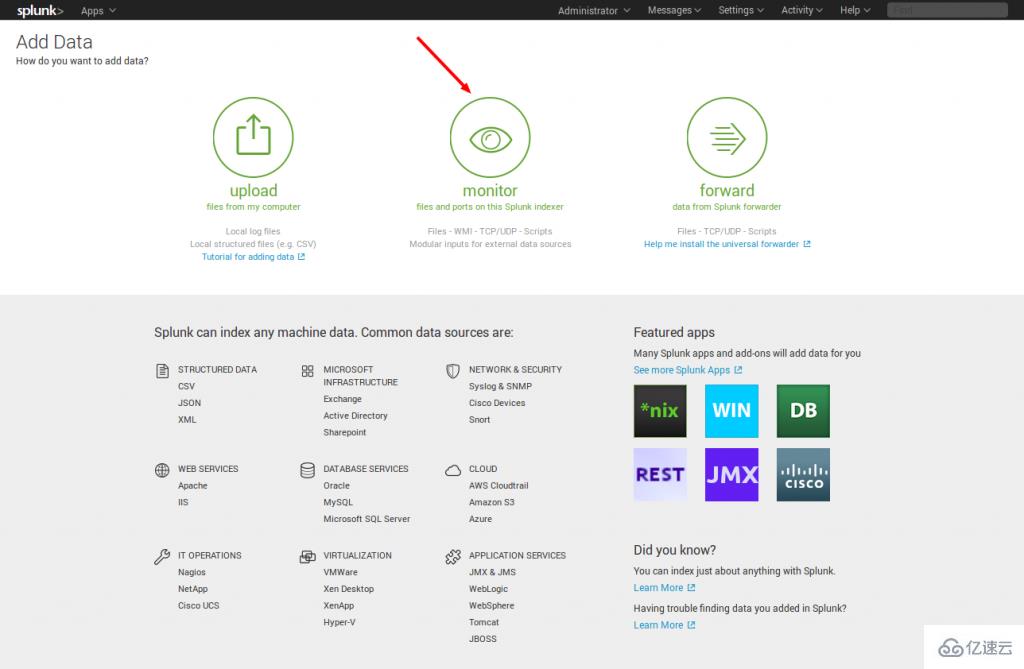 在监视器选项,有下图所示的四个类别:
文件与目录:监视文件/文件夹
HTTP事件收集器:监视通过HTTP的数据流
TCP/UDP:监视服务端口
脚本:监控脚本
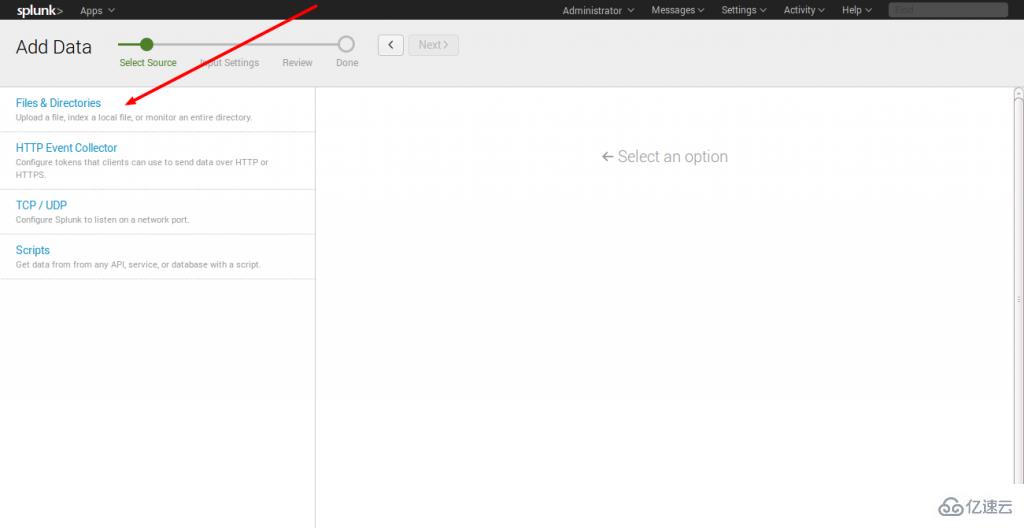
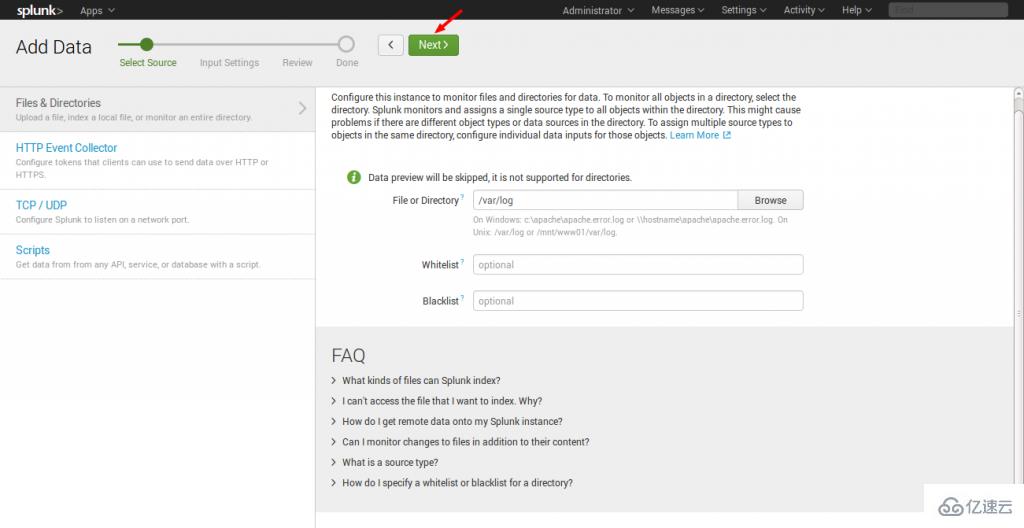
3.根据我们的目的,我选择文件及目录选项。
4.从需要监视的服务器选择确切的文件夹路径。
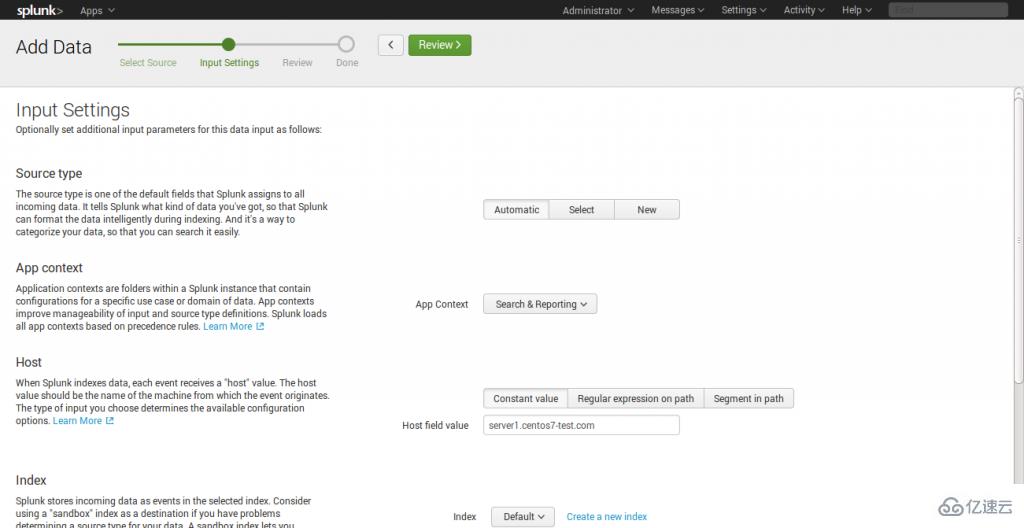
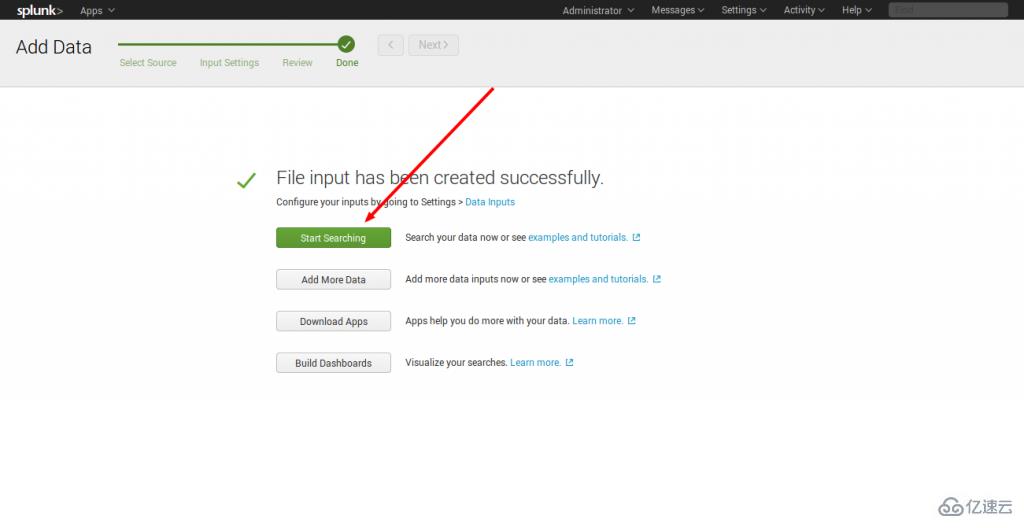
5.现在你可以开始搜索和监测作为所需的日志文件。
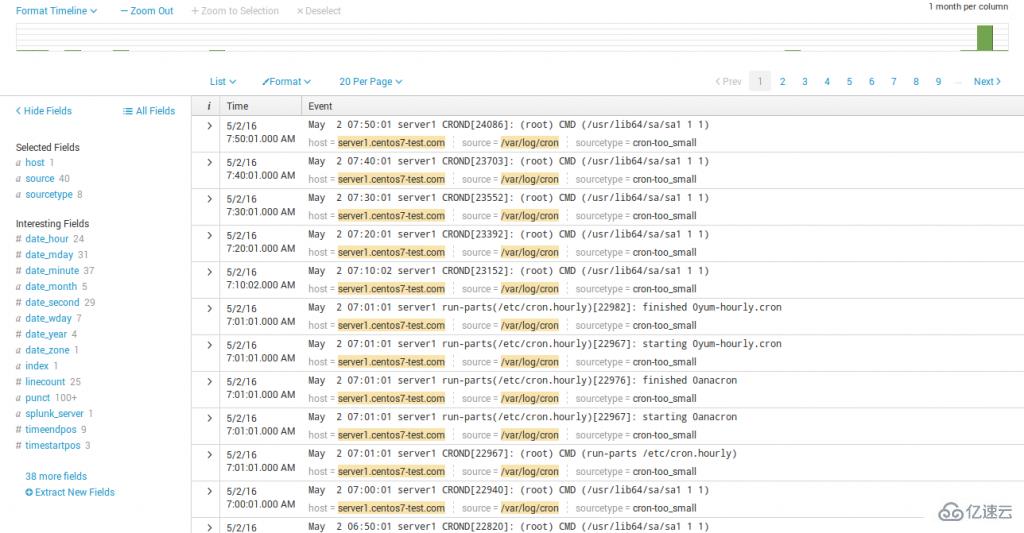 在服务器上你可以看到我的日志被缩小到一个应用程序。
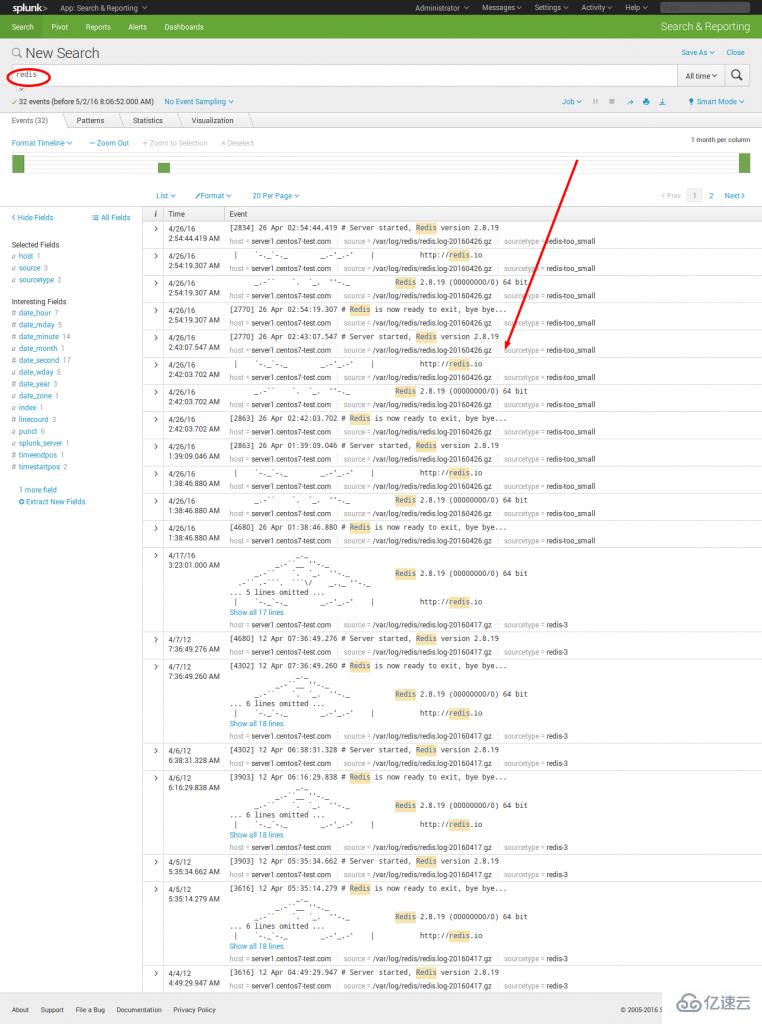
到此,关于“CentOS7怎么安装Splunk”的学习就结束了,希望能够解决大家的疑惑。理论与实践的搭配能更好的帮助大家学习,快去试试吧!若想继续学习更多相关知识,请继续关注亿速云网站,小编会继续努力为大家带来更多实用的文章!
免责声明:本站发布的内容(图片、视频和文字)以原创、转载和分享为主,文章观点不代表本网站立场,如果涉及侵权请联系站长邮箱:is@yisu.com进行举报,并提供相关证据,一经查实,将立刻删除涉嫌侵权内容。


