本篇内容主要讲解“Springboot怎么上传文件或头像”,感兴趣的朋友不妨来看看。本文介绍的方法操作简单快捷,实用性强。下面就让小编来带大家学习“Springboot怎么上传文件或头像”吧!
头像上传路径, 若不存在, 会根据该路径创建指定路径文件夹
upload:
  path: D:\\upload\headImgs
创建类 FileUtils 并读取配置文件中的值
@Component
@ConfigurationProperties(prefix = "upload")
@Data
public class FileUtils {
    private String path;
    public File getPath() {
        // 构建上传文件的存放 "文件夹" 路径
        String fileDirPath = new String(path);
        File fileDir = new File(fileDirPath);
        if (!fileDir.exists()) {
            // 递归生成文件夹
            fileDir.mkdirs();
        }
        return fileDir;
    }
    public boolean del(String filename) {
        File file = new File(path + File.separator + filename);
        return file.delete();
    }
    public boolean del(String path, String filename) {
        return new File(path + File.separator + filename).delete();
    }
}spring: servlet: multipart: max-request-size: 10MB # 上传文件的最大值 max-file-size: 5MB # 单个文件上传的最大值
创建config类
注意: 映射路径时, 最后面一定要加 / (File.separator)
@Configuration
public class WebMvcConfig extends WebMvcConfigurationSupport {
    @Autowired
    private FileUtils fileUtils;
    @Override
    public void addResourceHandlers(ResourceHandlerRegistry registry) {
        // 加入头像文件夹映射 可通过 localhost:7188/headimage/....   访问到指定位置的图片
        registry.addResourceHandler("/static/**").addResourceLocations("classpath:/static/"); // 默认头像
        registry.addResourceHandler("/headimage/**").addResourceLocations("file:"+fileUtils.getPath().getPath()+ File.separator);
        super.addResourceHandlers(registry);
    }
}
注意:
此时映射了两个路径
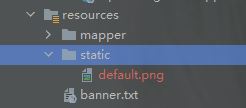
外部环境的路径static目录下的路径(该路径用于存放一张默认图片随意一张, 作为默认头像 可命名为 default.jpg)
该字段默认值为 ‘static/default.jpg’ 即为用户的默认头像
作用: 存放图片的相对路径
@RestController
@RequestMapping("operate/User")
public class UserController extends BaseController<UserService> {
    @ApiOperation("修改(可以修改头像和邮箱)")
    @PutMapping
    public R modify(MultipartFile headImg, String email){
        return baseService.modify(headImg, email);
    }
}public interface UserService extends IService<User> {
R modify(MultipartFile headImg, String email);
}
@Slf4j
@Service
public class UserServiceImpl extends ServiceImpl<UserDao, User> implements UserService {
@Autowired
private FileUtils fileUtils;
/**
* 获取当前用户名
*
* @return
*/
private String getCurrentuserName() {
// ...
return username;
}
/**
* 获取当前用户
*
* @return
*/
public User getCurrentuser() {
// ...
return user;
}
@Override
public R modify(MultipartFile headImg, String email) {
// 校验图片格式
if (!imageTypeRight(headImg)) return R.fail("图片格式不正确");
// 获取上传文件后的路径
String path = uploadFile(headImg);
User currentuser = getCurrentuser();
// 删除之前的头像(如果是默认头像不删除)
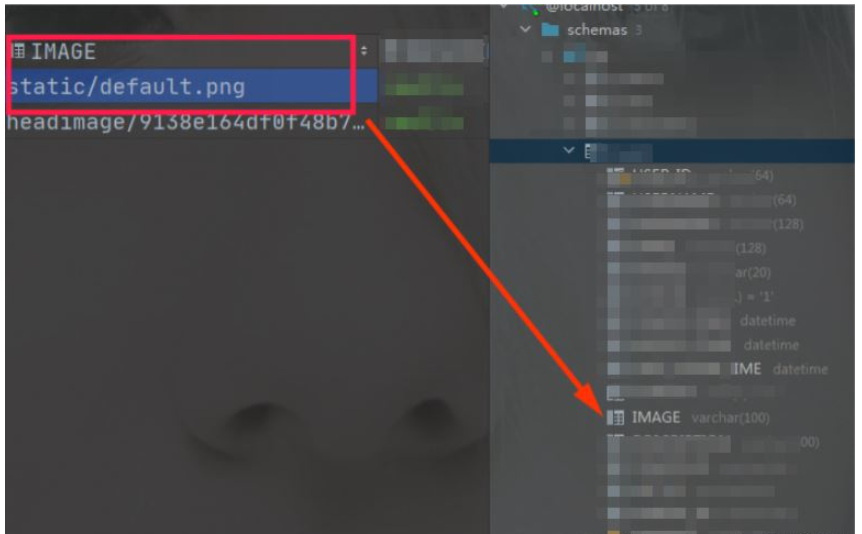
String image = currentuser.getImage();
if (!image.equals("static/default.png")) {
if (!fileUtils.del(image.substring(path.indexOf("/") + 1))) {
log.info("修改头像时, 原来的头像删除失败");
} else {
log.info("修改头像时, 原来的头像删除成功");
}
}
// 修改数据库中头像的路径信息 和 邮箱
update(Wrappers.<User>lambdaUpdate()
.set(User::getEmail, email)
.set(User::getImage, path)
.eq(User::getUsername, currentuser.getUsername()));
// 该路径为图片相对路径 可放在url中的服务后面 进行访问
// 比如: http://localhost:9000/cloudos-opt/headimage/01c8806dc26d45539b53c22c766cd250.jpg
// http://localhost:9000/cloudos-opt/static/default.png
return R.success(null, path);
}
/**
* 验证图片的格式
*
* @param file 图片
* @return
*/
private boolean imageTypeRight(MultipartFile file) {
// 首先校验图片格式
List<String> imageType = Lists.newArrayList("jpg", "jpeg", "png", "bmp", "gif");
// 获取文件名,带后缀
String originalFilename = file.getOriginalFilename();
// 获取文件的后缀格式
String fileSuffix = originalFilename.substring(originalFilename.lastIndexOf(".") + 1).toLowerCase(); //不带 .
if (!imageType.contains(fileSuffix)) return false;
return true;
}
/**
* 上传文件
*
* @param file
* @return 返回路径
*/
public String uploadFile(MultipartFile file) {
String originalFilename = file.getOriginalFilename();
String fileSuffix = originalFilename.substring(originalFilename.lastIndexOf(".") + 1).toLowerCase();
// 只有当满足图片格式时才进来,重新赋图片名,防止出现名称重复的情况
String newFileName = UUID.randomUUID().toString().replaceAll("-", "") + "." + fileSuffix;
// 该方法返回的为当前项目的工作目录,即在哪个地方启动的java线程
File fileTransfer = new File(fileUtils.getPath(), newFileName);
try {
file.transferTo(fileTransfer);
log.info("头像上传: " + fileTransfer.getPath());
} catch (IOException e) {
e.printStackTrace();
}
// 将图片相对路径返回给前端
return "headimage/" + newFileName;
}
}获取默认头像的路径url为
http://localhost:8080/{spring-application-name}/static/default.jpg
修改头像
修改完成后, 返回相对路径

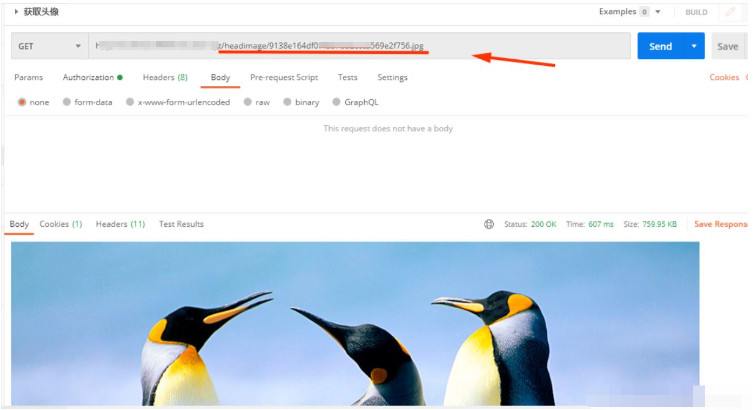
访问修改后的头像
带上相对路径在url上直接可以访问
到此,相信大家对“Springboot怎么上传文件或头像”有了更深的了解,不妨来实际操作一番吧!这里是亿速云网站,更多相关内容可以进入相关频道进行查询,关注我们,继续学习!
免责声明:本站发布的内容(图片、视频和文字)以原创、转载和分享为主,文章观点不代表本网站立场,如果涉及侵权请联系站长邮箱:is@yisu.com进行举报,并提供相关证据,一经查实,将立刻删除涉嫌侵权内容。


