软件下载地址:http://yunpan.cn/QbFvRDxugZZsT
这里有配置nagios所需的所有的各种版本的软件资源,包括fetion资源
1.实验环境:
nagios主机:desk32.example.com 192.168.122.32\
mysql主机:desk3.example.com 192.168.122.3
2.nagios的安装:
nagios是用一些命令在被监控主机上运行后将采集的信息返回。
编译需要的依赖包:
yum install httpd gcc make gd-devel perl-ExtUtils-Embed.x86_64 -y
yum  -y   localinstall  gd-devel-2.0.35-10.el6.x86_64
useradd nagios          #运行 nagios 服务的用户
usermod -G nagios apache        #使 apache 用户对 nagios 目录具有写权限,不然 web 页面操作失败
 tar jxf nagios-cn-3.2.3.tar.bz2
cd nagios-cn-3.2.3
useradd  nagios
usermod -G nagios apache
./configure --prefix=/usr/local/nagios --enable-embedded-perl
make all
make install
make install-init
make install-commandmode
make install-config
make install-webconf
bin Nagios 执行程序所在目录,这个目录只有一个文件 nagios
etc Nagios 配置文件位置,初始安装完后,只有几个*.cfg-sample 文件
sbin Nagios Cgi 文件所在目录,也就是执行外部命令所需文件所在的目录
share Nagios 网页文件所在的目录
var Nagios 日志文件、spid 等文件所在的目录
3.安装nagios-plugin插件:
安装依赖包:
yum -y install mysql-devel openssl-devel
[root@desk32 nagios-plugins-1.4.16]# ./configure --with-nagios-user=nagios --with-nagios-group=nagios --enable-extra-opts  --enable-perl-modules
[root@desk32 nagios-plugins-1.4.16]#make && make install
再没有安装插件前在/usr/local/nagios/libexec下没有东西,安装后次目录下安装的是nagios用于检查的命令。
[root@desk32 nagios-plugins-1.4.16]# cd /usr/local/nagios/
[root@desk32 nagios]# ls
bin  etc  include  libexec  perl  sbin  share  var
[root@desk32 nagios]# ls libexec/
…........check_apt check_file_age check_jabber check_nt        check_rpc       check_time   check_breeze    check_flexlm        check_load         check_ntp  …...........
主配置文件 nagios.cfg 定义和控制 nagios 行为 需要修改
Cgi 配置文件 cgi.cfg 浏览器执行诸如重启 nagios 服务等要修改
宏定义文件 Resource.cfg 定义插件路径 不需修改
命令定义文件 Commands.cfg 定义怎么发送短信、邮件等 需要修改
其他文件 contactgroups.cfg,contacts.cfg 监控对象配置文件,如主机 主配置文件,包含,手动联系人配置文件
[root@desk32 etc]# vim nagios.cfg
#注释或删掉这行
#cfg_file=/usr/local/nagios/etc/localhost.cfg
#主机配置文件路径
cfg_file=/usr/local/nagios/etc/objects/hosts.cfg
cfg_file=/usr/local/nagios/etc/objects/service.cfg
//将服务与主机分开
#//主机组配置文件路径
cfg_file=/usr/local/nagios/etc/hostgroups.cfg
#联系人配置文件路径
cfg_file=/usr/local/nagios/etc/contacts.cfg
#联系组配置文件路径
cfg_file=/usr/local/nagios/etc/contactgroups.cfg
#服务配置文件路径
cfg_file=/usr/local/nagios/etc/services.cfg
#监视时段配置文件路径
cfg_file=/usr/local/nagios/etc/timeperiods.cfg
#在 web 界面下重启 nagios、停止主机/服务检查等操作,.默认值是 0.
check_external_commands=1
#根据自己的情况定这个命令检查时间间隔.默认值是 1 秒.
command_check_interval=10s
注意:以上的有些文件的位置是不正确的。因为存在软件的升级等原因,文件位置有一些的调整
[root@desk32 objects]# cp localhost.cfg hosts.cfg #创建主机定义文件
[root@desk32 objects]# cp localhost.cfg service.cfg   #创建服务定义文件
[root@desk32 objects]#vim hosts.cfg  #只剩下对于主机及主机组的定义将服务的定义删掉
#########################################
# HOST DEFINITION
#########################################
# Define a host for the local machine
define host{
        use                     linux-server
        host_name               desk32.example.com
        alias                   ngios服务器
        address                 127.0.0.1
        icon_p_w_picpath              switch.gif
        statusmap_p_w_picpath         switch.gd2
        2d_coords               100,200
        3d_coords               100,200,100
        }
define host{
        use                     linux-server
        host_name               王兹银家电机
        alias                   家庭上网用机
        parents                 desk32.example.com
        address                 127.0.0.1
        icon_p_w_picpath              web.gif
        statusmap_p_w_picpath         web.gd2
        2d_coords               100,300
        3d_coords               100,300,100
        }
#####################################################################
# HOST GROUP DEFINITION
#####################################################################
# Define an optional hostgroup for Linux machines
define hostgroup{
        hostgroup_name  linux-servers
        alias           Linux Servers
        members         *       #包含的主机“*”代表包含上定义的所有的主机
        }
define hostgroup{
        hostgroup_name 家用机器组
        alias   放在家里用的PC机
       members 王兹银家电机   #只包含主机“王兹银家电机”
#        members     *
       #包含所有主机
        }
以下就是主机组的区别:

以下关于服务的定义:
[root@desk32 objects]# vim /usr/local/nagios/etc/objects/service.cfg
#########################################
# SERVICE DEFINITIONS
#########################################
define service{
        use                             local-service
        host_name                       *
      #表示此服务将监控所有主机
        service_description             PING
        }
define service{
        use                             local-service
        host_name                       *
        service_description             根分区
        }
define service{
        use                             local-service
        host_name                       desk32.example.com
   #该服务只监控desk32
        service_description             登录用户数
        }
define service{
        use                             local-service
        host_name                       desk32.example.com
        service_description             进程总数
        }
define service{
        use                             local-service
        host_name                       desk32.example.com
        service_description             系统负荷
        }
define service{
        use                             local-service
        host_name                       desk32.example.com
        service_description             交换空间利用率
        }
define service{
        use                             local-service
        host_name                       desk32.example.com
        service_description             SSH
        }
define service{
        use                             local-service
        host_name                       desk32.example.com
        service_description             HTTP
        }
#########################################
#DEFINE SERVICEGROUP
#########################################
define servicegroup{
        servicegroup_name       系统检查
        alias                   系统状况
    embers desk32.example.com,PING,desk32.example.com,根分区,desk32.example.com,登录用户数,desk32.example.com,系统负荷,desk32.example.com,交换空间利用率,desk32.example.com,SSH,desk32.example.com,HTTP,desk32.example.com,进程总数
        }
ot@desk32 objects]# /usr/local/nagios/bin/nagios -v /usr/local/nagios/etc/nagios.cfg
Total Warnings: 0
Total Errors:   0
#保证配置文件的语法没有问题
[root@desk32 etc]# /etc/init.d/nagios start
4.apache的安装配置:
yum -y install httpd
配置apache的虚拟主机:
[root@desk32 conf]# vim /etc/httpd/conf/httpd.conf
NameVirtualHost *:80
<VirtualHost *:80>
    DocumentRoot /usr/local/nagios/share
    ServerName nagios.example.com
</VirtualHost>
[root@desk32 conf]# /etc/init.d/httpd restart
[root@desk32 conf]# htpasswd -c /usr/local/nagios/etc/htpasswd.users nagiosadmin
#nagios 监控页面访问用户和密码以上的管理员的用户信息实在:/usr/local/nagios/etc/cgi.cfg中定义的,当然是可以修改的;
『
#如有多个用户,中间用逗号隔开
authorized_for_system_information=sery
authorized_for_configuration_information=sery
authorized_for_system_commands=sery
authorized_for_all_services=sery
authorized_for_all_hosts=nagiosadmin,sery
authorized_for_all_service_commands=sery
authorized_for_all_host_commands=sery
在这里指定的用户”sery”可以通过浏览器操纵 nagios 服务的关闭、重启等各种操作
』
完成以上的所有操作后我们在装有浏览器的主机上添加虚拟主机中的域名解析:
192.168.122.32nagios.example.com
网页访问:http://nagios.example.com


2)ngios监控其他的主机
(1)监控mysql主机的mysql服务:
mysql 主机上运行有 mysql 服务,在其上创建监控检测帐户
mysql> create database nagdb;
mysql> grant select on nagdb.* to nagdb@'192.168.122.32';
mysql> flush privileges;
[root@desk32 libexec]# cd /usr/local/nagios/libexec/
[root@desk32 libexec]# ./check_mysql -H 192.168.122.3 -u nagdb -d nagdb
Uptime: 363  Threads: 1  Questions: 6  Slow queries: 0  Opens: 15  Flush tables: 1  Open tables: 8  Queries per second avg: 0.16
## -H 指定检测的主机,-u 制定select mysql的用户,-d  指定登录select的数据库
添加监控主机信息:
vim /usr/local/nagios/etc/objects/hosts.cfg   添加:
define host{
        use                     linux-server
        host_name              desk3.example.com
        alias                   mysql服务器
        address                 192.168.122.3 ;desk3.example.com
        icon_p_w_picpath              server.gif
        statusmap_p_w_picpath         server.gd2
        2d_coords               500,200
        3d_coords               500,200,100
        }
[root@desk32 objects]# vim /usr/local/nagios/etc/objects/service.cfg
添加:
###################check_mysql#############################
define service{
        use                     local-service
        host_name               desk3.example.com
        service_groups          mysql服务组
        service_description     mysql服务
        check_command           check_mysql
        }
##########################check_mysql_groups#########################
define servicegroup{
        servicegroup_name       mysql服务组
        alias                   mysql服务器
        members desk3.example.com,mysql服务
        }
对于位置在libexec下的命令还必须在commands.cfg中定义才可以使用;
#####################check_mysql###########################
define command{
        command_name    check_mysql
        command_line    $USER1$/check_mysql -H $HOSTADDRESS$ -u nagdb -d nagdb
        }
#$USER1$ 这的就是libexec目录
[root@desk32objects]# /usr/local/nagios/bin/nagios -v /usr/local/nagios/etc/nagios.cfg
[root@desk32 objects]# /etc/init.d/nagios reload
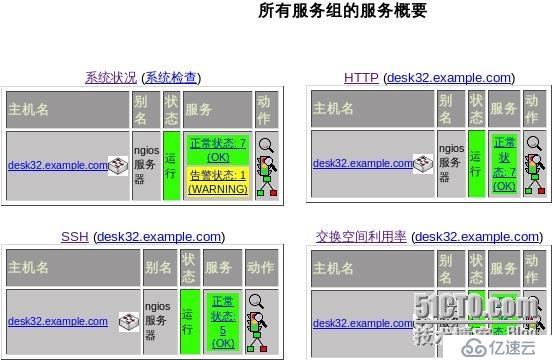
刷新网页后发现主机数多了一个:在该主机下的服务:

以上的mysql服务之所以可以直接就可以监控远程的主机,是因为chek_mysql的命令本身就带有-H指定主机访问主机的能力;其他的监控命令
并没有这样的功能,所以监控远程的其他的服务必须借助nrpe插件:

The NRPE addon consists of two pieces:
–The check_nrpe plugin, which resides on the local monitoring machine
–The NRPE daemon, which runs on the remote Linux/Unix machine
When Nagios needs to monitor a resource of service from a remote Linux/Unix machine:
–Nagios will execute the check_nrpe plugin and tell it what service needs to be checked
–The check_nrpe plugin contacts the NRPE daemon on the remote host over an (optionally) SSL-protected connection
–The NRPE daemon runs the appropriate Nagios plugin to check the service or resource
–The results from the service check are passed from the NRPE daemon back to the check_nrpe plugin, which then returns the check results to the Nagios process.
Note: The NRPE daemon requires that Nagios plugins be installed on the remote Linux/Unix host. Without these,the daemon wouldn't be able to monitor anything.
在nagios主机上使用check_nrpe通过ssl链接远程的主机的nrpe使用远程主机上的命令检查主机信息然后又将检查的信息返回;
所以在远程主机上要按装nrpe及nagios-plugins
在远程主机desk3上:
tar zxf nagios-plugins-1.4.16.tar.gz
cd nagios-plugins-1.4.16
./configure --with-nagios-user=nagios --with-nagios-group=nagios --enable-extra-opts --enable-perl-modules  --enable-libtap –with-openssl
make && make install
[root@desk3 nrpe-2.14]# cd /usr/local/nagios/
[root@desk3 nagios]# chown  nagios.nagios . -R
[root@desk3 nrpe-2.14]# yum -y install xinetd #用于管理nrpe的启动端口信息
tar zxf nrpe-2.14.tar.gz
cd nrpe-2.14
[root@desk3 nrpe-2.14]./configure
[root@desk3 nrpe-2.14]# make all
[root@desk3 nrpe-2.14]# make install
[root@desk3 nrpe-2.14]# make install-daemon-config
[root@desk3 nrpe-2.14]# make install-xinetd
[root@desk3 nagios]# vim /etc/xinetd.d/nrpe
        only_from       = 192.168.122.32
[root@desk3 nagios]# vim /etc/services
nrpe            5666/tcp #TCP port service nrpe
[root@desk3 etc]# vim /usr/local/nagios/etc/nrpe.cfg
command[check_disk]=/usr/local/nagios/libexec/check_disk -w 20% -c 10% -p /
因为系统上的分区可能会是lvm所以这样修改
[root@desk3 etc]# /etc/init.d/xinetd restart
[root@desk3 etc]# netstat -anplt
tcp        0      0 :::5666                     :::*                LISTEN      3984/xinetd
因为在nagios主机上是通命令check_nrpe实现的所以在ngios主机上同样安装nrpe
[root@desk32 libexec]# ./check_nrpe -H 192.168.122.3
NRPE v2.14
    #看见如此信息则表明nrpe征程链接
Configuring Things On The Nagios Host
command definition for the check_nrpe plugin would look like this:
[root@desk32 libexec]# vim /usr/local/nagios/etc/objects/commands.cfg
###################chek_nrpe##############################
define command{
        command_name    check_nrpe
        command_line    /usr/local/nagios/libexec/check_nrpe -H $HOSTADDRESS$ -c $ARG1$
        }
###################check_nrpe#########################################
define service{
        use                     generic-service
        host_name               desk3.example.com
        service_description     CPU-LOAD
        check_command           check_nrpe!check_load
        }
define service{
        use                     generic-service
        host_name               desk3.example.com
        service_description     USERS
        check_command           check_nrpe!check_users
        }
define service{
        use                     generic-service
        host_name               desk3.example.com
        service_description     GEN-Free-Space
        check_command           check_nrpe!check_disk
        }
define service{
        use                     generic-service
        host_name               desk3.example.com
        service_description     Zombie-Process
        check_command           check_nrpe!check_zombie_procs
        }
define service{
        use                     generic-service
        host_name               desk3.example.com
        service_description     Total-Process
        check_command           check_nrpe!check_total_procs
        }
##########################check_nrpe+mysql_groups#####################
define servicegroup{
        servicegroup_name       远程服务组
        alias                  mysql+nrpe服务
 members desk3.example.com,CPU-LOAD,desk3.example.com,USERS,    \
desk3.example.com,GEN-Free-Space,desk3.example.com,Zombie-          \
Process,desk3.example.com,Total-Process,desk3.example.com,mysql服务
        }
为了方便查看将host.cfg中的主机的定义中的desk3.example.com的alias改为了“远程主机”
[root@desk32 libexec]# /usr/local/nagios/bin/nagios -v               \
/usr/local/nagios/etc/nagios.cfg
[root@desk32 libexec]# /etc/init.d/nagios reload
可以看见远程的主机desk3的nrpe的那几个服务已经添加进来了;
测试:
mysql测试:
远程mysql主机上:
[root@desk3 etc]# /etc/init.d/mysqld stop

[root@desk3 etc]# df -h
Filesystem            Size  Used Avail Use% Mounted on
/dev/mapper/vol0-root
    3.9G  1.1G  2.6G  31% /
[root@desk3 etc]# dd if=/dev/zero of=/bigfile bs=510M count=5
[root@desk3 etc]# df -h
Filesystem            Size  Used Avail Use% Mounted on
/dev/mapper/vol0-root
    .9G  3.6G   66M  99% /
naios采集到的所有的图形信息,均存储与rrdtool的环形数据库中,其数据在/usr/local/nagios/var/rrd下存储的;
5.图形日志显示:

后“图书”标志为图形日志,当前无法显示:
[root@desk32 ~]# yum localinstall rrdtool-perl-1.3.8-6.el6.x86_64.rpm
[root@desk32 logs]# yum -y install perl-CGI
刷新后即可出现图形化的日志信息
6.ngios整合飞信报警
linux: http://www.it-adv.net/fetion/downng/fetion20090406003-linux.tar.gz
linux 下需要的四个文件:http://www.it-adv.net/fetion/downng/library_linux.tar.gz
libACE.so.5.6.8
libACE_SSL.so.5.6.8
libcrypto.so.0.9.8
libssl.so.0.9.8
>> 使用说明 <<
以下参数提供登录用的账号密码(三种方式,手机号-密码 飞信号-密码 文件--索引)
--mobile=[手机号]登录手机号
--sid=[飞信号]登录飞信号
--pwd=[密码]登录密码
--config=[文件名]存储手机号、密码的文件。
--index=[索引号]索引
--msg-utf8=[信息]发送的消息,UTF8 编码
--msg-gb=[信息]发送的消息,GB 编码
--file-utf8=[文件 utf8 格式]发送文件内容
--file-gb=[文件 gb 格式]发送文件内容
--msg-type=[0/1/2]发送消息类型:普通消息 长消息 智能短信
[root@desk32 ~]# mv fetion /usr/local/nagios/libexec/
[root@desk32 ~]# chmod a+x /usr/local/nagios/libexec/fetion
[root@desk32 ~]# tar zxf linuxso_20101113.tar.gz -C /usr/local/lib
[root@desk32 ~]# ldconfig /usr/local/lib
[root@desk32 ~]# chown nagios.nagios /usr/local/nagios/libexec/fetion
[root@desk32 libexec]#cd /usr/local/nagios/libexec
[root@desk32 libexec]# ./fetion #安装所有的依赖关系
当出现以下内容后则表示fetion已经准备妥当:
*************** IMPORTANT STATEMENT **************************
** PLEASEDON'TUSE THIS SOFTWARE TO S JUNK SHORT MESSAGES.**
**OTHERWISE PLEASE BEAR YOUR OWN CONSEQUENCES.**
**Version:[20101205002-linux]**
*******************************************************************
测试:
切换至nagios用户:
[nagios@desk32./fetion--mobile=15829476129 --pwd=password --to=15829476129 --msg-utf8="good luck"
第一次要输入验证码:
图形验证码已经生成,文件名为:15829476129.jpg请识别后输入图形验证码:
CG5Y
您输入的识别码是:CG5Y
SIP-C/4.0 280 Send SMS OK
T: sip:423345302@fetion.com.cn;p=7195
I: 2
Q: 1 M
L: 112
D: Wed, 28 Aug 2013 13:18:34 GMT
XI: C4134FD7BC7ED4B93982B2334E44124C
则表示短信发送成功;
7)nagios与fetion的整合
[root@desk32 libexec]# su - nagios
[nagios@desk32 ~]$ cd /usr/local/nagios/libexec/
[nagios@desk32 libexec]$ vim fetion.sh
/usr/local/nagios/libexec/fetion --mobile=15829476129 --pwd=password --to="$1" --msg-utf8="$2" > /dev/null
[nagios@desk32 libexec]$ chmod a+x fetion.sh
[root@desk32 objects]# vim commands.cfg #定义监控的飞信命令
# 'notify-host-by-fetion' command definition
define command{
command_namenotify-host-by-fetion
command_line$USER1$/fetion.sh $CONTACTPAGER$ "$NOTIFICATIONTYPE$ Host Alert: $HOSTNAME$ is $HOSTSTATE$"
}
# 'notify-service-by-fetion' command definition
define command{
command_namenotify-service-by-fetion
command_line$USER1$/fetion.sh $CONTACTPAGER$ "$NOTIFICATIONTYPE$ Service Alert: $HOSTALIAS$/$SERVICEDESC$ is $SERVICESTATE$"
}
[root@desk32 objects]# vim templates.cfg #fetion 报警选项
service_notification_commandsnotify-service-by-email,notify-service-by-fetion
host_notification_commandsnotify-host-by-email,notify-host-by-fetion
[root@desk32 objects]# vim contacts.cfg#连接文件用于链接mail及发送短信的对象
emailnagios@localhost
pager182205090xx
[root@desk32 objects]# /etc/init.d/nagios reload
测试:
关闭desk32.example.com的ssh服务,观察看有没有mail与fetion的通知。
西安石油大学计算机学院
王兹银
904483782
mailofwzy@163.com
免责声明:本站发布的内容(图片、视频和文字)以原创、转载和分享为主,文章观点不代表本网站立场,如果涉及侵权请联系站长邮箱:is@yisu.com进行举报,并提供相关证据,一经查实,将立刻删除涉嫌侵权内容。


