搜Swashbuckle.AspNetCore
在NuGet 中,安装 Swashbuckle.AspNetCore :
我使用的版本为 : 5.0.0-rc2
Ⅰ : Startup.cs
① ,ConfigureServices方法中:
public void ConfigureServices(IServiceCollection services)
        {
            services.AddMvc().SetCompatibilityVersion(CompatibilityVersion.Version_2_2).AddJsonOptions(options =>
            {
                options.SerializerSettings.Formatting = Formatting.Indented;
            });
            services.AddSwaggerGen(options =>
            {
                options.SwaggerDoc("v1", new OpenApiInfo()
                {
                    Title = "Swagger Test UI",
                    Version = "v1",
                    Description = "Aonaufly first ASP.NET Core Web API"
                });
                options.CustomSchemaIds(type => type.FullName); // 解决相同类名会报错的问题
                options.IncludeXmlComments(Path.Combine(Directory.GetCurrentDirectory(), "WebAPIPoco.xml")); // 标注要使用的 XML 文档
                options.DescribeAllEnumsAsStrings();
            });
        }
②:Configure中
        // This method gets called by the runtime. Use this method to configure the HTTP request pipeline.
        public void Configure(IApplicationBuilder app, IHostingEnvironment env)
        {
            if (env.IsDevelopment())
            {
                app.UseDeveloperExceptionPage();
            }
            else
            {
                // The default HSTS value is 30 days. You may want to change this for production scenarios, see https://aka.ms/aspnetcore-hsts.
                app.UseHsts();
            }
            //设置全局跨域
            app.UseCors(builder => builder.AllowAnyOrigin());
            app.UseHttpsRedirection();
            app.UseSwagger(c => { c.RouteTemplate = "swagger/{documentName}/swagger.json"; });
            // 在这里面可以注入
            app.UseSwaggerUI(options =>
            {
                options.ShowExtensions();
                options.ValidatorUrl(null);
                options.SwaggerEndpoint("/swagger/v1/swagger.json", "Aonaufly API V1");
                options.DocExpansion(DocExpansion.None);
            });
            app.UseMvc();
}①,到处项目XML , 加入1591禁止警告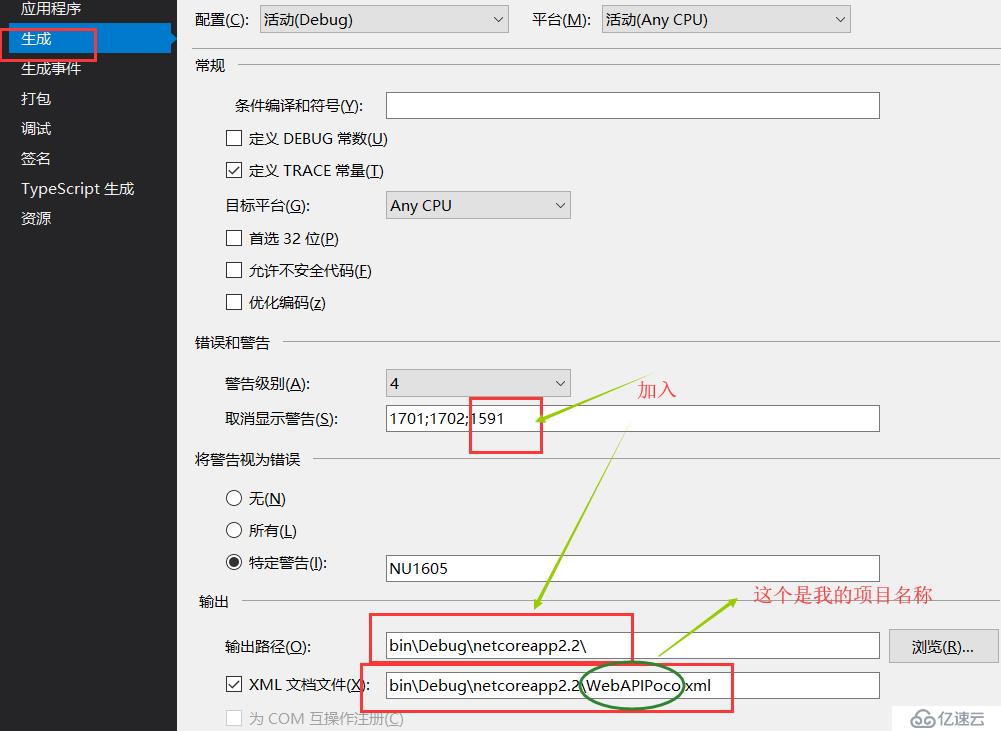
②,将项目XML生成路径复制到项目根路径
copy $(TargetDir)WebAPIPoco.xml $(ProjectDir)WebAPIPoco.xml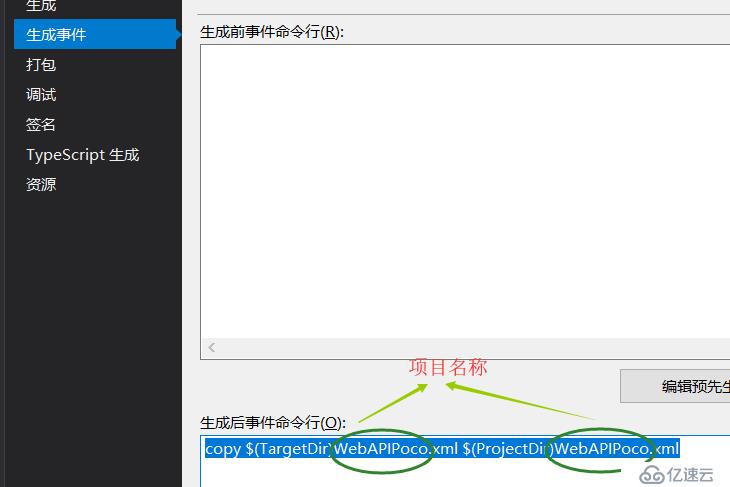
③,重置默认网页为swagger , 默认是 api/values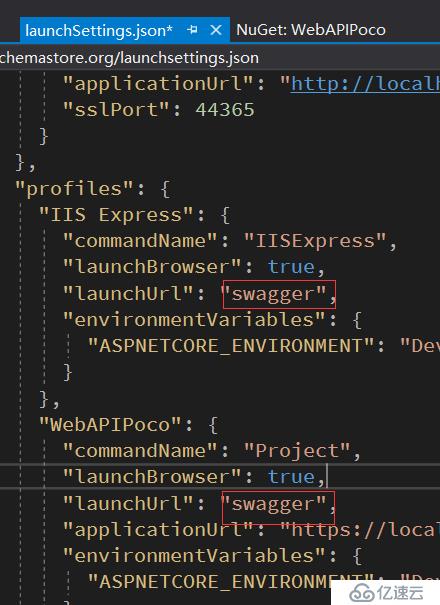

/// <summary>
        /// 带参数的get请求
        /// </summary>
        /// <remarks>
        /// <code>
        /// 输入 : int
        /// 输出 : string
        /// </code>
        /// </remarks>
        /// <param name="id">ID号</param>
        /// <returns>String</returns>
        /// <response code="201">返回字符串</response>
        /// <response code="400">如果id为空</response>
        // GET api/values/5
        [HttpGet("{id}")]
        [ProducesResponseType(201)]
        [ProducesResponseType(400)]
        public ActionResult<string> Get(int id)
        {
            return "value";
        }
结果: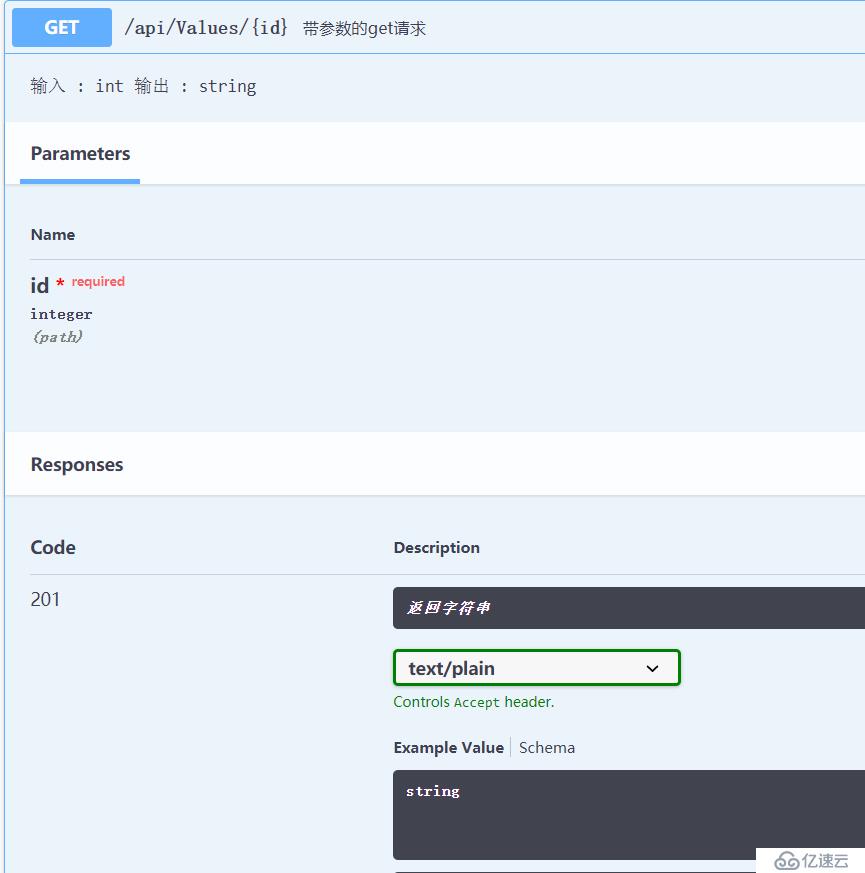
免责声明:本站发布的内容(图片、视频和文字)以原创、转载和分享为主,文章观点不代表本网站立场,如果涉及侵权请联系站长邮箱:is@yisu.com进行举报,并提供相关证据,一经查实,将立刻删除涉嫌侵权内容。


