mybatis的逆向工程是非常便捷的操作,能够显著的提高我们的开发效率,之前介绍过Eclipse的操作,本文来介绍下在idea中怎么处理。
mybatis逆向工程
1.配置文件
在resources目录下创建配置文件,具体如下:
<?xml version="1.0" encoding="UTF-8"?>
<!DOCTYPE generatorConfiguration
 PUBLIC "-//mybatis.org//DTD MyBatis Generator Configuration 1.0//EN"
 "http://mybatis.org/dtd/mybatis-generator-config_1_0.dtd">

<generatorConfiguration>
 <!-- 数据库的驱动包路径 -->
 <classPathEntry location="C:\Users\dengp\.m2\repository\mysql\mysql-connector-java\5.1.27\mysql-connector-java-5.1.27.jar" />

 <context id="DB2Tables" targetRuntime="MyBatis3">
 <!-- 去掉生成文件中的注释 -->
 <commentGenerator>
 <property name="suppressAllComments" value="true" />
 </commentGenerator>
 <!-- 数据库链接URL、用户名、密码 -->
 <jdbcConnection driverClass="com.mysql.jdbc.Driver"
  connectionURL="jdbc:mysql://localhost:3306/dpb-srm"
  userId="root"
  password="123456">
 </jdbcConnection>
 <!-- <jdbcConnection driverClass="oracle.jdbc.driver.OracleDriver"
   connectionURL="jdbc:oracle:thin:@localhost:1521:XE"
   userId="car"
   password="car">
 </jdbcConnection> -->

 <javaTypeResolver >
  <property name="forceBigDecimals" value="false" />
 </javaTypeResolver>
 <!-- 生成模型的包名和位置 当前项目下 .\-->
 <javaModelGenerator targetPackage="com.sxt.sys.pojo" targetProject=".\src\main\java">
  <!-- 是否在当前路径下新加一层schema,eg:fase路径com.oop.eksp.user.model, true:com.oop.eksp.user.model.[schemaName] -->
  <property name="enableSubPackages" value="false" />
  <property name="trimStrings" value="true" />
 </javaModelGenerator>
 <!-- 生成的映射文件包名和位置 -->
 <sqlMapGenerator targetPackage="mapper" targetProject=".\src\main\resources">
  <property name="enableSubPackages" value="false" />
 </sqlMapGenerator>
 <!-- 生成DAO的包名和位置 -->
 <javaClientGenerator type="XMLMAPPER" targetPackage="com.sxt.sys.mapper" targetProject=".\src\main\java">
  <property name="enableSubPackages" value="false" />
 </javaClientGenerator>


  <table tableName="t_emp" domainObjectName="Emp" schema=""></table>
  <table tableName="t_basic" domainObjectName="Basic" schema=""></table>
  <table tableName="t_dept" domainObjectName="Dept" schema=""></table>
  <table tableName="t_role" domainObjectName="Role" schema=""></table>
  <table tableName="t_user" domainObjectName="User" schema=""></table>
  <table tableName="t_menu" domainObjectName="Menu" schema=""></table>


 </context>
</generatorConfiguration>
2.插件依赖
在pom.xml文件中添加mybatis的generator插件。具体如下:
 <plugin>
 <groupId>org.mybatis.generator</groupId>
 <artifactId>mybatis-generator-maven-plugin</artifactId>
 <version>1.3.2</version>
 <configuration>
 <!--关联上面的配置文件 -->
 <configurationFile>src/main/resources/mybatis-generator/generatorConfig-sys.xml</configurationFile>
 <verbose>true</verbose>
 <overwrite>true</overwrite>
 </configuration>
 <executions>
 <execution>
  <id>Generate MyBatis Artifacts</id>
  <goals>
  <goal>generate</goal>
  </goals>
 </execution>
 </executions>
 <dependencies>
 <dependency>
  <groupId>org.mybatis.generator</groupId>
  <artifactId>mybatis-generator-core</artifactId>
  <version>1.3.2</version>
 </dependency>
 </dependencies>
</plugin>
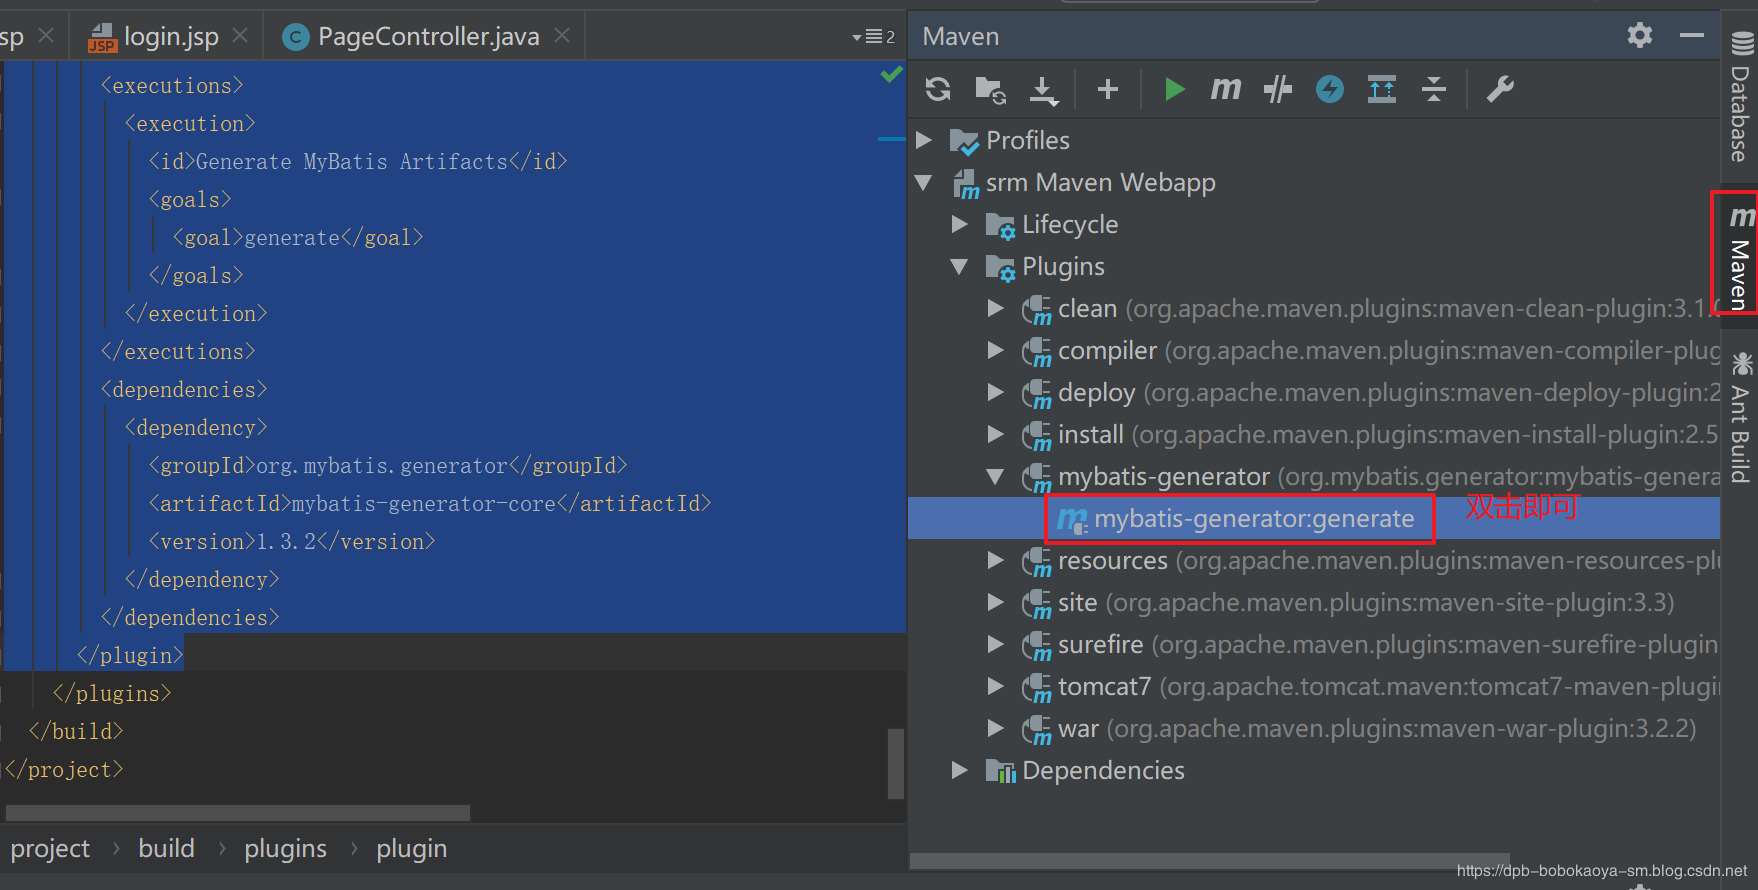
3.反向生成
生成的方式有多种,我们此处介绍一种简便常用的方式,直接通过idea的plugin方式生成,如图。
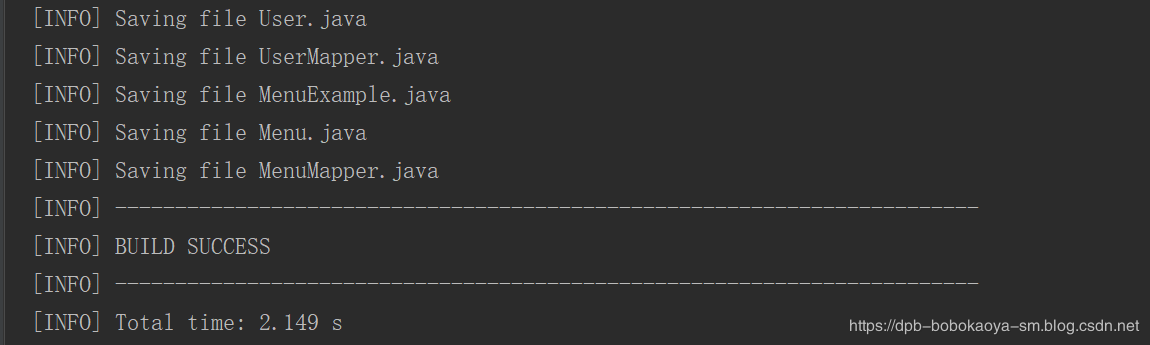
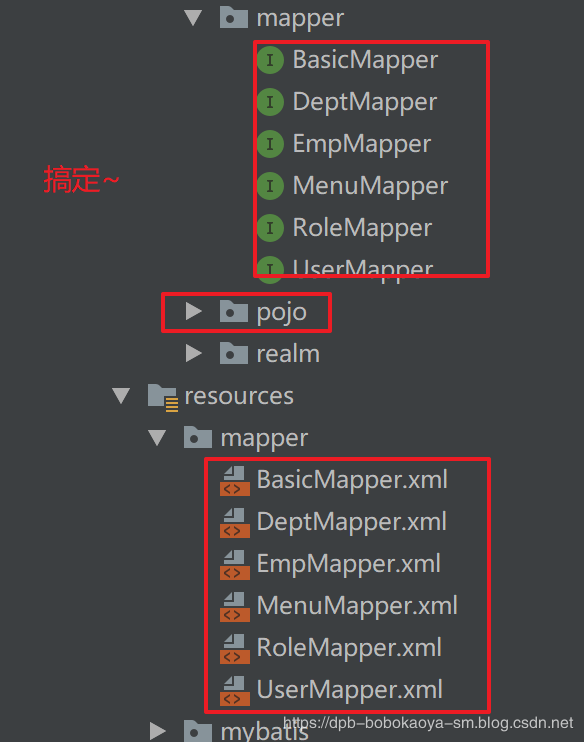
生成成功
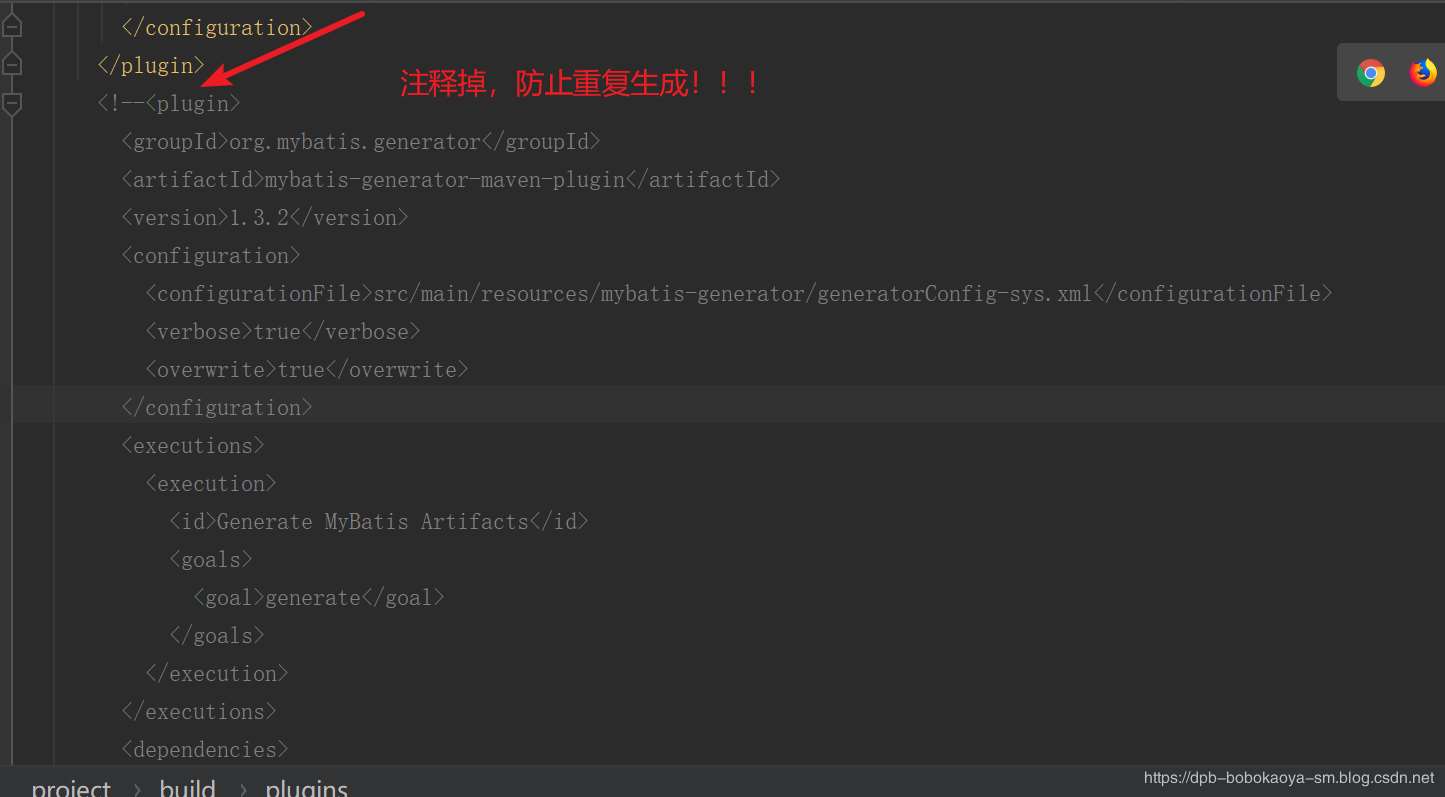
最后生成好后将插件注释掉即可
好了~搞定。以上就是本文的全部内容,希望对大家的学习有所帮助,也希望大家多多支持亿速云。
免责声明:本站发布的内容(图片、视频和文字)以原创、转载和分享为主,文章观点不代表本网站立场,如果涉及侵权请联系站长邮箱:is@yisu.com进行举报,并提供相关证据,一经查实,将立刻删除涉嫌侵权内容。


