cocos2dxе®һжҲҳзҜҮвҖ”вҖ”гҖҠиҗқиҺүеҝ«и·‘гҖӢеӯҰд№ еҝғеҫ—
гҖҗе” еҸЁгҖ‘
жәҗз Ғж•ҷзЁӢиҜ·з§»жӯҘпјҡhttp://blog.csdn.net/iamlazybone/article/details/19612941
ж„ҹи°ўжҮ’йӘЁеӨҙжҸҗдҫӣдәҶиҝҷд№ҲеӨҡзҡ„Demoж•ҷзЁӢпјҢеҜ№дәҺеҲқеӯҰиҖ…зҡ„жҲ‘иҖҢиЁҖпјҢеё®еҠ©зңҹзҡ„еҚҒеҲҶеӨ§гҖӮ
жіЁпјҡжң¬иҠӮд»…д»…и®°еҪ•еҚҡдё»иҮӘиә«еӯҰд№ гҖҠиҗқиҺүеҝ«и·‘гҖӢзҡ„еҝғеҫ—дҪ“дјҡгҖӮ
гҖҗжёёжҲҸжҲӘеӣҫгҖ‘
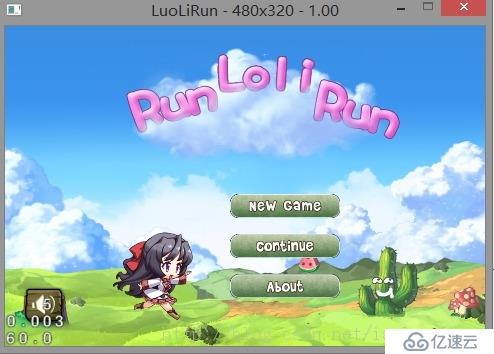
гҖҗеӯҰд№ еҝғеҫ—гҖ‘
1гҖҒжёёжҲҸдё»еңәжҷҜеҲҶеұӮ
еҰӮжһңе°ҶжүҖжңүзҡ„е…ғзҙ е…ЁйғЁйғҪеҶҷеңЁдёҖдёӘGameзұ»йҮҢйқўпјҢдјҡеҫҲж··д№ұпјҢдё”ж”№еҠЁд№ҹеҫҲйә»зғҰгҖӮ
жүҖд»Ҙеә”иҜҘеҜ№жёёжҲҸзҡ„е…ғзҙ иҝӣиЎҢеҲҶеұӮпјҢеҰӮпјҡиғҢжҷҜеұӮгҖҒдәәзү©еұӮгҖҒжҖӘзү©еұӮгҖҒйҒ“е…·еұӮзӯүгҖӮ
然еҗҺеҶҚе°ҶжүҖжңүзҡ„еұӮж”ҫе…ҘGameеңәжҷҜдёӯпјҢз»„еҗҲжҲҗе®Ңж•ҙзҡ„жёёжҲҸгҖӮ
пјҲ1пјүдәәзү©еұӮпјҡGameHero.h
пјҲ2пјүйҒ“е…·еұӮпјҡGameStar.h
пјҲ3пјүеҲҶж•°еұӮпјҡGameMark.h
пјҲ4пјүең°еӣҫеұӮпјҡGameMap.h
2гҖҒжӣҙжҚўCCMenuItemImageзҡ„еӣҫзүҮ
//
sp->setNormalImage(CCSprite::create("sound-off-A.png")); //жӯЈеёёеӣҫзүҮ
sp->setSelectedImage(CCSprite::create("sound-off-B.png")); //йҖүдёӯж—¶еӣҫзүҮ
//
3гҖҒзІҫзҒөиғҢжҷҜжӣҙжҚў
//
jump = CCTextureCache::sharedTextureCache()->addImage("s_jump.png"); //и·і
luoli->setTexture(jump);
//
4гҖҒи·‘еҠЁдҪңеҠЁз”»
дҪҝз”ЁAnimation/AnimateеҠЁз”»еҠЁдҪңгҖӮ
//
CCAnimation* anrun = CCAnimation::create();
anrun->addSpriteFrameWithFileName("s_1.png");
anrun->addSpriteFrameWithFileName("s_2.png");
anrun->addSpriteFrameWithFileName("s_3.png");
anrun->addSpriteFrameWithFileName("s_4.png");
anrun->addSpriteFrameWithFileName("s_5.png");
anrun->addSpriteFrameWithFileName("s_6.png");
anrun->addSpriteFrameWithFileName("s_7.png");
anrun->addSpriteFrameWithFileName("s_8.png");
anrun->setDelayPerUnit(0.1f); //её§й—ҙйҡ”
anrun->setRestoreOriginalFrame(true); //жҳҜеҗҰиҝ”еӣһеҲқе§Ӣеё§
CCRepeatForever* acrun = CCRepeatForever::create( CCAnimate::create(anrun) );
luoli->runAction(acrun);
//
5гҖҒGameйҮҢең°еӣҫеұӮзҡ„spе…ғзҙ зҡ„еқҗж Ү
еҒҮи®ҫпјҡbg1е’ҢspйғҪжҳҜд»Ҙдёӯеҝғдёәй”ҡзӮ№зҡ„пјҢAnchorPoint(0.5,0.5)пјҢдё”spдёәbg1зҡ„еӯҗиҠӮзӮ№гҖӮ
иҰҒжғізҹҘйҒ“spе…ғзҙ еңЁеұҸ幕дёҠзҡ„еқҗж ҮпјҢе°ұйңҖиҰҒзҹҘйҒ“bg1еңЁеұҸ幕дёҠзҡ„еқҗж ҮпјҢд»ҘеҸҠspзӣёеҜ№bg1зҡ„еқҗж ҮгҖӮ
еӣ дёәspи®ҫзҪ®зҡ„setPositionжҳҜзӣёеҜ№е…¶зҲ¶иҠӮзӮ№bg1зҡ„еқҗж ҮпјҢиҖҢдёҚжҳҜеңЁеұҸ幕дёҠзҡ„е®һйҷ…еқҗж ҮгҖӮ
//
//1.иҺ·еҫ—ең°еӣҫеұӮеқҗж ҮпјҢp1жҳҜзӣёеҜ№Gameзҡ„еқҗж Ү
CCPoint p1 = gamemap->getPosition();
//2.иҺ·еҫ—spеқҗж ҮпјҢpspжҳҜзӣёеҜ№gamemapзҡ„еқҗж Ү
CCPoint psp = (gamemap->sp)->getPosition();
//3.и®Ўз®—spеңЁGameдёӯзҡ„еқҗж Ү
CCPoint pt = ccp(
(p1.x - gamemap->getContentSize().width/2) + psp.x ,
(p2.y - gamemap->getContentSize().height/2) + psp.y );
//
6гҖҒиғҢжҷҜж»ҡеҠЁ
дҪҝз”ЁдёӨеј иғҢжҷҜеӣҫзүҮпјҢд»ҺеҸіеҲ°е·Ұж»ҡеҠЁпјҢи¶…еҮәеұҸ幕е°ұд»Һж–°и®ҫзҪ®дҪҚзҪ®пјҢ继з»ӯж»ҡеҠЁгҖӮ
еұҸ幕еӨ§е°Ҹпјҡ480 X 320гҖӮ
//
//иғҢжҷҜ1
bg1 = CCSprite::create("back_1.png");
bg1->setPosition(ccp(240,160));
this->addChild(bg1);
//иғҢжҷҜ2
bg2 = CCSprite::create("back_1.png");
bg2->setPosition(ccp(720,160));
this->addChild(bg2);
void GameMap::update(float dt)
{
//еҗ‘е·Ұ移еҠЁ2дёӘеғҸзҙ
bg1->setPosition(bg1->getPosition() - ccp(2, 0));
bg2->setPosition(bg2->getPosition() - ccp(2, 0));
//и¶…еҮәеұҸ幕пјҢи®ҫзҪ®еқҗж ҮпјҢйҮҚж–°ж»ҡеҠЁ
if (bg1->getPositionX() <= -240) {
bg1->setPosition(ccp(720, 160));
//йҮҚж–°еҠ иҪҪиғҢжҷҜдёҠзҡ„йҒ“е…·
resetStar(star1);
}
if (bg2->getPositionX() <= -240) {
bg2->setPosition(ccp(720, 160));
//йҮҚж–°еҠ иҪҪиғҢжҷҜдёҠзҡ„йҒ“е…·
resetStar(star2);
}
}
//


