1、基于源码编译安装的LNP+MYSQL主从实战
准备3台服务器,其中一台作为Nginx WEB服务器+PHP-FPM(FastCGI),另外两台作为MYSQL主从服务器,服务器IP信息:
10.10.10.4-Linux+Nginx+PHP
10.10.10.5-MYSQL Master;
10.10.10.6-MYSQL Slave;
1) Nginx安装配置
#安装PCRE库和基础库支持
yum install pcre-devel pcre gcc-c++ openssl openssl-devel zlib-devel -y
cd /usr/src
#下载Nginx源码包
wget -c http://nginx.org/download/nginx-1.12.0.tar.gz
tar -xzf nginx-1.12.0.tar.gz
cd nginx-1.12.0
#进入解压目录,然后sed修改Nginx版本信息为JWS
sed -i -e 's/1.12.0//g' -e 's/nginx\//JWS/g' -e 's/"NGINX"/"JWS"/g' src/core/nginx.h
#预编译Nginx
useradd www ;./configure --user=www --group=www --prefix=/usr/local/nginx --with-http_stub_status_module --with-http_ssl_module
#编译成功后,执行make命令进行编译
make
#make 执行成功后,执行make install正式安装
make install
#检查nginx配置文件是否正确,返回OK即正确。
/usr/local/nginx/sbin/nginx -t
#回车即可。查看进程是否已启动:
然后启动nginx,/usr/local/nginx/sbin/nginx
2) php安装配置
wget http://museum.php.net/php5/php-5.6.9.tar.gz
yum -y install gd curl curl-devel libjpeg libjpeg-devel libpng libpng-devel freetype freetype-devel libxml2 libxml2-devel mysql-devel
tar -xzf php-5.6.9.tar.gz
cd php-5.6.9
./configure --prefix=/usr/local/php5 --enable-fpm --enable-debug --with-gd --with-jpeg-dir --with-png-dir --with-freetype-dir --enable-mbstring --with-curl --with-mysql=mysqlnd
--with-mysqli=mysqlnd
--with-pdo-mysql=mysqlnd
--disable-fileinfo
mysqli扩展有一系列的优势,相对于mysql扩展的提升主要有:面向对象接口、 prepared语句支持、多语句执行支持、事务支持、增强的调试能力、嵌入式服务支持。
make
make install
\cp php.ini-development /usr/local/php5/lib/php.ini
\cp /usr/local/php5/etc/php-fpm.conf.default /usr/local/php5/etc/php-fpm.conf
\cp /usr/src/php-5.6.9/sapi/fpm/init.d.php-fpm /etc/init.d/php-fpm
chmod 755 /etc/init.d/php-fpm
chkconfig --add php-fpm
chkconfig php-fpm on
php解析器:用来解析PHP页面
php-fpm管理器:用来管理和调用和开启PHP解析器。
php-fpm.conf是php服务程序重要的配置文件之一,我们需要启用该配置文件中第25行左右的pid文件保存目录,然后分别将第148和149行的user与group参数分别修改为www账户和用户组名称:
1 ;;;;;;;;;;;;;;;;;;;;;
2 ; FPM Configuration ;
3 ;;;;;;;;;;;;;;;;;;;;;
23 ; Note: the default prefix is /usr/local/php/var
24 ; Default Value: none
25 pid = run/php-fpm.pid
………………省略部分输出信息………………
145 ; Unix user/group of processes
146 ; Note: The user is mandatory. If the group is not set, the default user's g roup
147 ; will be used.
148 user = www
149 group = www
………………省略部分输出信息………………
(4) Nginx配置文件配置
cat /usr/local/nginx/conf/nginx.conf
events {
worker_connections 1024;
}
http {
include mime.types;
default_type application/octet-stream;
server {
listen 80;
server_name localhost;
location / {
root /usr/local/nginx/html;
index index.html index.php;
}
location ~ .php$ {
root html;
fastcgi_pass 127.0.0.1:9000;
fastcgi_index index.php;#
fastcgi_paramSCRIPT_FILENAME
s/usr/local/nginx/html$fastcgi_script_name;
include fastcgi_params;
}
}
。
cat >/usr/local/nginx/html/index.php<<EOF
<?php
phpinfo();
?>
EOF
service php-fpm restart #重启php服务
/usr/local/nginx/sbin/nginx –t 检测Nginx服务参数
/usr/local/nginx/sbin/nginx 启动nginx服务参数
测试LNMP架构测试,创建index.php测试页面,如下图所示: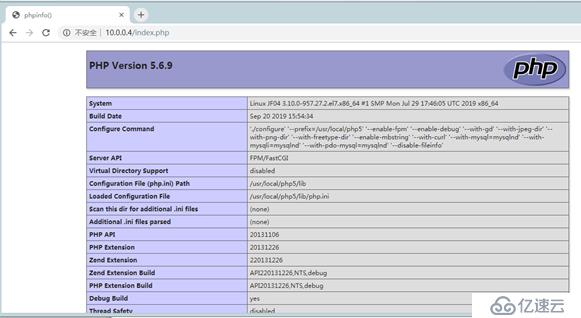
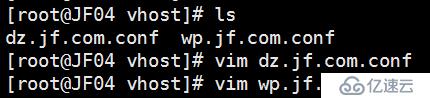
建立虚拟主机dz.jf.com && wp.jf.com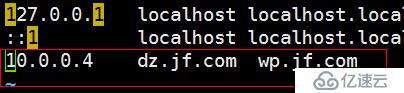

-
server {
listen 80;
server_name dz.jf.com;
  location / {
     root /usr/local/nginx/html/dz;
     index  index.php;
     }
  error_page 500 502 503 504 /50x.html;
  location = /50x.html {
  root html;
     }
   location ~ \.php$ {
         root           /usr/local/nginx/html/dz;
         fastcgi_pass   127.0.0.1:9000;
         fastcgi_index  index.php;
               fastcgi_param SCRIPT_FILENAME  /usr/local/nginx/html/dz$fastcgi_script_name;
         include        fastcgi_params;
     }
} #两个文件内容中就是域名和路径不一样,其余都一样
2-1)Discuz PHP论坛安装
LAMP源码整合完毕之后,Dicuz官网下载Discuz开源PHP软件包,将软件包解压并发布在Nginx Htdocs发布目录,代码如下:
cd /usr/src ;
wget http://download.comsenz.com/DiscuzX/3.1/Discuz_X3.1_SC_UTF8.zip
unzip Discuz_X3.1_SC_UTF8.zip -d /usr/local/nginx/html/dz
cd /usr/local/nginx/html/dz
mv upload/ /usr/local/nginx/html/dz
chmod 757 -R data/ uc_server/ config/ uc_client/
重新启动nginx
另外那个一样的操作,不同的路径
2-2)wordpress PHP论坛安装
cd /usr/src ;
tar –zxf wordpress-4.9.4-zh_CN.tar.gz –C /usr/local/nginx/html/wp
cd /usr/local/nginx/html/wp
mv wordpress / .
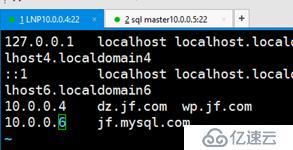
如下图找到路径添加ip 与域名 ,这样用主机就可以测试和访问这两个网站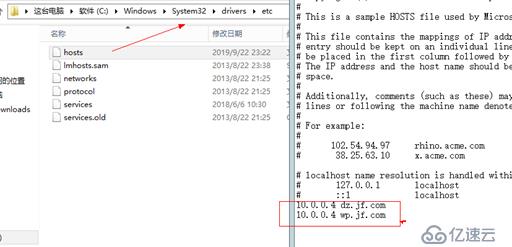
MYSQL数据库命令行中创建PHP连接MYSQL的用户及密码,命令如下:
create database discuz charset=utf8;
grant all on discuz. to root@'10.0.0.4' identified by "123456";
flush privileges;
create database wordpress charset=utf8;
grant all on wordpress. to root@'10.0.0.4' identified by "123456";
flush privileges;
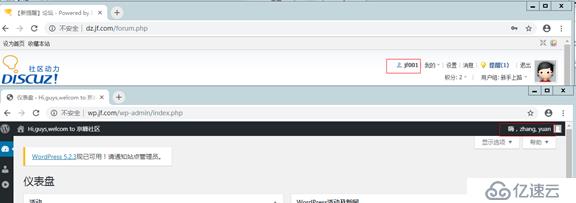
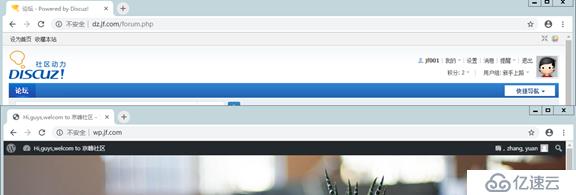
访问IP地址 进行论坛的访问,配置discuz论坛设置数据库。
3)MySQL安装配置
1).安装相关工具和软件包
yum install cmake ncurses-devel ncurses libaio bison git gcc-c++ -y
cd /usr/src
wget /mysql-5.5.20.tar.gz
tar -xzf mysql-5.5.20.tar.gz
cd mysql-5-5.20
cmake . -DCMAKE_INSTALL_PREFIX=/usr/local/mysql55 \
-DMYSQL_UNIX_ADDR=/tmp/mysql.sock \
-DMYSQL_DATADIR=/data/mysql \
-DSYSCONFDIR=/etc \
-DMYSQL_USER=mysql \
-DMYSQL_TCP_PORT=3306 \
-DWITH_XTRADB_STORAGE_ENGINE=1 \
-DWITH_INNOBASE_STORAGE_ENGINE=1 \
-DWITH_PARTITION_STORAGE_ENGINE=1 \
-DWITH_BLACKHOLE_STORAGE_ENGINE=1 \
-DWITH_MYISAM_STORAGE_ENGINE=1 \
-DWITH_READLINE=1 \
-DENABLED_LOCAL_INFILE=1 \
-DWITH_EXTRA_CHARSETS=1 \
-DDEFAULT_CHARSET=utf8 \
-DDEFAULT_COLLATION=utf8_general_ci \
-DEXTRA_CHARSETS=all \
-DWITH_BIG_TABLES=1 \
-DWITH_DEBUG=0 \
-DENABLE_DTRACE=0
make -j4 && make install
cd /usr/local/mysql55/
\cp -f support-files/my-large.cnf /etc/my.cnf
\cp -f support-files/mysql.server /etc/init.d/mysqld
chkconfig --add mysqld
chkconfig --level 35 mysqld on
mkdir -p /data/mysql
useradd mysql
/usr/local/mysql55/scripts/mysql_install_db --user=mysql --datadir=/data/mysql/ --basedir=/usr/local/mysql55/
ln -s /usr/local/mysql55/bin/* /usr/bin/
service mysqld start
建立主从复制
2).
Master and slave 一样 在/etc/my.conf 里面分别设置级别1,2;
设置日志名称及id :
server-id = 1
log-bin=mysql-bin
master 上面创建slave 链接master的复制账号和授权命令
Master数据库服务器命令行中 创建tongbu用户及密码并设置权限,执行如下命令,查看bin-log文件及position点,
grant replication slave on . to 'tongbu'@'10.0.0.4' identified by'123456';
show master status;
flush tables with read lock; #主库配置锁表
3)
.slave 链接 master,请求bin-log 文件(mysql-bin)。
change master to
master_host='10.0.0.5',master_user='tongbu',master_password='123456',masterlog
file='mysql-bin.000003',master_log_pos=477;
slave start;
MariaDB [(none)]> slave start;
Query OK, 0 rows affected (0.00 sec)
MariaDB [(none)]> show slave status\G
1. row
Slave_IO_State: Waiting for master to send event
Master_Host: 10.0.0.6
Master_User: tongbu
Master_Port: 3306
Connect_Retry: 60
Master_Log_File: mysql-bin.000003
Read_Master_Log_Pos: 477
Relay_Log_File: mariadb-relay-bin.000002
Relay_Log_Pos: 529
Relay_Master_Log_File: mysql-bin.000003
Slave_IO_Running: Yes
Slave_SQL_Running: Yes
Replicate_Do_DB:
Replicate_Ignore_DB:
Replicate_Do_Table:
Replicate_Ignore_Table:
Replicate_Wild_Do_Table:
Replicate_Wild_Ignore_Table:
Last_Errno: 0
Last_Error:
Skip_Counter: 0
Exec_Master_Log_Pos: 477
Relay_Log_Space: 825
Until_Condition: None
Until_Log_File:
Until_Log_Pos: 0
Master_SSL_Allowed: No
Master_SSL_CA_File:
Master_SSL_CA_Path:
Master_SSL_Cert:
Master_SSL_Cipher:
Master_SSL_Key:
Seconds_Behind_Master: 0
Master_SSL_Verify_Server_Cert: No
Last_IO_Errno: 0
Last_IO_Error:
Last_SQL_Errno: 0
Last_SQL_Error:
Replicate_Ignore_Server_Ids:
Master_Server_Id: 1
1 row in set (0.00 sec)
4).
在主库上面创建 数据库和表 ,主库和从库之间就会形成主从同步关系。
master 测试:
unlock tables;
create database jf1;
查看从库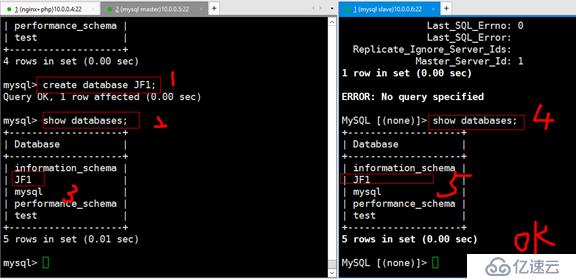
5).
主主同步就是用slave 的master去同步 mastar 的slave,叫做主从互备,一台宕机后,只需在/etc/hosts 文件中改变ip地址就可以将其切换(前提是主主mysql数据库主机名可以ping通和一致)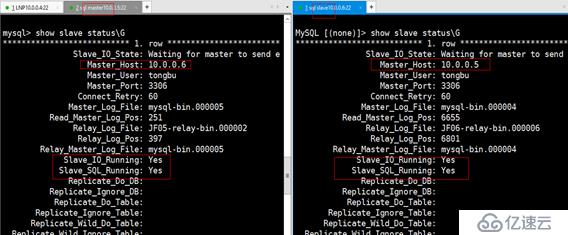
6).
模拟主宕机切换ip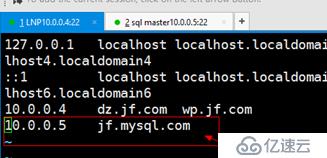 10.0.0.5的ip
创建jf001和jf002用户:
Kill “mysql’s id”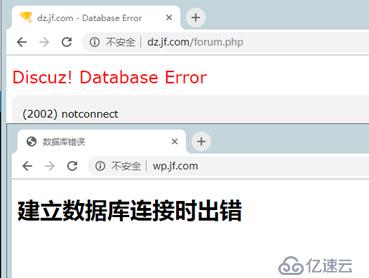
切换另一个主库(在安装论坛和网站时一定要用域名,不然主宕机后无法切换)
2、基于yum安装的LNP+MYSQL主从实战
配置LNP,Nginx WEB服务器+PHP-FPM(FastCGI),配置方法如下:
安装LNP服务;
yum install nginx php php-devel php-mysql php-fpm -y
Nginx默认发布目录:/usr/share/nginx/html/;
Nginx配置文件目录:/etc/nginx/
/usr/share/nginx/html/,发布目录创建index.php测试页面;
启动Nginx、PHP-FPM服务命令;
service php-fpm restart
service nginx restart
(配置内容和编译安装相似,唯一不同的是路径和启动命令)
2) 配置MYSQL 主主同步
yum install mariadb mariadb-devel -y
接下来的配置基本同编译安装mysql-5.5.20相似
免责声明:本站发布的内容(图片、视频和文字)以原创、转载和分享为主,文章观点不代表本网站立场,如果涉及侵权请联系站长邮箱:is@yisu.com进行举报,并提供相关证据,一经查实,将立刻删除涉嫌侵权内容。


