<Directory "/var/www/html">
    Options None
    AllowOverride None
    AuthType Basic
    AuthName "String"
    AuthUserFile "/etc/httpd/conf/.httpdpasswd"
    AuthGroupFile "/etc/httpd/conf/.grp"
<RequireAll>
   Require ip 172.20
   Require user ops1
</RequireAll>
</Directory>
基于用户组进行控制:
<Directory "/var/www/html">
Options None
AllowOverride None
AuthType Basic
AuthName "String"
AuthUserFile "/etc/httpd/conf/.httpdpasswd"
AuthGroupFile "/etc/httpd/conf/.grp"
<RequireAll>
   Require ip 172.20
   Require  group ops
</RequireAll>
</Directory>
(2)提供账号和密码存储(文本文件)
使用专用命令完成此类文件的创建及用户管理
htpasswd  [options]   /PATH/TO/HTTPD_PASSWD_FILE  username
    -c:自动创建此处指定的文件,因此,仅应该在此文件不存在时使用;
    -m:md5格式加密
    -s: sha格式加密
    -D:删除指定用户
    -b:批模式添加用户
[root@localhost conf]# htpasswd -bc /etc/httpd/conf/.httppasswd ops1 123456
Adding password for user ops1
[root@localhost conf]# vim /etc/httpd/conf/.grp
ops:ops1 ops2(3)重启测试:[root@localhost conf.d]# systemctl restart httpd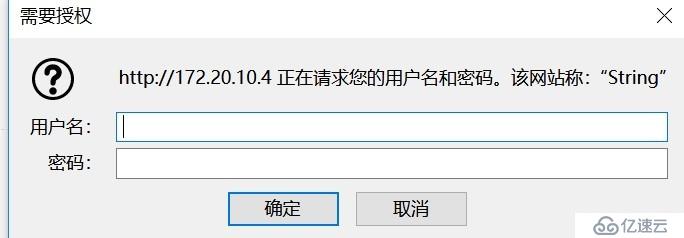
2.虚拟主机的配置
(1)基于IP地址的虚拟主机
[root@localhost /]# mkdir /data/html/{a,b} -pv
mkdir: created directory ‘/data/html’
mkdir: created directory ‘/data/html/a’
mkdir: created directory ‘/data/html/b’
[root@localhost /]# vim /data/html/a/index.html
<h2>hello a</h2>
[root@localhost /]# vim /data/html/b/index.html
<h2>hello b</h2>
[root@localhost conf.d]# vim vhost_ip.conf
<VirtualHost 172.20.10.4:80>
    ServerName www.a.com
    DocumentRoot "/data/html/a/"
    <Directory "/data/html/a/">
        Options None
        AllowOverride None
        Require all granted
    </Directory>
</VirtualHost>
<VirtualHost 172.20.10.7:80>
    ServerName www.b.com
    DocumentRoot "/data/html/b/"
    <Directory "/data/html/b/">
        Options None
        AllowOverride None
        Require all granted
    </Directory>
</VirtualHost>
(2)基于端口的虚拟主机:
[root@localhost conf.d]# vim vhost_ip.conf
Listen 8080
<VirtualHost 172.20.10.4:80>
    ServerName www.a.com
    DocumentRoot "/data/html/a/"
    <Directory "/data/html/a/">
        Options None
        AllowOverride None
        Require all granted
    </Directory>
</VirtualHost>
<VirtualHost 172.20.10.4:8080>
    ServerName www.b.com
    DocumentRoot "/data/html/b/"
    <Directory "/data/html/b/">
        Options None
        AllowOverride None
        Require all granted
    </Directory>
</VirtualHost>
(3)基于FQDN的虚拟主机:
[root@localhost conf.d]# vim vhost_ip.conf
<VirtualHost 172.20.10.4:80>
    ServerName www.a.com
    DocumentRoot "/data/html/a/"
    <Directory "/data/html/a/">
        Options None
        AllowOverride None
        Require all granted
    </Directory>
</VirtualHost>
<VirtualHost 172.20.10.4:80>
    ServerName www.b.com
    DocumentRoot "/data/html/b/"
    <Directory "/data/html/b/">
        Options None
        AllowOverride None
        Require all granted
    </Directory>
</VirtualHost>
注意:如果是httpd-2.2,则使用基于FQDN的虚拟主机时,需要事先使用如下指令:NameVirtualHost IP:PORT
3.实现https[root@localhost conf.d]# yum install -y mod_ssl
(1)构建私有CA:
生成私钥;
~]# (umask 077; openssl genrsa -out /etc/pki/CA/private/cakey.pem 4096)
生成自签证书;
~]# openssl req -new -x509 -key /etc/pki/CA/private/cakey.pem -out /etc/pki/CA/cacert.pem -days 3655
-new:生成新证书签署请求;
-x509:生成自签格式证书,专用于创建私有CA时;
-key:生成请求时用到的私有文件路径;
-out:生成的请求文件路径;如果自签操作将直接生成签署过的证书;
-days:证书的有效时长,单位是day;
为CA提供所需的目录及文件;
~]# mkdir  -pv  /etc/pki/CA/{certs,crl,newcerts}
~]# touch  /etc/pki/CA/{serial,index.txt}
~]# echo 01 > /etc/pki/CA/serial(2)要用到证书进行安全通信的服务器,需要向CA请求签署证书
用到证书的主机生成私钥;
~]# mkdir  /etc/httpd/ssl
~]# cd  /etc/httpd/ssl
~]# (umask  077; openssl  genrsa -out  /etc/httpd/ssl/httpd.key  2048)
生成证书签署请求
~]# openssl  req  -new  -key  /etc/httpd/ssl/httpd.key  -out /etc/httpd/ssl/httpd.csr  -days  365
在CA主机上签署证书;
~]# openssl ca  -in  /etc/httpd/ssl/httpd.csr  -out  /etc/pki/CA/certs/httpd.crt  -days  365
[root@localhost /]# vim /etc/httpd/conf.d/ssl.conf
DocumentRoot "/data/html/b/"
ServerName www.b.com:443
SSLCertificateFile /etc/httpd/ssl/httpd.csr
SSLCertificateKeyFile /etc/httpd/ssl/httpd.key
<Directory "/data/html/b/">
Options None
AllowOverride None
Require all granted
</Directory>免责声明:本站发布的内容(图片、视频和文字)以原创、转载和分享为主,文章观点不代表本网站立场,如果涉及侵权请联系站长邮箱:is@yisu.com进行举报,并提供相关证据,一经查实,将立刻删除涉嫌侵权内容。


