这篇文章主要为大家展示了“如何利用原生js实现选项卡功能”,内容简而易懂,条理清晰,希望能够帮助大家解决疑惑,下面让小编带领大家一起研究并学习一下“如何利用原生js实现选项卡功能”这篇文章吧。
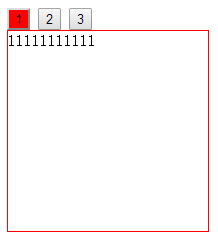
效果图:
代码如下:
<!DOCTYPE html>
<html>
 <head>
 <meta charset="UTF-8">
 <title>原生js选项卡写法</title>
 <style>
  #div1 div{width: 200px;height: 200px;border: 1px solid #FF0000;display: none;}
  .active{background: red;}
 </style>
 <script>
  window.onload=function(){//原生js选项卡写法
  var oDiv = document.getElementById('div1');
  var aInput = document.getElementsByTagName('input');
  var aCon = oDiv.getElementsByTagName('div');
  for(var i=0;i<aInput.length;i++){
   aInput[i].index = i;
   aInput[i].onclick = function(){
   for(var i=0;i<aInput.length;i++){
    aInput[i].className = '';
    aCon[i].style.display = 'none';
   }
   this.className= 'active';
   aCon[this.index].style.display = 'block';
   }
  }
  }
 </script>
 </head>
 <body>
 <div id="div1">
  <input class="active" type="button" value="1" />
  <input type="button" value="2"/>
  <input type="button" value="3"/>
  <div >11111111111</div>
  <div>22222222222</div>
  <div>333333333333</div>
 </div>
 </body>
</html>
以上是“如何利用原生js实现选项卡功能”这篇文章的所有内容,感谢各位的阅读!相信大家都有了一定的了解,希望分享的内容对大家有所帮助,如果还想学习更多知识,欢迎关注亿速云行业资讯频道!
免责声明:本站发布的内容(图片、视频和文字)以原创、转载和分享为主,文章观点不代表本网站立场,如果涉及侵权请联系站长邮箱:is@yisu.com进行举报,并提供相关证据,一经查实,将立刻删除涉嫌侵权内容。


