这篇文章主要讲解了Android如何使用DecorView实现对话框功能,内容清晰明了,对此有兴趣的小伙伴可以学习一下,相信大家阅读完之后会有帮助。
如果还不知道DecorView,那也没有什么关系 ^_^
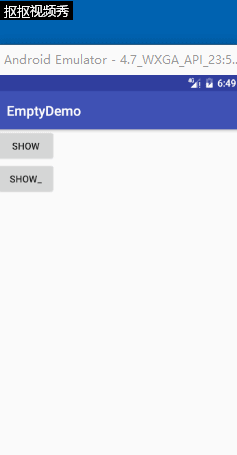
先来看看实现的效果

实现的大致思路
[下面大量 代码 ]
第一个对话框的实现
public class TipsDialog {
  private Activity activity;
  private View rootView;
  private TextView confirmTextView;
  private TextView cancelTextView;
  private TextView contentTextView;

  private boolean isShowing;

  public TipsDialog(Activity activity) {
    this.activity = activity;
    isShowing = false;
    rootView = LayoutInflater.from(activity).inflate(R.layout.view_tips_dialog,null);
    confirmTextView = (TextView) rootView.findViewById(R.id.view_tips_dialog_tv_confirm);
    cancelTextView = (TextView) rootView.findViewById(R.id.view_tips_dialog_tv_cancel);
    contentTextView = (TextView) rootView.findViewById(R.id.view_tips_dialog_tv_content);

  }

  public void show(){
    if(activity == null){
      return;
    }
    if(isShowing){
      return;
    }
    ViewGroup decorView = (ViewGroup) activity.getWindow().getDecorView();
    FrameLayout.LayoutParams params = new FrameLayout.LayoutParams(ViewGroup.LayoutParams.MATCH_PARENT, ViewGroup.LayoutParams.MATCH_PARENT);
    params.gravity = Gravity.CENTER;
    rootView.setLayoutParams(params);
    decorView.addView(rootView);
    rootView.setOnClickListener(new View.OnClickListener() {
      @Override
      public void onClick(View v) {
        dismiss();
      }
    });

    RotateAnimation rotateAnimation = new RotateAnimation(0,720f,RotateAnimation.RELATIVE_TO_SELF,0.5f,RotateAnimation.RELATIVE_TO_SELF,0.5f);
    rotateAnimation.setDuration(2000);
    contentTextView.startAnimation(rotateAnimation);

    isShowing = true;
  }

  public void dismiss(){
    if(!isShowing){
      return;
    }
    isShowing = false;
    if(rootView.getParent() == null){
      return;
    }
    ViewGroup parent = (ViewGroup) rootView.getParent();
    parent.removeView(rootView);

  }

  public int getRandomColor(){
    Random random = new Random();
    return Color.argb(random.nextInt(200),random.nextInt(240),random.nextInt(240),random.nextInt(240));
  }

  public boolean isShowing() {
    return isShowing;
  }
}
其实就是show的时候将布局添加到DecorView上面去,dismiss的时候将布局从DecorView上面移除
提示的实现(没有处理完善~~ 仅仅就是说明哈DecorView)
public class TopTipDialog {
  private Activity activity;
  private View rootView;
  private boolean isShowing;
  private static final int VIEW_HEIGHT = 64;//px

  public TopTipDialog(Activity activity) {
    this.activity = activity;
    rootView = LayoutInflater.from(activity).inflate(R.layout.view_top_tip_dialog,null);
  }


  public void show(){

    if(isShowing){
      return;
    }
    ViewGroup decorView = (ViewGroup) activity.getWindow().getDecorView();
    FrameLayout.LayoutParams params = new FrameLayout.LayoutParams(ViewGroup.LayoutParams.MATCH_PARENT, VIEW_HEIGHT);
    params.gravity = Gravity.TOP;
    params.setMargins(0,0,0,-VIEW_HEIGHT);
    rootView.setLayoutParams(params);

    TranslateAnimation translateAnimation = new TranslateAnimation(0,0,-VIEW_HEIGHT,0);
    translateAnimation.setDuration(1500);
    translateAnimation.setFillAfter(true);
    decorView.addView(rootView);
    rootView.startAnimation(translateAnimation);

    rootView.postDelayed(new Runnable() {
      @Override
      public void run() {
        TranslateAnimation translateAnimation1 = new TranslateAnimation(0,0,0,-VIEW_HEIGHT);
        translateAnimation1.setDuration(1500);
        translateAnimation1.setFillAfter(true);
        rootView.startAnimation(translateAnimation1);
      }
    },3000);

  }
}
看完上述内容,是不是对Android如何使用DecorView实现对话框功能有进一步的了解,如果还想学习更多内容,欢迎关注亿速云行业资讯频道。
免责声明:本站发布的内容(图片、视频和文字)以原创、转载和分享为主,文章观点不代表本网站立场,如果涉及侵权请联系站长邮箱:is@yisu.com进行举报,并提供相关证据,一经查实,将立刻删除涉嫌侵权内容。


