如何在Java项目中使用OCR tesseract实现一个图文识别功能?针对这个问题,这篇文章详细介绍了相对应的分析和解答,希望可以帮助更多想解决这个问题的小伙伴找到更简单易行的方法。
代码:
package com.zhy.test;

import java.io.BufferedReader;

import java.io.File;
import java.io.FileInputStream;
import java.io.InputStreamReader;
import java.util.ArrayList;
import java.util.List;

import org.jdesktop.swingx.util.OS;

public class OCRHelper
{
 private final String LANG_OPTION = "-l";
 private final String EOL = System.getProperty("line.separator");
 /**
  * 文件位置我防止在,项目同一路径
  */
 private String tessPath = new File("tesseract").getAbsolutePath();

 /**
  * @param imageFile
  *   传入的图像文件
  * @param imageFormat
  *   传入的图像格式
  * @return 识别后的字符串
  */
 public String recognizeText(File imageFile) throws Exception
 {
  /**
   * 设置输出文件的保存的文件目录
   */
  File outputFile = new File(imageFile.getParentFile(), "output");

  StringBuffer strB = new StringBuffer();
  List<String> cmd = new ArrayList<String>();
  if (OS.isWindowsXP())
  {
   cmd.add(tessPath + "\\tesseract");
  } else if (OS.isLinux())
  {
   cmd.add("tesseract");
  } else
  {
   cmd.add(tessPath + "\\tesseract");
  }
  cmd.add("");
  cmd.add(outputFile.getName());
  cmd.add(LANG_OPTION);
//  cmd.add("chi_sim");
  cmd.add("eng");

  ProcessBuilder pb = new ProcessBuilder();
  /**
   *Sets this process builder's working directory.
   */
  pb.directory(imageFile.getParentFile());
  cmd.set(1, imageFile.getName());
  pb.command(cmd);
  pb.redirectErrorStream(true);
  Process process = pb.start();
  // tesseract.exe 1.jpg 1 -l chi_sim
  // Runtime.getRuntime().exec("tesseract.exe 1.jpg 1 -l chi_sim");
  /**
   * the exit value of the process. By convention, 0 indicates normal
   * termination.
   */
//  System.out.println(cmd.toString());
  int w = process.waitFor();
  if (w == 0)// 0代表正常退出
  {
   BufferedReader in = new BufferedReader(new InputStreamReader(
     new FileInputStream(outputFile.getAbsolutePath() + ".txt"),
     "UTF-8"));
   String str;

   while ((str = in.readLine()) != null)
   {
    strB.append(str).append(EOL);
   }
   in.close();
  } else
  {
   String msg;
   switch (w)
   {
   case 1:
    msg = "Errors accessing files. There may be spaces in your image's filename.";
    break;
   case 29:
    msg = "Cannot recognize the image or its selected region.";
    break;
   case 31:
    msg = "Unsupported image format.";
    break;
   default:
    msg = "Errors occurred.";
   }
   throw new RuntimeException(msg);
  }
  new File(outputFile.getAbsolutePath() + ".txt").delete();
  return strB.toString().replaceAll("\\s*", "");
 }
}
代码很简单,中间那部分ProcessBuilder其实就类似Runtime.getRuntime().exec("tesseract.exe 1.jpg 1 -l chi_sim"),大家不习惯的可以使用Runtime。
测试代码:
package com.zhy.test;

import java.io.File;

public class Test
{
 public static void main(String[] args)
 {
  try
  {

   File testDataDir = new File("testdata");
   System.out.println(testDataDir.listFiles().length);
   int i = 0 ;
   for(File file :testDataDir.listFiles())
   {
    i++ ;
    String recognizeText = new OCRHelper().recognizeText(file);
    System.out.print(recognizeText+"\t");

    if( i % 5 == 0 )
    {
     System.out.println();
    }
   }

  } catch (Exception e)
  {
   e.printStackTrace();
  }

 }
}
输出结果:
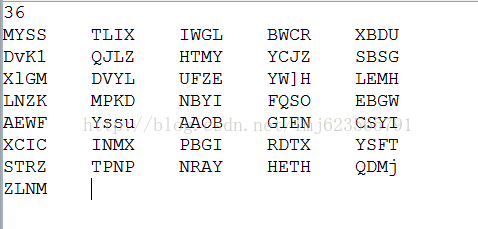
对比第一张图片,是不是很完美~哈哈 ,当然了如果你只需要实现验证码的读写,那么上面就足够了。下面继续普及图像处理的知识。
当然了,有时候图片被扭曲或者模糊的很厉害,很不容易识别,所以下面我给大家介绍一个去噪的辅助类,绝对碉堡了,先看下效果图。
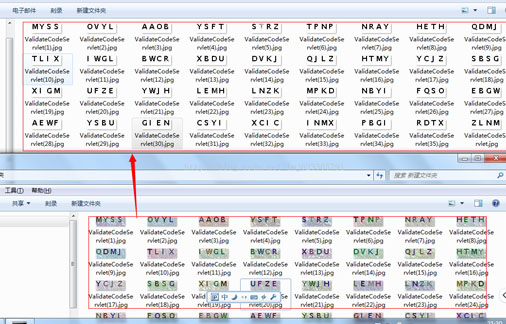
来张特写:

一个类,不依赖任何jar,把图像中的干扰线消灭了,是不是很给力,然后再拿这样的图片去识别,会不会效果更好呢,嘿嘿,大家自己实验~
代码:
package com.zhy.test;

import java.awt.Color;
import java.awt.image.BufferedImage;
import java.io.File;
import java.io.IOException;

import javax.imageio.ImageIO;

public class ClearImageHelper
{

 public static void main(String[] args) throws IOException
 {


  File testDataDir = new File("testdata");
  final String destDir = testDataDir.getAbsolutePath()+"/tmp";
  for (File file : testDataDir.listFiles())
  {
   cleanImage(file, destDir);
  }

 }

 /**
  *
  * @param sfile
  *   需要去噪的图像
  * @param destDir
  *   去噪后的图像保存地址
  * @throws IOException
  */
 public static void cleanImage(File sfile, String destDir)
   throws IOException
 {
  File destF = new File(destDir);
  if (!destF.exists())
  {
   destF.mkdirs();
  }

  BufferedImage bufferedImage = ImageIO.read(sfile);
  int h = bufferedImage.getHeight();
  int w = bufferedImage.getWidth();

  // 灰度化
  int[][] gray = new int[w][h];
  for (int x = 0; x < w; x++)
  {
   for (int y = 0; y < h; y++)
   {
    int argb = bufferedImage.getRGB(x, y);
    // 图像加亮(调整亮度识别率非常高)
    int r = (int) (((argb >> 16) & 0xFF) * 1.1 + 30);
    int g = (int) (((argb >> 8) & 0xFF) * 1.1 + 30);
    int b = (int) (((argb >> 0) & 0xFF) * 1.1 + 30);
    if (r >= 255)
    {
     r = 255;
    }
    if (g >= 255)
    {
     g = 255;
    }
    if (b >= 255)
    {
     b = 255;
    }
    gray[x][y] = (int) Math
      .pow((Math.pow(r, 2.2) * 0.2973 + Math.pow(g, 2.2)
        * 0.6274 + Math.pow(b, 2.2) * 0.0753), 1 / 2.2);
   }
  }

  // 二值化
  int threshold = ostu(gray, w, h);
  BufferedImage binaryBufferedImage = new BufferedImage(w, h,
    BufferedImage.TYPE_BYTE_BINARY);
  for (int x = 0; x < w; x++)
  {
   for (int y = 0; y < h; y++)
   {
    if (gray[x][y] > threshold)
    {
     gray[x][y] |= 0x00FFFF;
    } else
    {
     gray[x][y] &= 0xFF0000;
    }
    binaryBufferedImage.setRGB(x, y, gray[x][y]);
   }
  }

  // 矩阵打印
  for (int y = 0; y < h; y++)
  {
   for (int x = 0; x < w; x++)
   {
    if (isBlack(binaryBufferedImage.getRGB(x, y)))
    {
     System.out.print("*");
    } else
    {
     System.out.print(" ");
    }
   }
   System.out.println();
  }

  ImageIO.write(binaryBufferedImage, "jpg", new File(destDir, sfile
    .getName()));
 }

 public static boolean isBlack(int colorInt)
 {
  Color color = new Color(colorInt);
  if (color.getRed() + color.getGreen() + color.getBlue() <= 300)
  {
   return true;
  }
  return false;
 }

 public static boolean isWhite(int colorInt)
 {
  Color color = new Color(colorInt);
  if (color.getRed() + color.getGreen() + color.getBlue() > 300)
  {
   return true;
  }
  return false;
 }

 public static int isBlackOrWhite(int colorInt)
 {
  if (getColorBright(colorInt) < 30 || getColorBright(colorInt) > 730)
  {
   return 1;
  }
  return 0;
 }

 public static int getColorBright(int colorInt)
 {
  Color color = new Color(colorInt);
  return color.getRed() + color.getGreen() + color.getBlue();
 }

 public static int ostu(int[][] gray, int w, int h)
 {
  int[] histData = new int[w * h];
  // Calculate histogram
  for (int x = 0; x < w; x++)
  {
   for (int y = 0; y < h; y++)
   {
    int red = 0xFF & gray[x][y];
    histData[red]++;
   }
  }

  // Total number of pixels
  int total = w * h;

  float sum = 0;
  for (int t = 0; t < 256; t++)
   sum += t * histData[t];

  float sumB = 0;
  int wB = 0;
  int wF = 0;

  float varMax = 0;
  int threshold = 0;

  for (int t = 0; t < 256; t++)
  {
   wB += histData[t]; // Weight Background
   if (wB == 0)
    continue;

   wF = total - wB; // Weight Foreground
   if (wF == 0)
    break;

   sumB += (float) (t * histData[t]);

   float mB = sumB / wB; // Mean Background
   float mF = (sum - sumB) / wF; // Mean Foreground

   // Calculate Between Class Variance
   float varBetween = (float) wB * (float) wF * (mB - mF) * (mB - mF);

   // Check if new maximum found
   if (varBetween > varMax)
   {
    varMax = varBetween;
    threshold = t;
   }
  }

  return threshold;
 }
}
关于如何在Java项目中使用OCR tesseract实现一个图文识别功能问题的解答就分享到这里了,希望以上内容可以对大家有一定的帮助,如果你还有很多疑惑没有解开,可以关注亿速云行业资讯频道了解更多相关知识。
免责声明:本站发布的内容(图片、视频和文字)以原创、转载和分享为主,文章观点不代表本网站立场,如果涉及侵权请联系站长邮箱:is@yisu.com进行举报,并提供相关证据,一经查实,将立刻删除涉嫌侵权内容。


