在Spring Boot项目中如何实现使用 Mybatis中的@ Annotation注解?相信很多没有经验的人对此束手无策,为此本文总结了问题出现的原因和解决方法,通过这篇文章希望你能解决这个问题。
一、运行 springboot-mybatis-annotation 工程
然后Application 应用启动类的 main 函数,然后在浏览器访问:
http://localhost:8080/api/city?cityName=温岭市
可以看到返回的 JSON 结果:
{
"id": 1,
"provinceId": 1,
"cityName": "温岭市",
"description": "我的家在温岭。"
}
三、springboot-mybatis-annotation 工程配置详解
1.pom 添加 Mybatis 依赖
<?xml version="1.0" encoding="UTF-8"?> <project xmlns="http://maven.apache.org/POM/4.0.0" xmlns:xsi="http://www.w3.org/2001/XMLSchema-instance" xsi:schemaLocation="http://maven.apache.org/POM/4.0.0 http://maven.apache.org/xsd/maven-4.0.0.xsd"> <modelVersion>4.0.0</modelVersion> <groupId>springboot</groupId> <artifactId>springboot-mybatis-annotation</artifactId> <version>0.0.1-SNAPSHOT</version> <packaging>jar</packaging> <name>springboot-mybatis-annotation</name> <description>Springboot-mybatis :: 整合Mybatis Annotation Demo</description> <!-- Spring Boot 启动父依赖 --> <parent> <groupId>org.springframework.boot</groupId> <artifactId>spring-boot-starter-parent</artifactId> <version>1.5.1.RELEASE</version> </parent> <properties> <mybatis-spring-boot>1.2.0</mybatis-spring-boot> <mysql-connector>5.1.39</mysql-connector> </properties> <dependencies> <!-- Spring Boot Web 依赖 --> <dependency> <groupId>org.springframework.boot</groupId> <artifactId>spring-boot-starter-web</artifactId> </dependency> <!-- Spring Boot Test 依赖 --> <dependency> <groupId>org.springframework.boot</groupId> <artifactId>spring-boot-starter-test</artifactId> <scope>test</scope> </dependency> <!-- Spring Boot Mybatis 依赖 --> <dependency> <groupId>org.mybatis.spring.boot</groupId> <artifactId>mybatis-spring-boot-starter</artifactId> <version>${mybatis-spring-boot}</version> </dependency> <!-- MySQL 连接驱动依赖 --> <dependency> <groupId>mysql</groupId> <artifactId>mysql-connector-java</artifactId> <version>${mysql-connector}</version> </dependency> <!-- Junit --> <dependency> <groupId>junit</groupId> <artifactId>junit</artifactId> <version>4.12</version> </dependency> </dependencies> </project>
2.在 CityDao 城市数据操作层接口类添加注解 @Mapper、@Select 和 @Results
/**
* 城市 DAO 接口类
*
* Created by xchunzhao on 02/05/2017.
*/
@Mapper // 标志为 Mybatis 的 Mapper
public interface CityDao {
/**
* 根据城市名称,查询城市信息
*
* @param cityName 城市名
*/
@Select("SELECT * FROM city")
// 返回 Map 结果集
@Results({
@Result(property = "id", column = "id"),
@Result(property = "provinceId", column = "province_id"),
@Result(property = "cityName", column = "city_name"),
@Result(property = "description", column = "description"),
})
City findByName(@Param("cityName") String cityName);
}
@Mapper 标志接口为 MyBatis Mapper 接口
@Select 是 Select 操作语句
@Results 标志结果集,以及与库表字段的映射关系
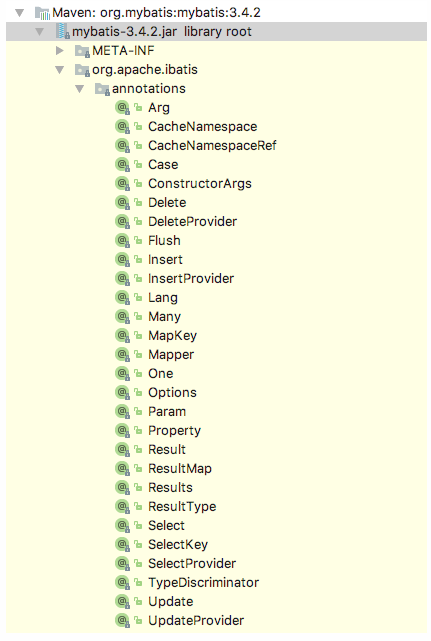
其他的注解可以看 org.apache.ibatis.annotations 包提供的,如图:
看完上述内容,你们掌握在Spring Boot项目中如何实现使用 Mybatis中的@ Annotation注解的方法了吗?如果还想学到更多技能或想了解更多相关内容,欢迎关注亿速云行业资讯频道,感谢各位的阅读!
免责声明:本站发布的内容(图片、视频和文字)以原创、转载和分享为主,文章观点不代表本网站立场,如果涉及侵权请联系站长邮箱:is@yisu.com进行举报,并提供相关证据,一经查实,将立刻删除涉嫌侵权内容。


