之前在网上看了很多Oracle的静默安装教程,感觉有些乱,经过自己查阅Oracle官网英文手册,结合在虚拟机中安装测试,整理出了这篇RedHat 7 静默安装Oracle 12c。redhat 6静默安装Oracle 11g R2也已基本整理好了,等有时间了再发出来。
本文原始出处:江健龙的技术博客http://jiangjianlong.blog.51cto.com/3735273/1792451
一、环境要求与准备
1、硬件要求
(1)磁盘空间
EnterpriseEdition : 6.4GB
StandardEdition : 6.1GB
1 GB of space inthe /tmp directory on your Linux system.
(2)RAM
Minimum: 1 GB of RAM
Recommended: 2 GB ofRAM or more
(3)SWAP
RAM Swap Space
Between 1 GB and 2 GB ——1.5 times the size of the RAM
Between2 GB and 16 GB ——Equal to the size of the RAM
Morethan 16 GB ——16 GB
2、软件要求
(1)操作系统
■Supported OracleLinux 7 and Red Hat Enterprise Linux 7 Distributions for x86-64
■ Supported OracleLinux 6 and Red Hat Enterprise Linux 6 Distributions for x86-64
■ Supported OracleLinux 5 and Red Hat Enterprise Linux 5 Distributions for x86-64
■ Supported SUSEDistributions for x86-64
Starting with Oracle Database 12c Release 1 (12.1.0.2), Red HatEnterprise Linux 7 (3.10.0-54.0.1.el7.x86_64)are supported on Linuxx86-64 systems.
(2)RPM包要求forRH7
binutils-2.23.52.0.1-12.el7.x86_64
compat-libcap1-1.10-3.el7.x86_64
compat-libstdc++-33-3.2.3-71.el7.i686(需另外下载)
compat-libstdc++-33-3.2.3-71.el7.x86_64(需另外下载)
gcc-4.8.2-3.el7.x86_64
gcc-c++-4.8.2-3.el7.x86_64
glibc-2.17-36.el7.i686
glibc-2.17-36.el7.x86_64
glibc-devel-2.17-36.el7.i686
glibc-devel-2.17-36.el7.x86_64
ksh
libaio-0.3.109-9.el7.i686
libaio-0.3.109-9.el7.x86_64
libaio-devel-0.3.109-9.el7.i686
libaio-devel-0.3.109-9.el7.x86_64
libgcc-4.8.2-3.el7.i686
libgcc-4.8.2-3.el7.x86_64
libstdc++-4.8.2-3.el7.i686
libstdc++-4.8.2-3.el7.x86_64
libstdc++-devel-4.8.2-3.el7.i686
libstdc++-devel-4.8.2-3.el7.x86_64
libXi-1.7.2-1.el7.i686
libXi-1.7.2-1.el7.x86_64
libXtst-1.2.2-1.el7.i686
libXtst-1.2.2-1.el7.x86_64
make-3.82-19.el7.x86_64
sysstat-10.1.5-1.el7.x86_64
unixODBC-2.3.1 orlater
3、设置域名解析
4、关闭Transparent HugePages
使用root登录
查看:cat /sys/kernel/mm/redhat_transparent_hugepage/enabled
关闭方法:
官方推荐关闭,但Redhat 7我还未找到关闭方法,但也不影响安装
5、创建用户和组
Thefollowing local operating system groups and users are required if you areinstalling Oracle Database:
■ The OracleInventory group (typically, oinstall )
■ The OSDBA group(typically, dba )
■ The Oraclesoftware owner (typically, oracle )
■ The OSOPER group(optional. Typically, oper )
# grep dba/etc/group
# id oracle
If the oracle user exists:
# /usr/sbin/usermod-g oinstall -G dba oracle
If the oracle user does not exist:
# /usr/sbin/useradd-g oinstall -G dba oracle
set the password:
# passwd oracle

6、创建安装目录
Oracle_Base目录:/u01/app/oracle/
Oracle_Home目录:/u01/app/oracle/12c
Oracle清单目录:/u01/app/oracle/oraInventory

7、设置资源限制
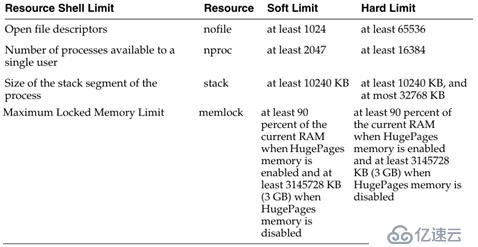
查看方式:
$ ulimit -Sn
1024
$ ulimit -Hn
65536
$ ulimit -Su
2047
$ ulimit -Hu
16384
$ ulimit -Ss
10240
$ ulimit -Hs
32768
修改方法:
vi /etc/security/limits.conf,加上以下内容:
oracle soft nproc 2047
oracle hard nproc 16384
oracle soft nofile 1024
oracle hard nofile 65536
oracle hard stack 32768
oracle soft stack 10240
注:如果Oracle已登录,必须先登出后再次登录才生效
8、配置Oracle用户环境变量
vi /home/oracle/.bash_profile,加上以下内容,标橙色的部分需要根据自己实际进行修改
export EDITOR=vi
export ORACLE_SID=orcl
export ORACLE_BASE=/u01/app/oracle
export ORACLE_HOME=$ORACLE_BASE/12c
export nls_date_format="yyyy-mm-dd hh34:mi:ss"
export PATH=/u01/app/oracle/12c/bin:$PATH
9、配置内核参数

Note:If the current value for any parameter is greater than the valuelisted in this table, then the Fixupscripts do not change the value of that parameter.
查看方式:
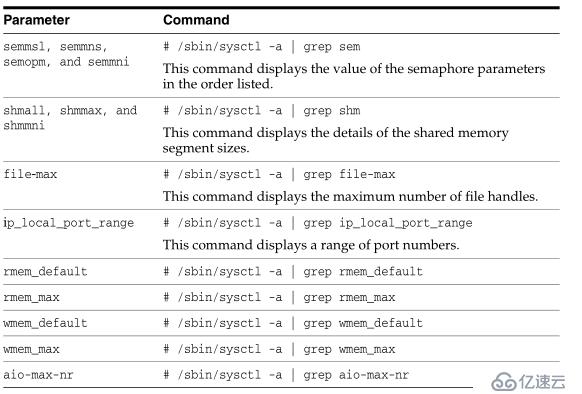
修改方式:vi /etc/sysctl.conf,修改或增加以下内容:
fs.aio-max-nr =1048576
fs.file-max =6815744
kernel.shmall =2097152
kernel.shmmax =4294967295
kernel.shmmni = 4096
kernel.sem = 25032000 100 128
net.ipv4.ip_local_port_range= 9000 65500
net.core.rmem_default= 262144
net.core.rmem_max =4194304
net.core.wmem_default= 262144
net.core.wmem_max =1048576
最好reboot一下,不然有的参数不生效
10、编辑/etc/profile
vi /etc/profile
末尾加入
if [ $USER ="oracle" ]; then
if [ $SHELL = "/bin/ksh" ]; then
ulimit-p 16384
ulimit-n 65536
else
ulimit-u 16384 -n 65536
fi
fi
二、静默安装Oracle software
1、编辑应答文件db_install.rsp
Oracle安装介质中有应答文件,复制一份出来进行修改,更改以下内容,标橙色部分需要根据自己实际修改,应答文件中的其他内容不需要改,Oracle版本:12.1.0.2
本文原始出处:江健龙的技术博客http://jiangjianlong.blog.51cto.com/3735273/1792451
oracle.install.option=INSTALL_DB_SWONLY
ORACLE_HOSTNAME=rh7
UNIX_GROUP_NAME=oinstall
INVENTORY_LOCATION=/u01/app/oraInventory
SELECTED_LANGUAGES=en,zh_CN
ORACLE_HOME=/u01/app/oracle/12c
ORACLE_BASE=/u01/app/oracle
oracle.install.db.InstallEdition=EE
oracle.install.db.DBA_GROUP=dba
oracle.install.db.OPER_GROUP=oinstall
oracle.install.db.BACKUPDBA_GROUP=dba
oracle.install.db.DGDBA_GROUP=dba
oracle.install.db.KMDBA_GROUP=dba
DECLINE_SECURITY_UPDATES=true
2、执行静默安装命令
[oracle@rh7 database]$ ./runInstaller -silent -ignorePrereq -responseFile /oracle12czip/db_install.rsp
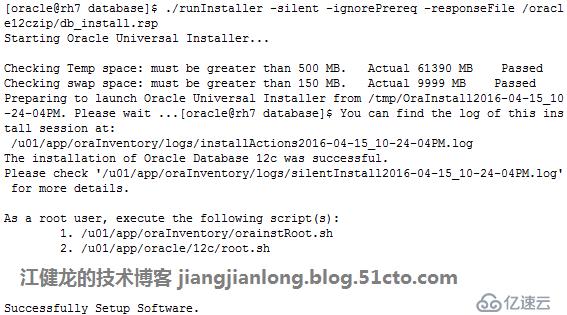
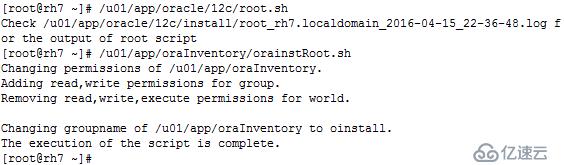
3、完成安装后使用root登录执行脚本
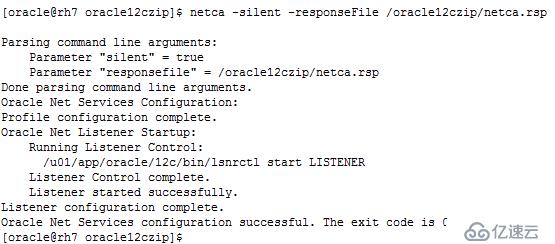
4、配置监听
复制一份安装介质中的应答文件netca.rsp,无需修改,直接静默执行即可
[oracle@rh7 oracle12czip]$ netca -silent -responseFile /oracle12czip/netca.rsp
三、静默安装数据库
1、编辑应答文件dbca.rsp
Oracle安装介质中有应答文件dbca.rsp,复制一份出来进行修改,更改以下内容,标橙色部分需要根据自己实际修改,应答文件中的其他内容不需要改
[GENERAL]
RESPONSEFILE_VERSION = "12.1.0"
OPERATION_TYPE = "createDatabase"
[CREATEDATABASE]
GDBNAME ="orcl"
SID = "orcl"
TEMPLATENAME = "General_Purpose.dbc"
SYSPASSWORD ="p@ssw0rd"
SYSTEMPASSWORD ="p@ssw0rd"
EMCONFIGURATION ="DBEXPRESS"
EMEXPRESSPORT = "5520" #(指定该参数安装后未生效,仍是默认的5500)
DBSNMPPASSWORD ="p@ssw0rd"
STORAGETYPE="FS"
CHARACTERSET = "ZHS16GBK"
NATIONALCHARACTERSET= "AL16UTF16"
MEMORYPERCENTAGE ="40"
TOTALMEMORY ="1024"
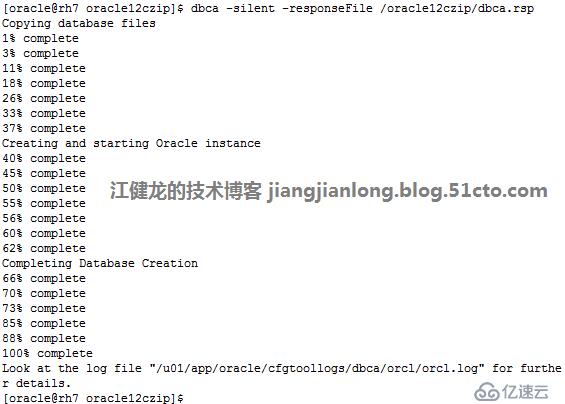
2、执行静默安装命令
$dbca -silent
-responseFile /oracle12czip/dbca.rsp
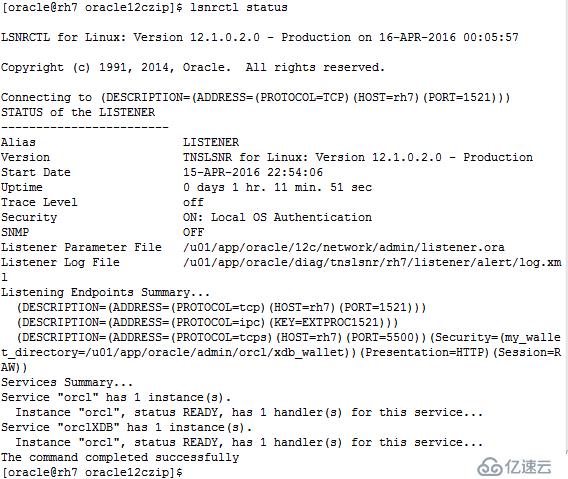
四、安装完成后检查
1、检查监听状态:$ lsnrctl status
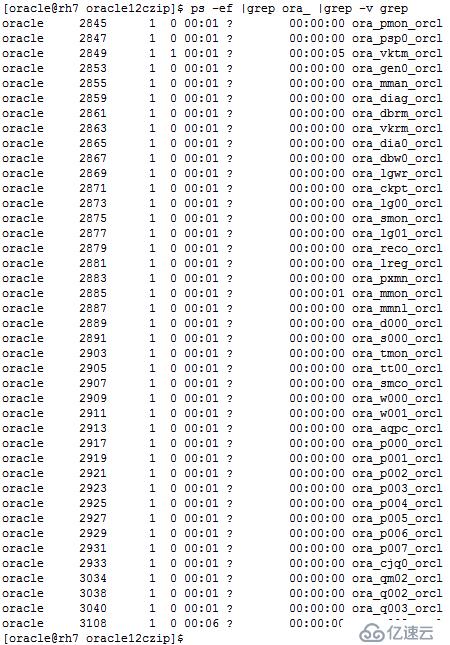
2、检查Oracle进程:]$ ps -ef
|grep ora_ |grep -v grep
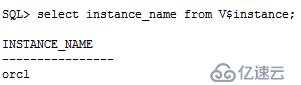
3、登录Oracle数据库

SQL> select name from V$database;

SQL> select instance_name from V$instance;
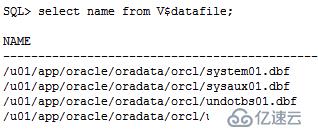
SQL> select name from V$datafile;
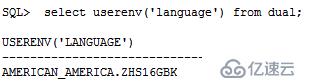
SQL> select userenv('language') from dual;
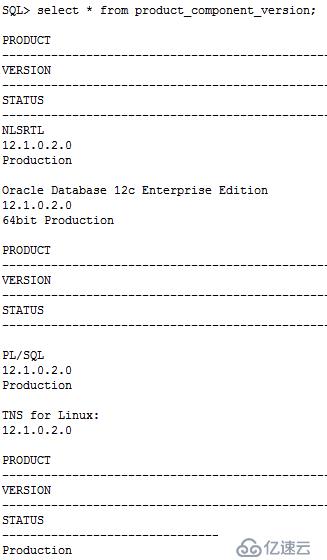
SQL> select * from product_component_version;
SQL> show parameter background_dump_dest;

4、登录EM

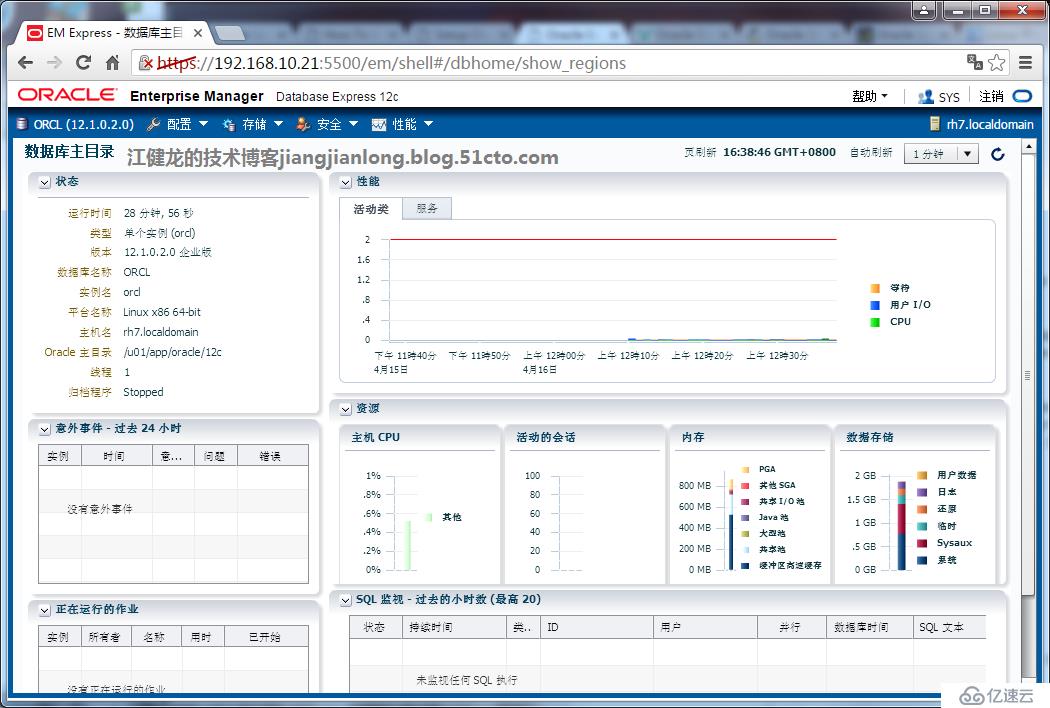
Oracle 12c至此已在redhat 7上静默安装完成了,可以创建表空间、创建用户去使用了。
免责声明:本站发布的内容(图片、视频和文字)以原创、转载和分享为主,文章观点不代表本网站立场,如果涉及侵权请联系站长邮箱:is@yisu.com进行举报,并提供相关证据,一经查实,将立刻删除涉嫌侵权内容。


