官方下载和安装文档:http://www.lepus.cc/page/product
由于参考官方的文档,让安装天兔时受挫不少,于是有了这篇手记:
环境 CentOS 6.5 + xampp-linux-x64-1.8.2-5-installer.run + Lepus数据库企业监控系统3.8 Beta
安装 xampp:
#wget http://cdn.lepus.cc/cdncache/software/xampp-linux-x64-1.8.2-5-installer.run
#chmod +x xampp-linux-x64-1.8.2-5-installer.run
#./xampp-linux-x64-1.8.2-5-installer.run -- 一路yes就可以了
#ln -s /opt/lampp/xampp /sbin/xampp --创建软链接,方便启动xampp
#ln -s /opt/lampp/bin/mysql /sbin/mysql --创建软链接,方便启动mysql客户端
-----------------------------------------------------------------------------------------------------------------------
安装python 2.7 --官方未提供
#yum install -y openssl openssl-devel --安装python for mysql时需要
#wget https://www.python.org/ftp/python/2.7.13/Python-2.7.13.tar.xz
#xz -d Python-2.7.13.tar.xz
#tar xvf Python-2.7.13.tar
#cd Python-2.7.13
#./configure --enable-optimizations
#vim Modules/Setup.dist -- configure之后才有Modules 文件夹
把下面几行前的#去掉:
#SSL=/usr/local/ssl
#_ssl _ssl.c \
# -DUSE_SSL -I$(SSL)/include -I$(SSL)/include/openssl \
# -L$(SSL)/lib -lssl -lcrypto
改成:
SSL=/usr/local/ssl
_ssl _ssl.c \
-DUSE_SSL -I$(SSL)/include -I$(SSL)/include/openssl \
-L$(SSL)/lib -lssl -lcrypto
保存退出。
-------------------------------------------------------------------------------------------------------------------------
安装python for mysql模块
#wget http://cdn.lepus.cc/cdncache/software/MySQLdb-python.zip
#unzip MySQLdb-python.zip
#cd MySQLdb1-master --MySQLdb-python.zip 解压后的目录
#find / -name mysql_config --官方指导里用的是which mysql_config ,可能是安装方式不同,我是找不到这个文件的
/opt/lampp/bin/mysql_config
#vim site.cfg 添加一行:
mysql_config = /usr/local/mysql/bin/mysql_config
# python setup.py build --找不到mysql_config文件
EnvironmentError: /usr/local/mysql/bin/mysql_config not found
#ln -s /opt/lampp/bin/mysql_config /usr/local/mysql/bin/mysql_config --创建链接
# python setup.py install
Finished processing dependencies for MySQL-python==1.2.4 --python from mysql 安装成功
-------------------------------------------------------------------------------------------------------------------------
安装天兔 Lepus数据库企业监控系统3.8 Beta.zip
-- 天兔需要在windows端下载,然后上传到linux服务器
#unzip Lepus数据库企业监控系统3.8 Beta.zip
#mv Lepus数据库企业监控系统3.8 Beta lepus3.8
建立lepus 数据库:
#msyql
mysql> create database lepus default character set utf8;
Query OK, 1 row affected (0.01 sec)
mysql> grant select,insert,update,delete,create on lepus.* to 'lepus'@'localhost' identified by '123456';
Query OK, 0 rows affected (0.00 sec)
mysql> flush privileges;
mysql>exit;
#mysql lepus < sql/lepus_table.sql --导入数据表
#mysql -uroot lepus < sql/lepus_data.sql --导入数据
-------------------------------------------------------------------------------------------------------------------------
------------------------------
安装Lepus程序:
#cd python --Lepus3.8程序包内的目录
# chmod +x install.sh --授权执行
# ./install.sh --执行
[root@slave python]# ./install.sh
[note] lepus will be install on basedir: /usr/local/lepus -- 天兔安装到了这里
[note] /usr/local/lepus directory does not exist,will be created.
[note] /usr/local/lepus directory created success.
[note] wait copy files.......
[note] change script permission.
[note] create links.
[note] install complete.
修改 Lepus 配置文件
# cd /usr/local/lepus/
# vim etc/config.ini
###监控机MySQL数据库连接地址###
[monitor_server]
host="127.0.0.1"
port=3306
user=" lepus " --输入天兔数据库的用户名
passwd="xxxxxx" --输入天兔数据库的用户lepus的密码
dbname="lepus"
# lepus start --测试是否可以启动天兔
lepus server start fail!
#cat logs/lepus.log
ImportError: libmysqlclient.so.18: cannot open shared object file: No such file or directory --缺少文件libmysqlclient.so.18
# yum install -y libmysqlclient.so.18
# lepus start --测试是否可以启动天兔
lepus server start fail!
# cat /usr/local/lepus/logs/lepus.log
ImportError: libcrypto.so.1.0.0: cannot open shared object file: No such file or directory --缺少文件 libcrypto.so.1.0.0
#find / -name libcrypto.so.1.0.0
/opt/lampp/lib/libcrypto.so.1.0.0
# ln -s /opt/lampp/lib/libcrypto.so.1.0.0 /usr/lib64 ---建立软链接
# ln -s /opt/lampp/lib/libcrypto.so.1.0.0 /usr/lib ---建立软链接
#lepus start --测试是否可以启动天兔
lepus server start success! --终于启动了
-------------------------------------------------------------------------------------------------------------------------
------------------------------
安装WEB管理台
#cp -rf /root/lepus3.8/php/* /opt/lampp/htdocs/ --复制天兔安装包里的PHP文件夹内的文件到 apache主页目录
# vim /opt/lampp/htdocs/application/config/database.php --修改PHP的database.php文件
$db['default']['username'] = 'lepus'; --把用户名加进去
$db['default']['password'] = '123456'; --把用户密码加进去
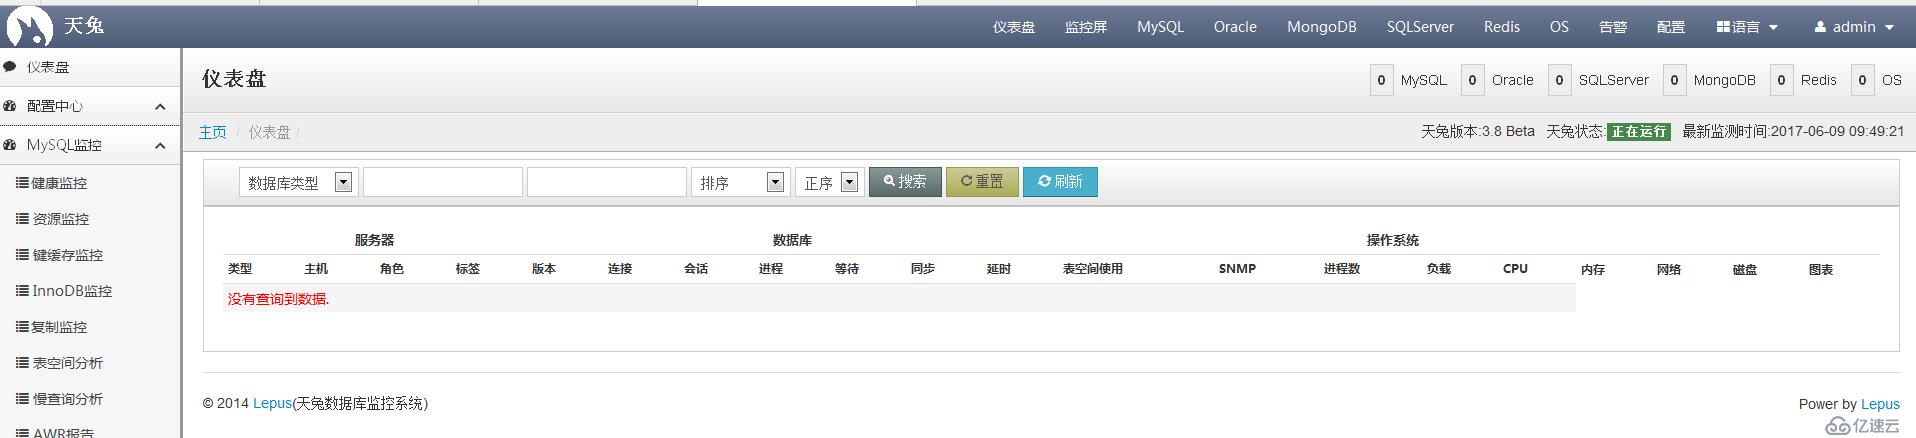
登录进行添加主机和监控
通过浏览器输入IP地址或域名打开监控界面,即可登录系统。.默认管理员账号密码admin/Lepusadmin登录后请修改管理员密码,增加普通账号。
-------------------------------------------------------------------------------------------------------------------------
------------------------------
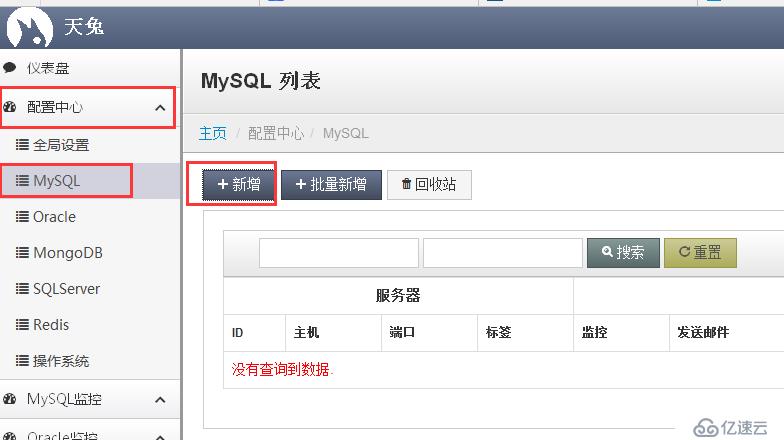
添加被监控端
在被控端mysql添加一个mysql帐号,然后在登录天兔系统,在天兔里添加:
被控端:
mysql> grant all on *.* to 'lepus'@'%' identified by '123456';
Query OK, 0 rows affected, 1 warning (0.25 sec)
天兔:
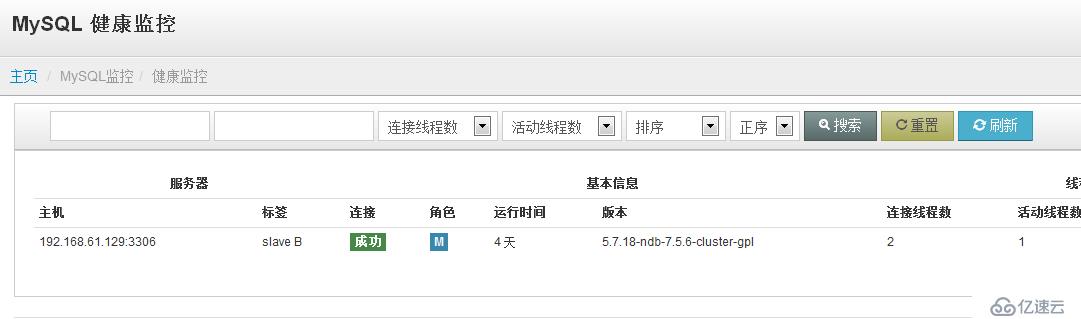
其他更多功能要自己琢磨了,官方也没文档
全文完
免责声明:本站发布的内容(图片、视频和文字)以原创、转载和分享为主,文章观点不代表本网站立场,如果涉及侵权请联系站长邮箱:is@yisu.com进行举报,并提供相关证据,一经查实,将立刻删除涉嫌侵权内容。


