这篇文章主要讲解了“怎么使用JavaScript和HTML创建博客阅读器”,文中的讲解内容简单清晰,易于学习与理解,下面请大家跟着小编的思路慢慢深入,一起来研究和学习“怎么使用JavaScript和HTML创建博客阅读器”吧!
在 Visual Studio 中创建新项目
为我们的应用创建一个名为 WindowsBlogReader 的新项目。以下是操作方法:
启动 Visual Studio。
在“起始页”选项卡中,单击“新建项目”。随即将打开“新建项目”对话框。
在“已安装”窗格中,展开 JavaScript 并选择“Windows 应用商店应用”模板类型。JavaScript 可用的项目模板随即将显示在对话框的中心窗格中。
在中心窗格中,选择“拆分应用”项目模板。
在“名称”文本框中,输入 "WindowsBlogReader"。
单击“确定”以创建项目。这需要花费一点时间。
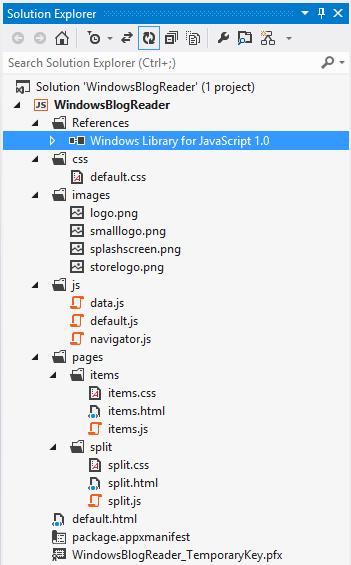
下面是在解决方案资源管理器中显示的项目的结构。页面文件夹包含两组文件,一组文件用于项页面,另一组文件用于拆分页面。这些组中的每个组为 PageControl、一组 HTML、CSS 以及 JavaScript 文件,这些文件定义应用可以导航至或用作自定义控件的页面。
新项目包含创建项 PageControl 和拆分 PageControl 所需的 HTML、CSS 和 JavaScript 文件。稍后我们将为项详细信息 PageControl 添加文件。
启动我们的新 Windows 应用商店应用
如果你非常想看到基本的分隔应用的外观,请按 F5 以生成、部署并启动应用。应用显示为全屏页面,标题为 "WindowsBlogReader",包含一列示例项目,显示为网格。每个项目表示一组数据。点击或单击列表中的项目以导航至拆分页。拆分页包含两个 核心内容区域。在左侧,你可以看到与所选组关联的项目列表。在右侧,可以看到所选项目的内容。可以通过点击或单击页面上的“后退”按钮来返回项目页。
运行应用时,应用会提取 items.html 中的(或其中链接的)HTML、CSS 和 JavaScript,并将其注入到作为应用起始页的 default.html 页面中。对于在应用容器中运行的代码默认可以执行的操作有一些限制。例如,你的应用不能访问 Internet 或摄像头,除非你声明应用需要此访问权限,且用户在安装应用时授予了此访问权限。如需了解详细信息,请打开 package.appxmanifest,并转至“许可范围”选项卡。
更改标题和背景色
我们来执行两个简单的任务来自定义应用。
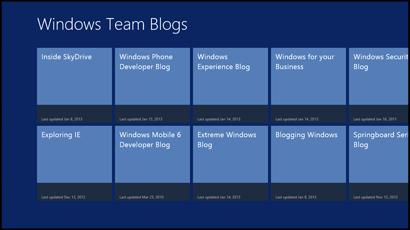
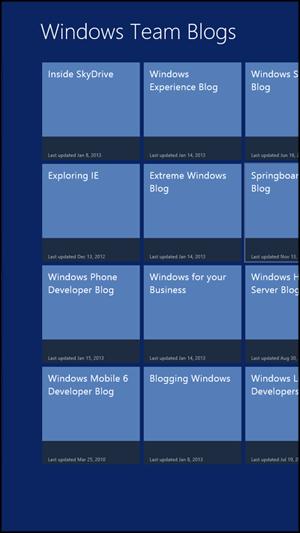
若要更改应用标题,请打开 items.html,然后将 itemspage 中的 h2 元素文本替换为 "Windows 团队博客",如此处所示。
<h2 class="titlearea win-type-ellipsis"> <span class="pagetitle">Windows Team Blogs</span> </h2>
若要设置应用的背景色,请打开 default.css,并将此 background-color 属性添加到 #contenthost 中。
#contenthost { height: 100%; width: 100%; background-color: #0A2562; }按 F5 来生成、部署并启动此应用。请注意,项目页的标题已更改,项目页和拆分页的背景色为蓝色。
Note项目中的 images 文件夹包含默认的文件,系统将这些文件用于应用启动时应用的磁贴和初始屏幕。在本教程中,我们不更改这些内容,但是你可以按照自己的喜好使用其他图像。只 需将要使用的图像文件添加到 images 文件夹中即可。打开 package.appxmanifest,将“应用程序 UI”选项卡上“徽标”、“小徽标”和“初始屏幕”的内容替换为你的图像文件的路径。
替换示例数据
项目模板包含运行应用时看到的示例数据。我们使用这些步骤为 Windows 团队博客将这些示例数据替换为来自 ATOM 源的数据:
删除示例数据
打开 data.js,其中包含应用的示例数据。
我们不需要 generateSampleData 函数,因此你可以将它删除。
// Returns an array of sample data that can be added to the application's // data list. function generateSampleData() { // Omitted code. }我们不需要此代码,所以你可以将其删除:
// TODO: Replace the data with your real data. // You can add data from asynchronous sources whenever it becomes available. generateSampleData().forEach(function (item) { list.push(item); });设置变量和函数
将此代码添加到 data.js(文件开头的 var list = new WinJS.Binding.List(); 声明前面)。此代码可设置我们所需的变量以及填充它们的函数。在执行本教程中的步骤时,你可以利用其中包含的注释来找到每一步放置代码的位置。
// Set up array variables var dataPromises = []; var blogs; // Create a data binding for our ListView var blogPosts = new WinJS.Binding.List(); // Process the blog feeds function getFeeds() { // Create an object for each feed in the blogs array // Get the content for each feed in the blogs array // Return when all asynchronous operations are complete } function acquireSyndication(url) { // Call xhr for the URL to get results asynchronously } function getBlogPosts() { // Walk the results to retrieve the blog posts } function getItemsFromXml(articleSyndication, bPosts, feed) { // Get the info for each blog post }定义博客列表
为了使这个示例简单一点,我们在 blogs 数组中包含一列硬编码的 URL。
将此代码添加到 getFeeds 函数。此代码将 JSON 数组添加到 blogs 数组。每个 JSON 数组都包含多个 JSON 对象,以存储来自源的内容。JSON 对象是名称/值对的未经排序的容器。例如,博客标题存储在一个 JSON 对象中,该对象名为 title,还有一个从 ATOM 源检索的值。使用 JSON 对象使我们将来自源的内容绑定到应用的控件变得很简单。
// Create an object for each feed in the blogs array blogs = [ { key: "blog1", url: 'http://blogs.windows.com/skydrive/b/skydrive/atom.aspx', title: 'tbd', updated: 'tbd', acquireSyndication: acquireSyndication, dataPromise: null }, { key: "blog2", url: 'http://blogs.windows.com/windows/b/windowsexperience/atom.aspx', title: 'tbd', updated: 'tbd', acquireSyndication: acquireSyndication, dataPromise: null }, { key: "blog3", url: 'http://blogs.windows.com/windows/b/extremewindows/atom.aspx', title: 'tbd', updated: 'tbd', acquireSyndication: acquireSyndication, dataPromise: null }, { key: "blog4", url: 'http://blogs.windows.com/windows/b/business/atom.aspx', title: 'tbd', updated: 'tbd', acquireSyndication: acquireSyndication, dataPromise: null }, { key: "blog5", url: 'http://blogs.windows.com/windows/b/bloggingwindows/atom.aspx', title: 'tbd', updated: 'tbd', acquireSyndication: acquireSyndication, dataPromise: null }, { key: "blog6", url: 'http://blogs.windows.com/windows/b/windowssecurity/atom.aspx', title: 'tbd', updated: 'tbd', acquireSyndication: acquireSyndication, dataPromise: null }, { key: "blog7", url: 'http://blogs.windows.com/windows/b/springboard/atom.aspx', title: 'tbd', updated: 'tbd', acquireSyndication: acquireSyndication, dataPromise: null }, { key: "blog8", url: 'http://blogs.windows.com/windows/b/windowshomeserver/atom.aspx', title: 'tbd', updated: 'tbd', acquireSyndication: acquireSyndication, dataPromise: null }, { key: "blog9", url: 'http://blogs.windows.com/windows_live/b/developer/atom.aspx', title: 'tbd', updated: 'tbd', acquireSyndication: acquireSyndication, dataPromise: null }, { key: "blog10", url: 'http://blogs.windows.com/ie/b/ie/atom.aspx', title: 'tbd', updated: 'tbd', acquireSyndication: acquireSyndication, dataPromise: null }, { key: "blog11", url: 'http://blogs.windows.com/windows_phone/b/wpdev/atom.aspx', title: 'tbd', updated: 'tbd', acquireSyndication: acquireSyndication, dataPromise: null }, { key: "blog12", url: 'http://blogs.windows.com/windows_phone/b/wmdev/atom.aspx', title: 'tbd', updated: 'tbd', acquireSyndication: acquireSyndication, dataPromise: null }];检索源数据
对于此部分中的步骤,我们使用适用于 JavaScript 的 Windows 库来管理联合源。
将此代码添加到 acquireSyndication 函数。我们调用 Windows.JS.xhr 函数以检索源内容。此调用为异步调用。幸运的是,程序已经为我们处理好了在进行异步调用时可能会遇到的许多复杂问题。xhr 返回时,我们将收到结果的承诺,此承诺将返回到调用方。
// Call xhr for the URL to get results asynchronously return WinJS.xhr( { url: url, headers: { "If-Modified-Since": "Mon, 27 Mar 1972 00:00:00 GMT" } });现在,我们将代码添加到 getFeeds 函数以调用 blogs 数组中每个博客的 acquireSyndication 函数,并添加返回到我们 promise 数组的 promise dataPromises。我们先调用 WinJS.Promise.join 函数,等待所有承诺均已满足后,再从 getFeeds 返回。这可以确保在显示 ListView 控件之前,我们拥有全部所需的信息。
// Get the content for each feed in the blogs array blogs.forEach(function (feed) { feed.dataPromise = feed.acquireSyndication(feed.url); dataPromises.push(feed.dataPromise); }); // Return when all asynchronous operations are complete return WinJS.Promise.join(dataPromises).then(function () { return blogs; });接下来,将此代码添加到 getBlogPosts 函数。对于 blogs 数组中的每个博客,我们针对所需的信息分析 XML 源数据。首先,我们使用 responseXML 属性以获得响应正文,然后使用 querySelector 方法以及所需的选择器来获得博客的标题和最后更新日期。我们使用 Windows.Globalization.DateTimeFormatting.DateTimeFormatter 来转换显示的上次更新日期。
如果 articlesResponse.responseXML 是 null,则说明加载博客时出错,因此我们会在博客发布位置显示一条错误消息。
// Walk the results to retrieve the blog posts getFeeds().then(function () { // Process each blog blogs.forEach(function (feed) { feed.dataPromise.then(function (articlesResponse) { var articleSyndication = articlesResponse.responseXML; if (articleSyndication) { // Get the blog title feed.title = articleSyndication.querySelector("feed > title").textContent; // Use the date of the latest post as the last updated date var published = articleSyndication.querySelector("feed > entry > published").textContent; // Convert the date for display var date = new Date(published); var dateFmt = new Windows.Globalization.DateTimeFormatting.DateTimeFormatter( "month.abbreviated day year.full"); var blogDate = dateFmt.format(date); feed.updated = "Last updated " + blogDate; // Get the blog posts getItemsFromXml(articleSyndication, blogPosts, feed); } else { // There was an error loading the blog. feed.title = "Error loading blog"; feed.updated = "Error"; blogPosts.push({ group: feed, key: "Error loading blog", title: feed.url, author: "Unknown", month: "?", day: "?", year: "?", content: "Unable to load the blog at " + feed.url }); } }); }); }); return blogPosts;最后,将此代码添加到 getItemsFromXml 函数。首先,我们使用 querySelectorAll 来获得博客文章集以及每篇博客文章的信息。然后,我们使用 querySelector 来获得每篇博客文章的信息。我们使用 Windows.Globalization.DateTimeFormatting.DateTimeFormatter 来转换显示的上次更新日期。最后,我们使用 push 方法将每篇博客文章的信息存储在 bPosts 数组中的相应条目中。
// Get the info for each blog post var posts = articleSyndication.querySelectorAll("entry"); // Process each blog post for (var postIndex = 0; postIndex < posts.length; postIndex++) { var post = posts[postIndex]; // Get the title, author, and date published var postTitle = post.querySelector("title").textContent; var postAuthor = post.querySelector("author > name").textContent; var postPublished = post.querySelector("published").textContent; // Convert the date for display var postDate = new Date(postPublished); var monthFmt = new Windows.Globalization.DateTimeFormatting.DateTimeFormatter( "month.abbreviated"); var dayFmt = new Windows.Globalization.DateTimeFormatting.DateTimeFormatter( "day"); var yearFmt = new Windows.Globalization.DateTimeFormatting.DateTimeFormatter( "year.full"); var blogPostMonth = monthFmt.format(postDate); var blogPostDay = dayFmt.format(postDate); var blogPostYear = yearFmt.format(postDate); // Process the content so it displays nicely var staticContent = toStaticHTML(post.querySelector("content").textContent); // Store the post info we care about in the array bPosts.push({ group: feed, key: feed.title, title: postTitle, author: postAuthor, month: blogPostMonth.toUpperCase(), day: blogPostDay, year: blogPostYear, content: staticContent }); }使数据可用
现在,我们已完成了将源数据存储到数组中的代码,我们需要按照 ListView 控件的预期来对源数据进行分组。我们还需要完成将源数据绑定到 ListView 控件这一任务。
getItemsFromGroup 函数调用 createFiltered 方法,并返回指定博客的博客文章。getItemsFromGroup 函数依赖变量 list。
var list = new WinJS.Binding.List();
将此定义替换为对 getBlogPosts 函数的调用,该函数返回 blogPosts 变量。这是一个 WinJS.Binding.List 对象。
var list = getBlogPosts();
注意,调用 createGrouped 方法将按指定的键(此情况中是指每篇文章所属的博客)对博客文章排序。
var groupedItems = list.createGrouped( function groupKeySelector(item) { return item.group.key; }; function groupDataSelector(item) { return item.group; }更新项 PageControl
项 PageControl 的主要功能是使用 WinJS.UI.ListView 实现的 ListView 控件。每个博客在此列表中都有一个项目。让我们修改模板中提供的 ListView 项,以包含博客标题和上次更新博客的日期。
打开 items.html。我们需要更新此 div 标记中的 HTML,从而在我们的 blogs 数组中反映内容。
<div class="itemtemplate" data-win-control="WinJS.Binding.Template"> <div class="item"> <img class="item-image" src="#" data-win-bind="src: backgroundImage; alt: title" /> <div class="item-overlay"> <h5 class="item-title" data-win-bind="textContent: title"></h5> <h7 class="item-subtitle win-type-ellipsis" data-win-bind="textContent: subtitle"></h7> </div> </div> </div>
进行以下更新:
因为不是每个博客都有图像,因此请删除 img 标记。
在 h7 标记中,将 textContent: subtitle 更新为 textContent: updated。这会在 ListView 项目的覆盖部分中放置上次更新日期。
移动位于类 item-overlay 的 div 之前的 h5 标记。这会在 ListView 项目的主要部分中放置博客标题。
结果如下所示。
<div class="itemtemplate" data-win-control="WinJS.Binding.Template"> <div class="item"> <h5 class="item-title" data-win-bind="textContent: title"></h5> <div class="item-overlay"> <h7 class="item-subtitle win-type-ellipsis" data-win-bind="textContent: updated"></h7> </div> </div> </div>
若要将列表项目的颜色设置为浅蓝色,请打开 items.css 并添加此处所示的 background-color 属性。此外,在 -ms-grid-rows 属性中将第二行的大小从 90px 更改为 60px,如此处所示,因为我们只显示覆盖中的上次更新日期。
.itemspage .itemslist .item { -ms-grid-columns: 1fr; -ms-grid-rows: 1fr 60px; display: -ms-grid; height: 250px; width: 250px; background-color: #557EB9; }若要为博客标题设置字体大小和边距,请将此代码添加到 items.css。
.itemspage .itemslist .win-item .item-title { -ms-grid-row: 1; overflow: hidden; width: 220px; font-size: 24px; margin-top: 12px; margin-left: 15px; }更新拆分 PageControl
打开 split.html。模板中拆分页的 HTML 使用与示例数据相同的名称。我们需要更新此 div 标记中的 HTML,从而在我们的 blogPosts 数组中反映名称。
<div class="itemtemplate" data-win-control="WinJS.Binding.Template"> <div class="item"> <img class="item-image" src="#" data-win-bind="src: backgroundImage; alt: title" /> <div class="item-info"> <h4 class="item-title win-type-ellipsis" data-win-bind="textContent: title"></h4> <h7 class="item-subtitle win-type-ellipsis" data-win-bind="textContent: subtitle"></h7> <h5 class="item-description" data-win-bind="textContent: description"></h5> </div> </div> </div>
进行以下更新:
将 img 标记替换为新的 <div class="item-date">...</div> 节点。
在 h7 标记中,将 textContent: subtitle 改为 textContent: author。
删除 h5 标记
结果如下所示。
<div class="itemtemplate" data-win-control="WinJS.Binding.Template"> <div class="item"> <div class="item-date"> <p class="item-month" data-win-bind="innerHTML: month"></p> <span class="item-day" data-win-bind="innerHTML: day"></span> | <span class="item-year" data-win-bind="innerHTML: year"></span> </div> <div class="item-info"> <h4 class="item-title win-type-ellipsis" data-win-bind="textContent: title"></h4> <h7 class="item-subtitle win-type-ellipsis" data-win-bind="textContent: author"></h7> </div> </div> </div>
注意,我们将管道字符用作分隔符,因为 HTML 不包含用于绘制竖线的标记。
因为我们没有包含在示例数据中的所有信息,所以从 articleSection 删除此代码可以简化页面。
<header class="header"> <div class="text"> <h3 class="article-title win-type-ellipsis" data-win-bind="textContent: title"></h3> <h5 class="article-subtitle" data-win-bind="textContent: subtitle"></h5> </div> <img class="article-image" src="#" data-win-bind="src: backgroundImage; alt: title" /> </header>
若要设置文本块的颜色以及文本的项目日期、字体和边距,请打开 split.css 并添加此代码。
.splitpage .itemlistsection .itemlist .item .item-date { -ms-grid-column: 1; background-color: #557EB9; } .splitpage .itemlistsection .itemlist .item .item-date .item-month{ margin-top: 12px; margin-left: 12px; margin-bottom: 4px; font-weight: bold; font-size: 28px; } .splitpage .itemlistsection .itemlist .item .item-date .item-day{ margin-left: 12px; font-size: 28px; }若要获取我们所需的页面布局,请将此 -ms-grid-row 属性从 "1" 改为 "2"。这导致页面标题填满整个第一行,并且将 ListView 和文章放在第二行。
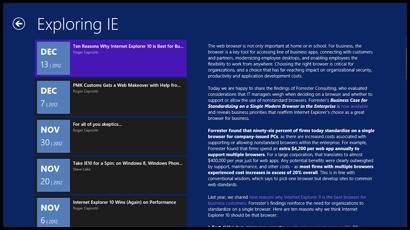
.splitpage .articlesection { -ms-grid-column: 2; -ms-grid-row: 2; -ms-grid-row-span: 2; margin-left: 50px; overflow-y: auto; padding-right: 120px; position: relative; z-index: 0; }现在,来试试再次运行应用吧。按 F5 可构建、部署并启动此应用。可以立即看到页面标题,但是应用检索源数据时有短暂的延迟。满足所有承诺后,可以看到在 ListView 中每个博客一个项。(此代码以满足承诺的顺序将这些项添加到 ListView 中。)点击或单击 ListView 中的项会将你带到拆分页,此拆分页包含所选博客的博客文章列表以及所选博客文章的内容。默认选中第一篇博客文章。
单击“后退”箭头可返回到项页。请注意,返回到屏幕的磁贴带有过渡动画。这是 Windows JavaScript 库中的一个功能,它支持控件以及其他用户界面元素按照 Windows 应用商店应用的 UX 指南移动。
添加项详细信息 PageControl
项详细信息 PageControl 将博客文章的标题显示为自己的标题,并有一块区域包含博客文章的内容。
添加项详细信息 PageControl 的步骤:
在解决方案资源管理器中,右键单击 pages 文件夹,选择“添加”>“新建文件夹”。
将该文件夹命名为 itemDetail。
在解决方案资源管理器中,右键单击 itemDetail 文件夹,选择“添加”>“新建项”。
选择“JavaScript”>“Windows 应用商店”>“页面控件”,然后使用文件名 itemDetail.html。
单击“添加”以在 pages/itemDetail 文件夹中创建 itemDetail.css、itemDetail.html 和 itemDetail.js 文件。
打开 itemDetail.html 并更新此处所示的主要部分。此代码定义页面布局。(这是网格应用模板中包含的 itemDetail.html 页面代码的简化版本。)
<!DOCTYPE html> <html> <head> <meta charset="utf-8" /> <title>itemDetail</title> <!-- WinJS references --> <link href="//Microsoft.WinJS.2.0.Preview/css/ui-dark.css" rel="stylesheet" /> <script src="//Microsoft.WinJS.2.0.Preview/js/base.js"></script> <script src="//Microsoft.WinJS.2.0.Preview/js/ui.js"></script> <link href="itemDetail.css" rel="stylesheet" /> <script src="itemDetail.js"></script> </head> <body> <div class="itemDetail fragment"> <header aria-label="Header content" role="banner"> <button class="win-backbutton" aria-label="Back" disabled type="button"></button> <h2 class="titlearea win-type-ellipsis"> <span class="pagetitle">Welcome to itemDetail</span> </h2> </header> <section aria-label="Main content" role="main"> <p>Content goes here.</p> </section> </div> </body> </html>
用以下代码替换 Main content 部分。
<section aria-label="Main content" role="main"> <article> <div class="item-content"></div> </article> </section>
打开 itemDetail.js 并更新此处所示的 ready 函数的代码。此代码显示用户导航至此页面时的标题和内容。(这是网格应用模板中包含的 itemDetail.js 页面代码的简化版本。)
ready: function (element, options) { // Display the appbar but hide the Full View button var appbar = document.getElementById('appbar'); var appbarCtrl = appbar.winControl; appbarCtrl.hideCommands(["view"], false); var item = options && options.item ? options.item : Data.items.getAt(0); element.querySelector(".titlearea .pagetitle").textContent = item.title; element.querySelector("article .item-content").innerHTML = item.content; },现在,我们为项详细信息页面定义样式。打开 itemDetail.css,使用此处显示的代码替换模板代码。
.itemDetail section[role=main] { -ms-grid-row: 2; display: block; height: 100%; overflow-x: auto; position: relative; width: 100%; z-index: 0; } .itemDetail section[role=main] article { /* Define a multi-column, horizontally scrolling article by default. */ column-fill: auto; column-gap: 80px; column-width: 480px; height: calc(100% - 50px); margin-left: 120px; width: 480px; } .itemDetail section[role=main] article .item-content p { margin-bottom: 20px; margin-right: 20px; vertical-align: baseline; } @media screen and (-ms-view-state: snapped) { .itemDetail section[role=main] article { /* Define a single column, vertically scrolling article in snapped mode. */ -ms-grid-columns: 300px 1fr; -ms-grid-row: 2; -ms-grid-rows: auto 60px; display: -ms-grid; height: 100%; margin-left: 20px; overflow-x: hidden; overflow-y: auto; width: 300px; } .itemDetail section[role=main] article .item-content { padding-bottom: 60px; } } @media screen and (-ms-view-state: fullscreen-portrait) { .itemDetail section[role=main] article { margin-left: 100px; } }添加带有显示项目详细信息页面命令的应用栏
我们添加一个应用栏,它包含可用于导航到项目详细信息页面的按钮,并使此按钮仅在我们位于拆分页时才显示。
打开 default.html 并取消注释此代码。
<!-- <div id="appbar" data-win-control="WinJS.UI.AppBar"> <button data-win-control="WinJS.UI.AppBarCommand" data-win-options="{id:'cmd', label:'Command', icon:'placeholder'}" type="button"></button> </div> -->修改占位符按钮的定义,以在应用栏靠右侧远端创建一个标签为“完全视图”的按钮,如此处所示。
<div id="appbar" data-win-control="WinJS.UI.AppBar"> <button data-win-control="WinJS.UI.AppBarCommand" data-win-options="{id:'view', label:'Full View', icon:'add'}" type="button"> </button> </div>在导航至项目页面和项目详细信息页面时,我们不希望“完全视图”按钮显示在应用栏上。将此代码添加到 items.js 中的 ready 函数内以隐藏按钮。(此代码已经出现在我们创建的 ready 中的 itemDetail.js 函数内。)
// Display the appbar but hide the Full View button var appbar = document.getElementById('appbar'); var appbarCtrl = appbar.winControl; appbarCtrl.hideCommands(["view"], false);我们导航至拆分页时,“完全视图”按钮将显示在应用栏上。将此代码添加到 split.js 中的 ready 函数内以显示按钮。
// Display the appbar and show the Full View button var appbar = document.getElementById('appbar'); var appbarCtrl = appbar.winControl; appbarCtrl.showCommands(["view"], false);从拆分 PageControl 导航到项详细信息 PageControl
用户单击应用栏上的“完全视图”按钮时,应用导航到项详细信息 PageControl 并显示所选博客文章的标题和内容。
打开 split.js。将此变量声明添加到 utils 变量声明的后面。
// The selected item var post;
在第二次调用 querySelector 之前将此语句添加到 ready 函数,以便可以先设置 this.items。此代码将 post 变量设置为用户导航至页面时第一篇博客文章的索引。
// Get the first item, which is the default selection post = this._items.getAt(0);
将此语句添加到 _selectionChanged 函数,该函数位于设置 this._itemSelectionIndex 的语句后面。此代码会将 post 变量设置为用户所选博客文章的索引。
// Get the item selected by the user post = this._items.getAt(this._itemSelectionIndex);
在 _selectionChanged 函数之外,将此事件处理程序函数添加到 post 变量声明的后面。用户单击“完全视图”按钮时即调用此处理程序。WinJS.Navigation.navigate 函数会加载项详细信息页面,并将所选的博客文章作为项传递。
function displayFullView() { // Display the selected item in the item detail page nav.navigate('/pages/itemDetail/itemDetail.html', { item: post }); }将此代码添加到 ready 函数中(在我们添加的代码的之后),以显示“完全视图”按钮。此代码将我们的 displayFullView 函数注册为“完全视图”按钮的 click 事件的事件处理程序。
// Register the event handler for the Full View button document.getElementById('view').addEventListener("click", displayFullView, false);按 F5 以运行应用。单击项目页上的项目会将你带到拆分页,此拆分页包含博客文章列表以及所选博客文章的内容。点击或单击博客文章,文章内容即显示在右侧栏中。若要显示应用栏,请右键单击,或者从底端或顶端轻扫(如果你的系统支持触摸)。
点击或单击“完全视图”按钮,我们的应用将在项目详细信息页面中显示所选博客文章的内容。
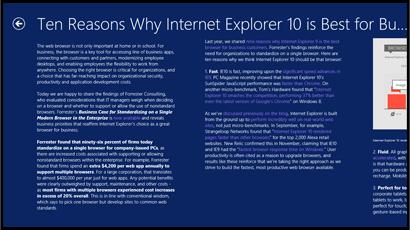
如果点击或单击“后退”按钮,则返回到拆分页。ListView 中的第一项被选中,它不一定是你在项目详细信息页面中选择显示的项。 你可以根据需要添加代码来保存并还原所选项。
我们的应用所使用的模板代码可以显示横向和纵向方向。旋转你的电脑,或在 Microsoft Visual Studio Express 2012 for Windows 8 的模拟器中运行你的应用,然后旋转显示器。项页外观如下所示。
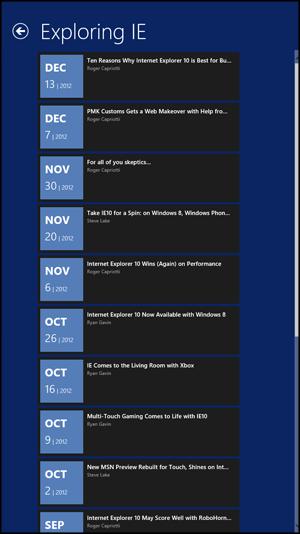
拆分页外观如下所示。请注意,在选择项目前,仅显示 ListView 控件。然后,博客文章以垂直方向显示。如果单击 Full View 按钮,则博客文章以水平方向显示。
感谢各位的阅读,以上就是“怎么使用JavaScript和HTML创建博客阅读器”的内容了,经过本文的学习后,相信大家对怎么使用JavaScript和HTML创建博客阅读器这一问题有了更深刻的体会,具体使用情况还需要大家实践验证。这里是亿速云,小编将为大家推送更多相关知识点的文章,欢迎关注!
免责声明:本站发布的内容(图片、视频和文字)以原创、转载和分享为主,文章观点不代表本网站立场,如果涉及侵权请联系站长邮箱:is@yisu.com进行举报,并提供相关证据,一经查实,将立刻删除涉嫌侵权内容。


