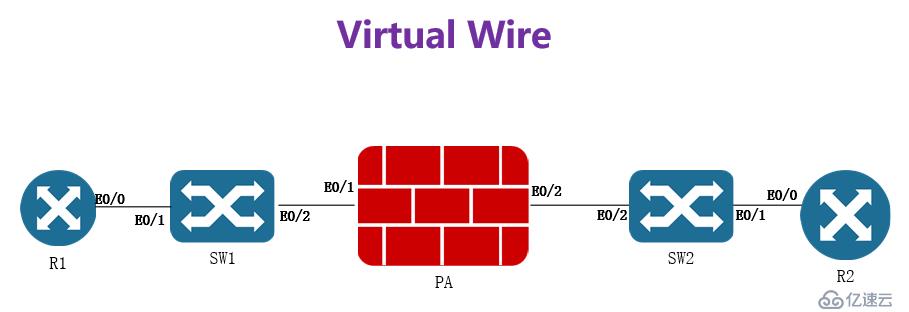
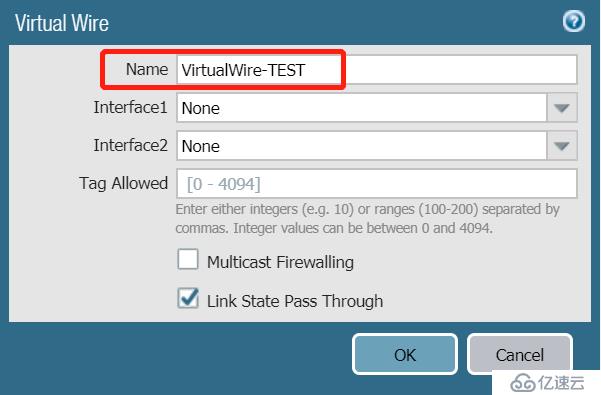
Virtual Wire模式可以在不改变原有网络拓扑结构的情况下,实现安全。需要两个接口为一组进行绑定。可以实现所有的安全防护功能,支持NAT。同时可以实现安全区域间VLAN Tag的控制。
| 序号 | 设备名称 | 接口 | 接口信息 | 备注 |
|---|---|---|---|---|
| 1 | R1 | E0/0 | 10.0.0.1/24 | |
| 2 | SW1 | E0/1 | VLAN2 | |
| E0/2 | Trunk | |||
| 3 | SW2 | E0/1 | VLAN2 | |
| E0/2 | Trunk | |||
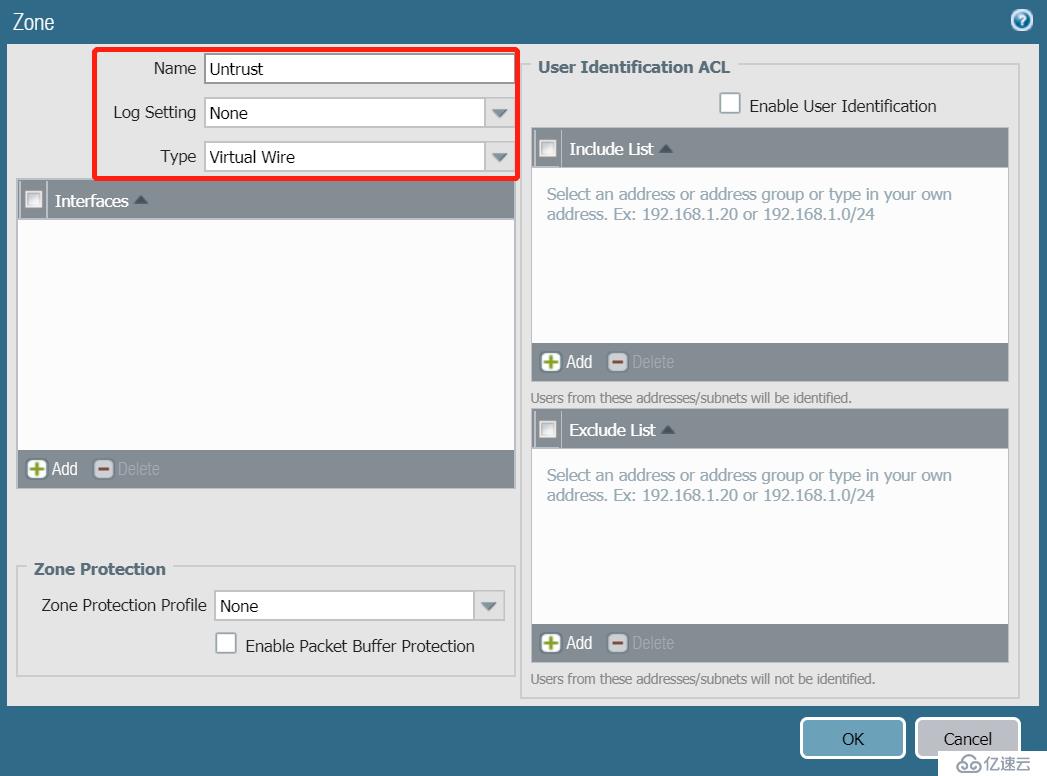
| 4 | PA | E1/1 | Virtual Wire | 区域:Untrust |
| E1/2 | Virtual Wire | 区域:Trust | ||
| 5 | R2 | E0/1 | 10.0.0.2/24 | 开启telnet |
R1:
------------
en
conf t
interface e0/0
ip address 10.0.0.1 255.255.255.0
no shutdown

R2:
------------
en
conf t
hostname R1
interface e0/0
ip address 10.0.0.2 255.255.255.0
no shutdown
exit
line vty 0 4
password cisco
SW1:
------------
en
conf t
hostname SW1

vlan 2
exit
interface e0/1
switch mode access
no shutdown
exit
interface Ethernet0/2
 switchport trunk encapsulation dot1q
 switchport mode trunk
 exit
================================================
SW2:
------------
en
conf t
hostname SW2

vlan 2
exit
interface e0/1
switch mode access
no shutdown
exit
interface Ethernet0/2
 switchport trunk encapsulation dot1q
 switchport mode trunk
 exit

创建Zone Trust和Untrust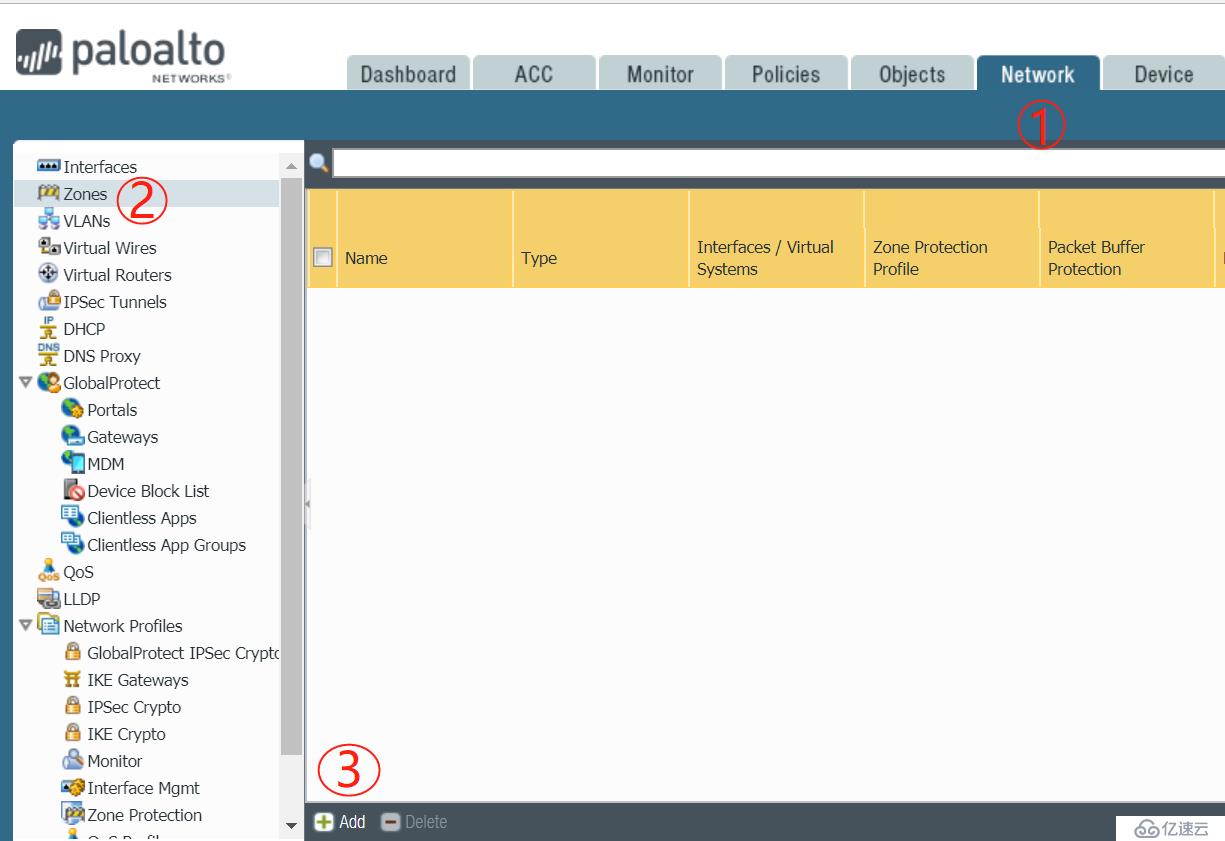


【Policy】-【Security】
说明:配置完成后,记得Commit
免责声明:本站发布的内容(图片、视频和文字)以原创、转载和分享为主,文章观点不代表本网站立场,如果涉及侵权请联系站长邮箱:is@yisu.com进行举报,并提供相关证据,一经查实,将立刻删除涉嫌侵权内容。


