这篇文章主要讲解了“Vue如何实现登陆跳转”,文中的讲解内容简单清晰,易于学习与理解,下面请大家跟着小编的思路慢慢深入,一起来研究和学习“Vue如何实现登陆跳转”吧!
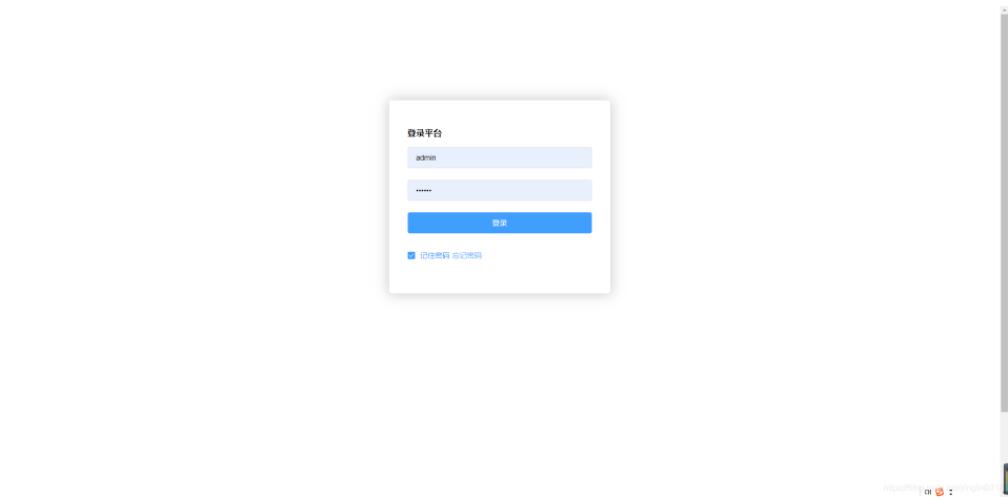
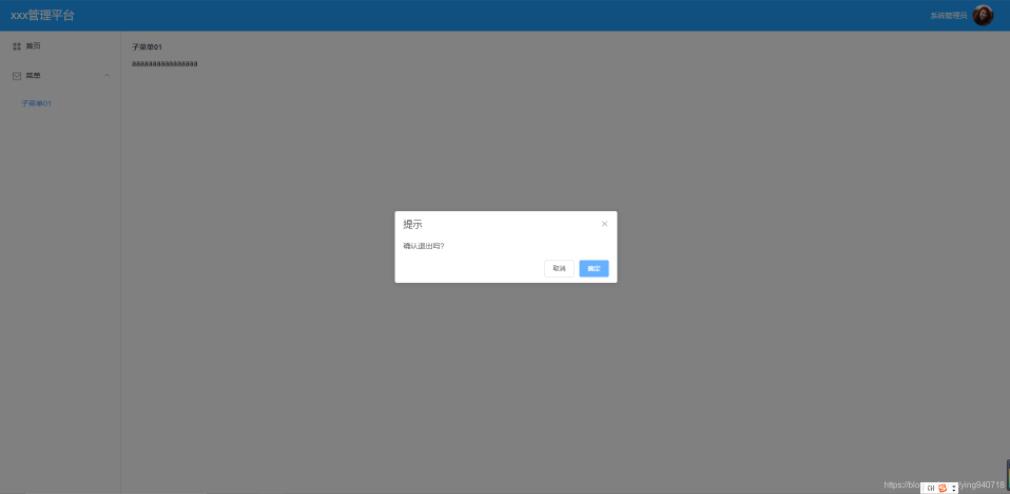
效果图
具体的实现方法,参照以下步骤~
1.创建login.vue,绘制login画面,添加跳转事件。
<template>
<div>
<el-form :model="ruleForm2" :rules="rules2"
status-icon
ref="ruleForm2"
label-position="left"
label-width="0px"
class="demo-ruleForm login-page">
<h3>登录平台</h3>
<el-form-item prop="username">
<el-input type="text"
v-model="ruleForm2.username"
auto-complete="off"
placeholder="用户名"></el-input>
</el-form-item>
<el-form-item prop="password">
<el-input type="password"
v-model="ruleForm2.password"
auto-complete="off"
placeholder="密码"></el-input>
</el-form-item>
<el-form-item style="width:100%;">
<el-button type="primary" style="width:100%;" @click="handleSubmit" :loading="logining">登录</el-button>
</el-form-item>
<el-form-item >
<el-checkbox
v-model="checked"
>记住密码</el-checkbox>
<el-button type="text" @click="forgetpassword">忘记密码</el-button>
</el-form-item>
</el-form>
</div>
</template>
<script>
import { requestLogin } from "../api/api";
export default {
data() {
return {
logining: false,
ruleForm2: {
},
rules2: {
account: [
{ required: true, message: "请输入账号", trigger: "blur" },
],
checkPass: [
{ required: true, message: "请输入密码", trigger: "blur" },
]
},
checked: true
};
},
methods: {
handleReset2() {
this.$refs.ruleForm2.resetFields();
},
handleSubmit(ev) {
this.$refs.ruleForm2.validate((valid) => {
if (valid) {
this.logining = true;
var loginParams = { username: this.ruleForm2.username, password: this.ruleForm2.password, identifycode: this.ruleForm2.identifycode };
requestLogin(loginParams).then(data => {
this.logining = false;
let { msg, code, user } = data;
if (code !== 200) {
this.$message({
message: msg,
type: "error"
});
} else {
if (user.type === "admin"){
sessionStorage.setItem("user", JSON.stringify(user));
this.$router.push({ path: "/homepage" });
} else if (user.type === "advert") {
sessionStorage.setItem("user", JSON.stringify(user));
this.$router.push({ path: "/table" });
}
}
});
} else {
console.log("error submit!!");
return false;
}
});
},
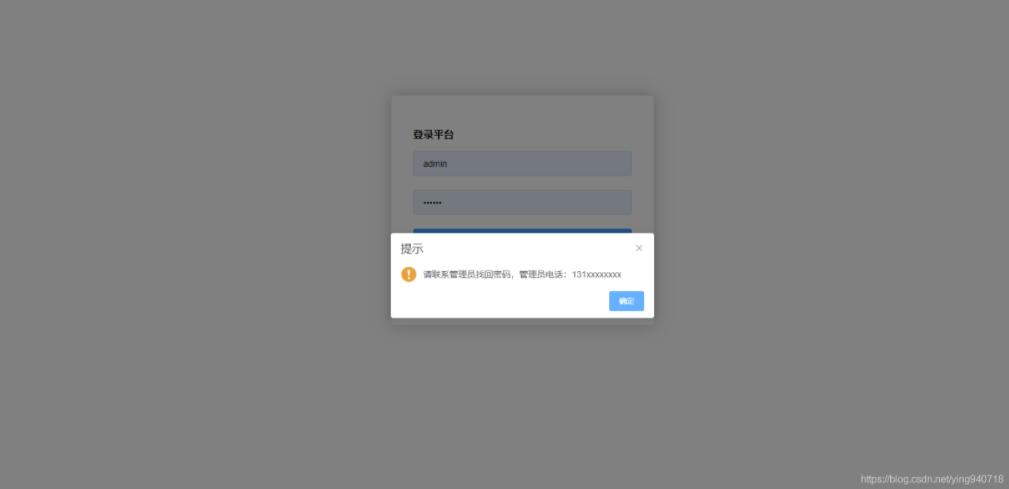
forgetpassword(){
this.$alert("请联系管理员找回密码,管理员电话:131xxxxxxxx", "提示", {
confirmButtonText: "确定",
type: "warning"
})
}
}
}
</script>
<style scoped>
label.el-checkbox.rememberme {
margin: 0px 0px 15px;
text-align: left;
}
label.el-button.forget {
margin: 0;
padding: 0;
border: 1px solid transparent;
outline: none;
}
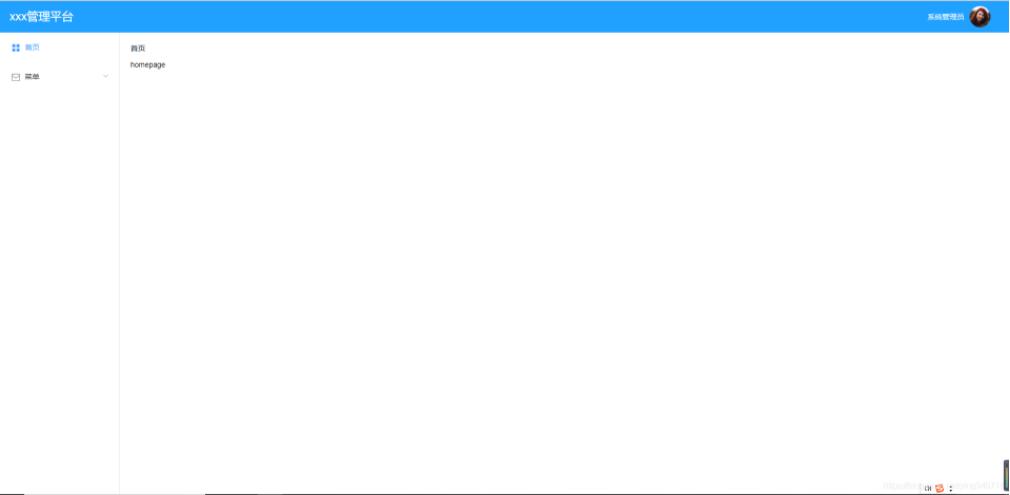
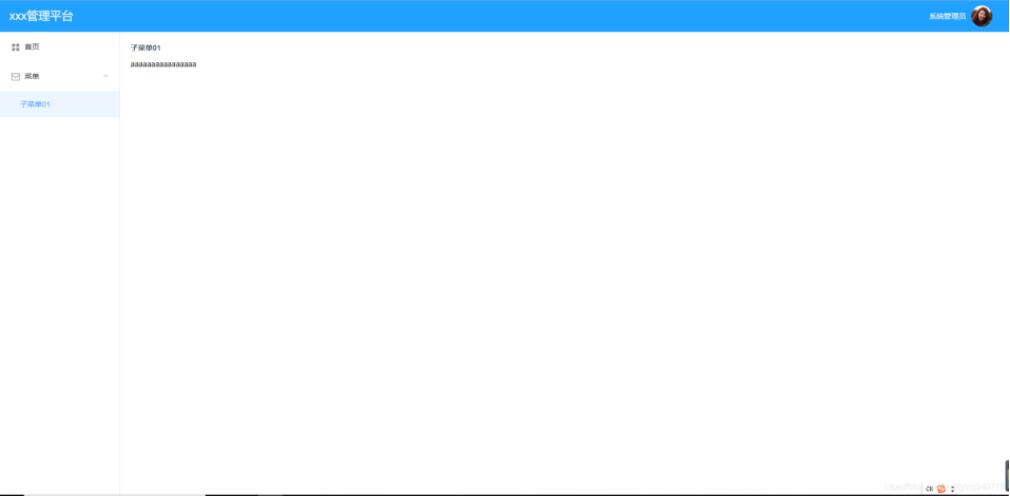
</style>2.创建Home.vue菜单栏页面
<template>
    <el-row>
        <el-col :span="24">
   <el-col :span="18" >
                {{sysName}}
   </el-col>
   <el-col :span="4">
    <el-dropdown trigger="hover">
     <span class="el-dropdown-link userinfo-inner"><img :src="this.sysUserAvatar" /> {{sysUserName}}</span>
     <el-dropdown-menu slot="dropdown">
      <el-dropdown-item>我的消息</el-dropdown-item>
      <el-dropdown-item>设置</el-dropdown-item>
      <el-dropdown-item @click.native="logout">退出登录</el-dropdown-item>
     </el-dropdown-menu>
    </el-dropdown>
   </el-col>
  </el-col>
        <el-col :span="24">
            <aside>
                <el-menu :default-active="$route.path" class="el-menu el-menu-vertical-demo" @select="handleselect"
                        unique-opened router >
                        <template v-for="(item,index) in $router.options.routes" v-if="!item.hidden">
      <el-submenu :index="index+""" v-if="!item.leaf">
       <template slot="title"><i :class="item.iconCls"></i>{{item.name}}</template>
       <el-menu-item v-for="child in item.children" :index="child.path" :key="child.path" v-if="!child.hidden">{{child.name}}</el-menu-item>
      </el-submenu>
      <el-menu-item v-if="item.leaf&&item.children.length>0" :index="item.children[0].path"><i :class="item.iconCls"></i>{{item.children[0].name}}</el-menu-item>
     </template>
                </el-menu>
            </aside>
   <section>
    <div class="grid-content bg-purple-light">
     <el-col :span="24">
      <strong>{{$route.name}}</strong>
     </el-col>
     <el-col :span="24">
      <transition name="fade" mode="out-in">
       <router-view></router-view>
      </transition>
     </el-col>
    </div>
   </section>
  </el-col>
    </el-row>
</template>

<script>
export default {
    data() {
   return {
    sysName:"xxx管理平台",
    sysUserName: "",
    sysUserAvatar: "",
    form: {
     name: "",
     region: "",
     date1: "",
     date2: "",
     delivery: false,
     type: [],
     resource: "",
     desc: ""
    }
   }
        },
    methods: {
   //退出登录
   logout: function () {
    var _this = this;
    this.$confirm("确认退出吗?", "提示", {
     //type: "warning"
    }).then(() => {
     sessionStorage.removeItem("user");
     _this.$router.push("/login");
    }).catch(() => {

    });
   }
  },
    mounted() {
   var user = sessionStorage.getItem("user");
   if (user) {
    user = JSON.parse(user);
    this.sysUserName = user.name || "";
    this.sysUserAvatar = user.avatar || "";
   }

  }
}
</script>

<style scoped>
@import "../style/vars.scss";

    .container {
  position: absolute;
  top: 0px;
  bottom: 0px;
  width: 100%;
    }
    .header {
   height: 60px;
            line-height: 60px;
   background: $color-primary;
   color:#fff;
   .userinfo {
    text-align: right;
    padding-right: 35px;
    float: right;
    .userinfo-inner {
     cursor: pointer;
     color:#fff;
     img {
      width: 40px;
      height: 40px;
      border-radius: 20px;
      margin: 10px 0px 10px 10px;
      float: right;
     }
    }
   }
   .logo {
    height:60px;
    font-size: 22px;
    padding-left:20px;
    img {
     width: 40px;
     float: left;
     margin: 10px 10px 10px 0px;
    }
    .txt {
                    color:#fff;
    }
   }
   .logo-width{
    width:230px;
   }
   .logo-collapse-width{
    width:60px
   }
   .title{
                font-size: 22px;
    padding-left:20px;
    line-height: 60px;
    color:#fff;
   }
        }
    .main {
   display: flex;
   position: absolute;
   top: 60px;
   bottom: 0px;
   overflow: hidden;
   aside {
    flex:0 0 230px;
    width: 230px;
    .el-menu{
                    height: 100%;
                    /* width: 34%; */
    }
   }
   .content-container {
    flex:1;
    /* overflow-y: scroll; */
    padding: 20px;
    .breadcrumb-container {
     .title {
      width: 200px;
      float: left;
      color: #475669;
     }
     .breadcrumb-inner {
      float: right;
     }
    }
    .content-wrapper {
     background-color: #fff;
     box-sizing: border-box;
    }
   }
  }
</style>
3.制作子页面
<template>
   <p> homepage</p>
</template>
4.路由配置
import Login from "./views/Login.vue"
import Home from "./views/Home.vue"
import Homepage from "./views/list/homepage.vue"
import Table from "./views/list/Table.vue"

let routes = [
    {
        path: "/login",
        component: Login,
        name: "",
        hidden: true
    },
    {
        path: "/",
        component: Home,
        name: "",
        leaf: true,//只有一个节点
        iconCls: "el-icon-menu", //图标样式class
        children: [
            { path: "/homepage", component: Homepage, name: "首页" },
        ]
    },
    {
        path: "/",
        component: Home,
        name: "菜单",
        // leaf: true,//只有一个节点
        iconCls: "el-icon-message", //图标样式class
        children: [
            { path: "/table", component: Table, name: "子菜单01" }
        ]
    }
];

export default routes;
5.main.js实现
// The Vue build version to load with the `import` command
// (runtime-only or standalone) has been set in webpack.base.conf with an alias.
import Vue from "vue"
import App from "./App"
import VueRouter from "vue-router"
import routes from "./routes"
import Vuex from "vuex"
import store from "./vuex/store"
import ElementUI from "element-ui"
import "element-ui/lib/theme-chalk/index.css"
import Mock from "./mock"
Mock.bootstrap();
import "./style/login.css"

/* Vue.use(VueAxios, axios) */
Vue.use(ElementUI)
Vue.use(VueRouter)
Vue.use(Vuex)
Vue.config.productionTip = false

const router = new VueRouter({
  routes
})

router.beforeEach((to, from, next) => {
  //NProgress.start();
  if (to.path == "/login") {
    sessionStorage.removeItem("user");
  }
  let user = JSON.parse(sessionStorage.getItem("user"));
  if (!user && to.path != "/login") {
    next({ path: "/login" })
  } else {
    next()
  }
})

new Vue({
  router,
  store,
  render: h => h(App)
}).$mount("#app")
感谢各位的阅读,以上就是“Vue如何实现登陆跳转”的内容了,经过本文的学习后,相信大家对Vue如何实现登陆跳转这一问题有了更深刻的体会,具体使用情况还需要大家实践验证。这里是亿速云,小编将为大家推送更多相关知识点的文章,欢迎关注!
免责声明:本站发布的内容(图片、视频和文字)以原创、转载和分享为主,文章观点不代表本网站立场,如果涉及侵权请联系站长邮箱:is@yisu.com进行举报,并提供相关证据,一经查实,将立刻删除涉嫌侵权内容。


