由于工作需要,经常要安装系统并有多国语言的要求,现在以英文和中文(en-us/zh-cn)为例,手工制作一个包括多语言的windows 安装光盘(U盘):
1.下载最新的Windows ADK:
https://docs.microsoft.com/zh-cn/windows-hardware/get-started/adk-install
最新的为 windows 10 1809
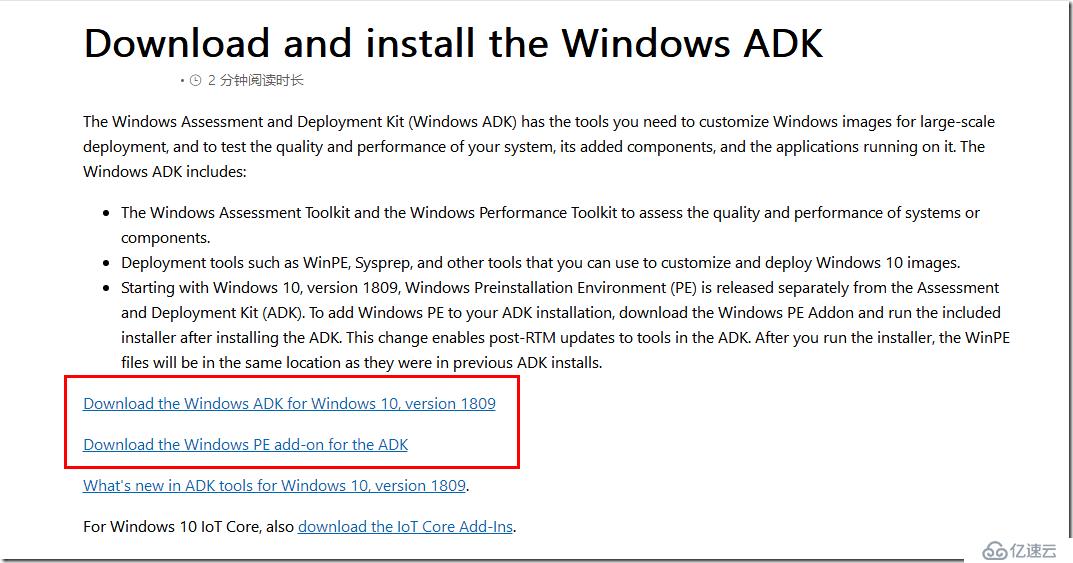
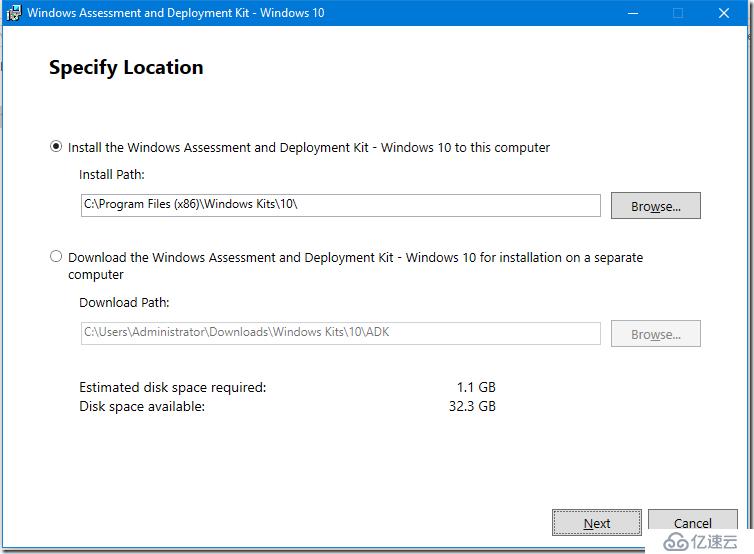
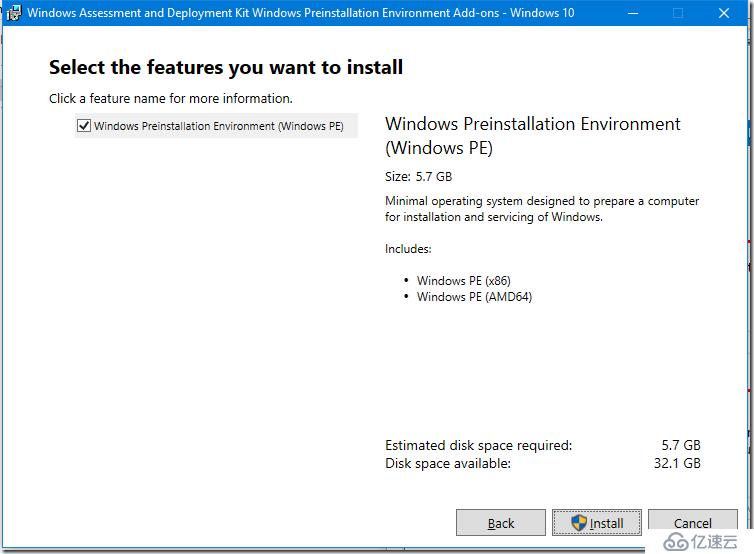
下载安装adk:
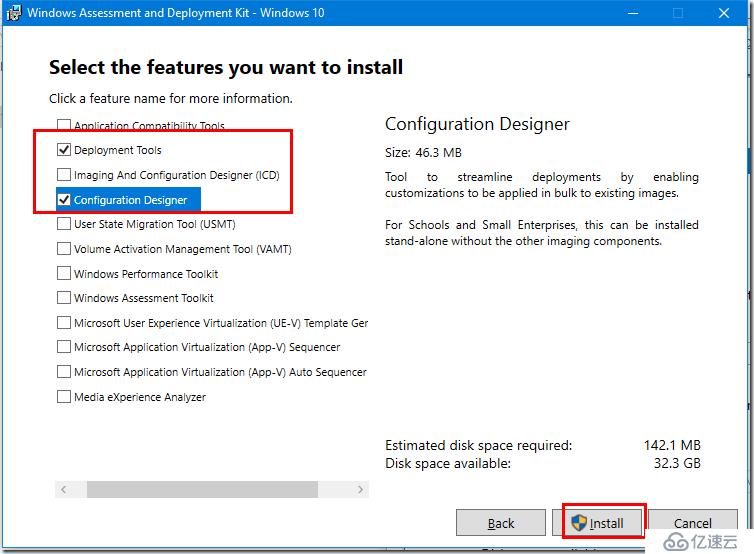
选择以下两项就够用:
接下来安装ADKWinPEAddons:
运行:adkwinpesetup.exe
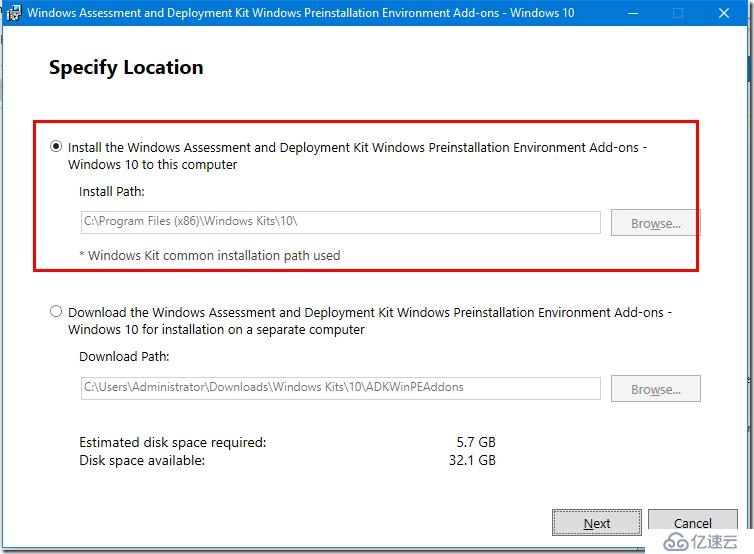
直到安装完成:
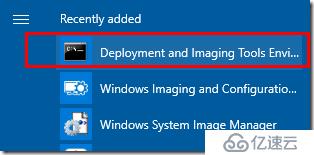
以管理员身份运行:

接下来准备一张英文版的Windows安装光盘(以最新windows 10 :Win10_1809Oct_English_x32.iso为例)
下载最新的系统盘可以到:https://tb.rg-adguard.net/public.php
如果以后要安装32位的windows,就必须以32位的为模板,因为32位的boot.wim既能安装32位又能安装x64系统.
准备必要的目录:
Mkdir C:\m\mount\windows
Mkdir C:\m\mount\winre
Mkdir C:\m\mount\boot
Mkdir C:\m\LanguagePack\en-us
Mkdir C:\m\LanguagePack\zh-cn
Mkdir C:\m\my_Distribution
Mkdir C:\m\wim\win10pro
Mkdir C:\m\wim\win10ent
Mkdir C:\m\wim\win7pro
Mkdir C:\m\wim\win7ent
Mkdir C:\m\wim\win7ult
Mkdir C:\m\hotfix\win10_1809
Mkdir C:\m\hotfix\win7sp2
将 en-US Windows DVD 的所有内容复制到 C:\m\my_distribution
xcopy F:\ C:\m\my_distribution /s /e
Dism /Get-ImageInfo /ImageFile:C:\m\my_distribution\sources\install.wim
导出需要的win10 pro:
dism /Export-Image /SourceImageFile:C:\m\my_distribution\sources\install.wim /SourceIndex:6 /DestinationImageFile:C:\m\wim\win10pro\install.wim
Dism /Get-ImageInfo /ImageFile:C:\m\wim\win10pro\install.wim
xcopy C:\m\wim\win10pro\install.wim C:\m\my_distribution\sources\install.wim
Dism /Get-ImageInfo /ImageFile:C:\m\my_distribution\sources\install.wim
Dism /Mount-Image /ImageFile:C:\m\my_distribution\sources\install.wim /Index:1 /MountDir:C:\m\mount\windows
Dism /Mount-Image /ImageFile:C:\m\mount\windows\Windows\System32\recovery\winre.wim /Index:1 /MountDir:C:\m\mount\winre
Dism /Add-Package /image:C:\m\mount\windows /PackagePath:C:\m\LanguagePack\zh-cn\Microsoft-Windows-Client-Language-Pack_x86_zh-cn.cab
Dism /Add-Package /image:C:\m\mount\windows /PackagePath:C:\m\hotfix\win10_1809\windows10.0-kb4467708-x86.msu
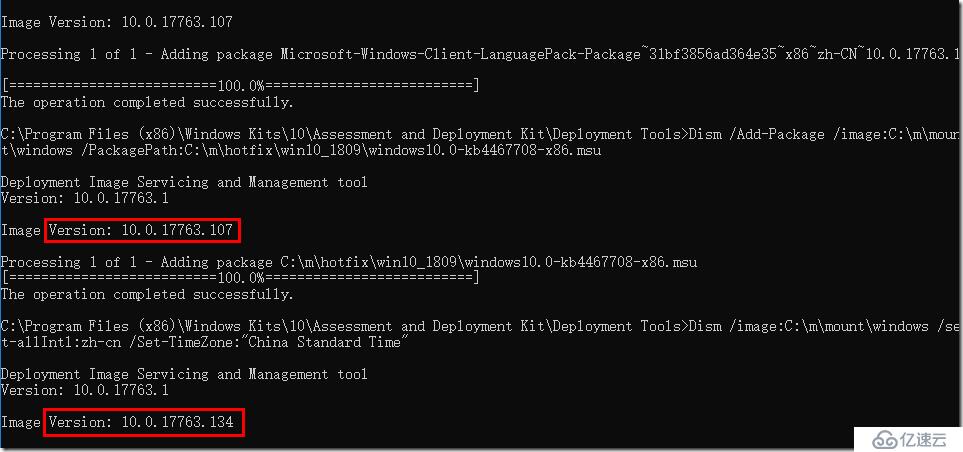
Dism /image:C:\m\mount\windows /set-allIntl:zh-cn /Set-TimeZone:"China Standard Time"

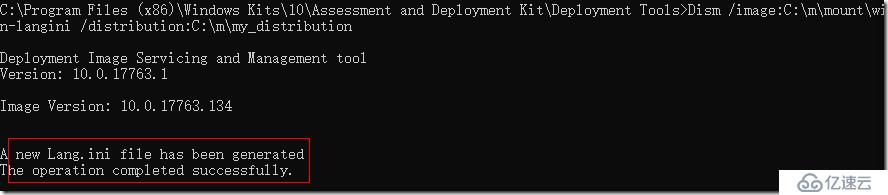
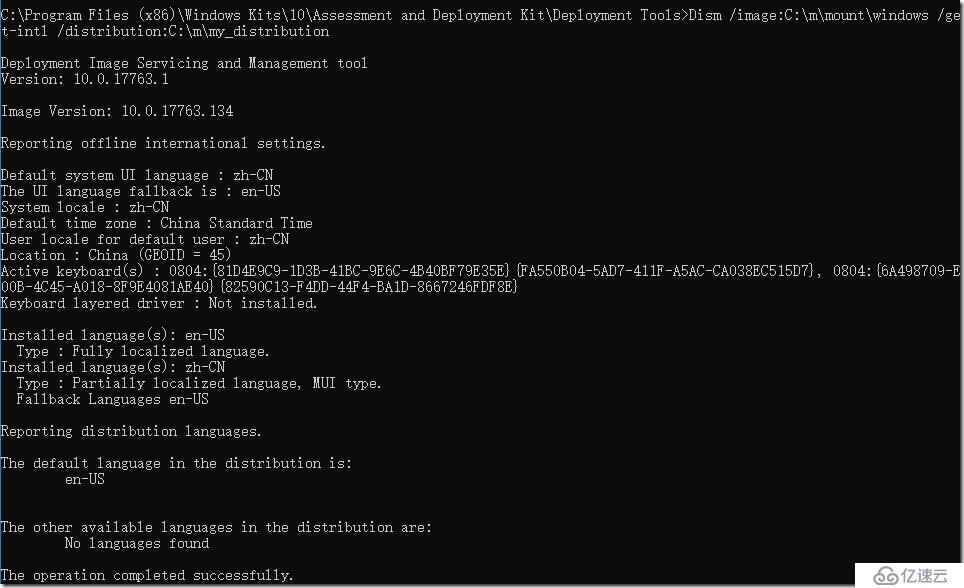
Dism /image:C:\m\mount\windows /gen-langini /distribution:C:\m\my_distribution
Dism /image:C:\m\mount\windows /get-intl /distribution:C:\m\my_distribution
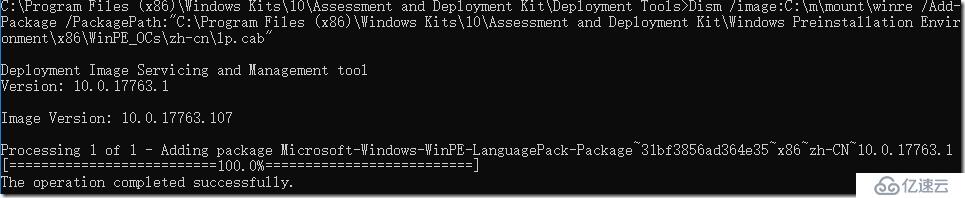
Dism /image:C:\m\mount\winre /Add-Package /PackagePath:"C:\Program Files (x86)\Windows Kits\10\Assessment and Deployment Kit\Windows Preinstallation Environment\x86\WinPE_OCs\zh-cn\lp.cab"
X64:
Dism /image:C:\m\mount\winre /Add-Package /PackagePath:"C:\Program Files (x86)\Windows Kits\10\Assessment and Deployment Kit\Windows Preinstallation Environment\amd64\WinPE_OCs\zh-cn\lp.cab"
Dism /image:C:\m\mount\winre /set-allIntl:zh-cn /Set-TimeZone:"China Standard Time"

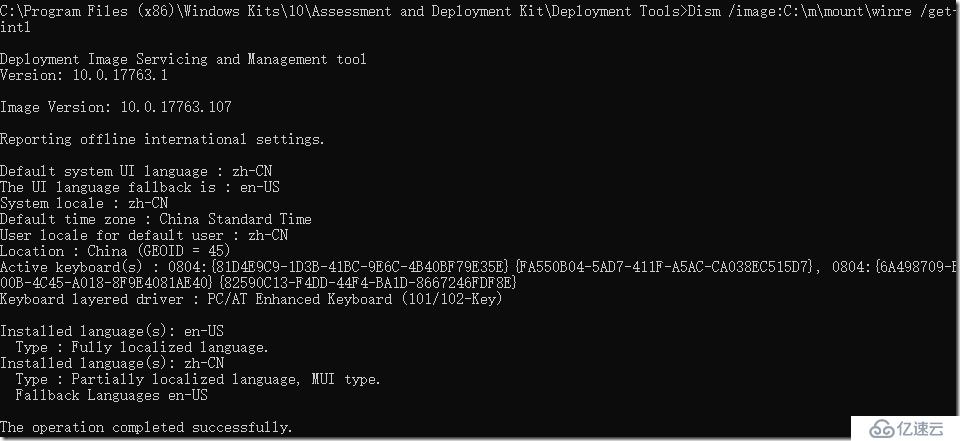
Dism /image:C:\m\mount\winre /get-intl
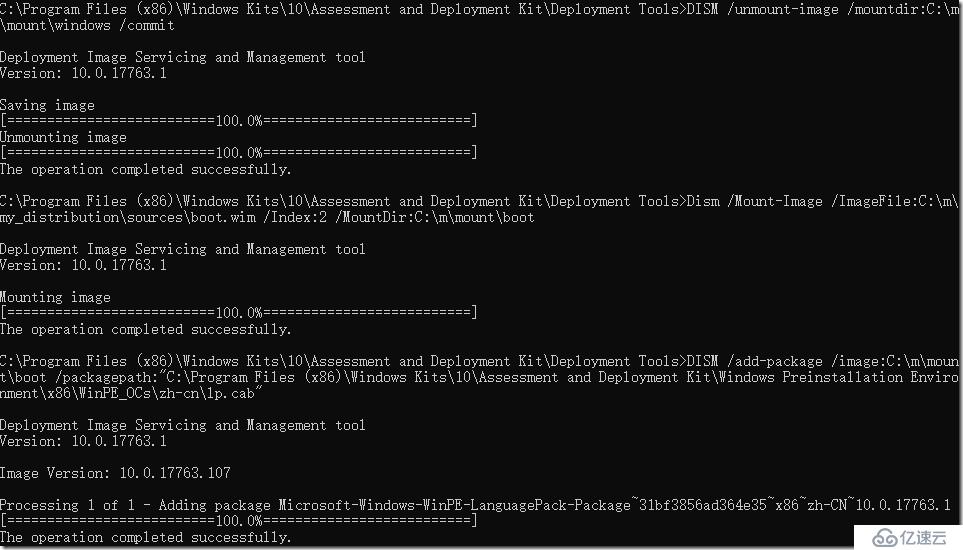
DISM /unmount-image /mountdir:C:\m\mount\winre /commit
DISM /unmount-image /mountdir:C:\m\mount\windows /commit
2.将语言包添加到 Windows 安装程序:
1)使用 DISM 装载 Boot.wim 文件的索引 2 :
Dism /Mount-Image /ImageFile:C:\m\my_distribution\sources\boot.wim /Index:2 /MountDir:C:\m\mount\boot
2)针对每一种要支持的语言,将 Windows PE 语言包和 Windows 安装程序可选组件添加到已装载的映像中:
DISM /add-package /image:C:\m\mount\boot /packagepath:"C:\Program Files (x86)\Windows Kits\10\Assessment and Deployment Kit\Windows Preinstallation Environment\x86\WinPE_OCs\zh-cn\lp.cab"
x64:
DISM /add-package /image:C:\m\mount\boot /packagepath:"C:\Program Files (x86)\Windows Kits\10\Assessment and Deployment Kit\Windows Preinstallation Environment\amd64\WinPE_OCs\zh-cn\lp.cab"
3)添加 Windows PE 安装程序可选组件:
DISM /add-package /image:C:\m\mount\boot /packagepath:"C:\Program Files (x86)\Windows Kits\10\Assessment and Deployment Kit\Windows Preinstallation Environment\x86\WinPE_OCs\WinPE-FontSupport-ZH-CN.cab"
DISM /add-package /image:C:\m\mount\boot /PackagePath:"C:\Program Files (x86)\Windows Kits\10\Assessment and Deployment Kit\Windows Preinstallation Environment\x86\WinPE_OCs\WinPE-Setup.cab"
DISM /add-package /image:C:\m\mount\boot /packagepath:"C:\Program Files (x86)\Windows Kits\10\Assessment and Deployment Kit\Windows Preinstallation Environment\x86\WinPE_OCs\zh-cn\WinPE-Setup_zh-cn.cab"
DISM /add-package /image:C:\m\mount\boot /PackagePath:"C:\Program Files (x86)\Windows Kits\10\Assessment and Deployment Kit\Windows Preinstallation Environment\x86\WinPE_OCs\WinPE-Setup-client.cab"
DISM /add-package /image:C:\m\mount\boot /packagepath:"C:\Program Files (x86)\Windows Kits\10\Assessment and Deployment Kit\Windows Preinstallation Environment\x86\WinPE_OCs\zh-cn\WinPE-Setup-Client_zh-cn.cab"
x64:
DISM /add-package /image:C:\m\mount\boot /packagepath:"C:\Program Files (x86)\Windows Kits\10\Assessment and Deployment Kit\Windows Preinstallation Environment\amd64\WinPE_OCs\WinPE-FontSupport-ZH-CN.cab"
DISM /add-package /image:C:\m\mount\boot /PackagePath:"C:\Program Files (x86)\Windows Kits\10\Assessment and Deployment Kit\Windows Preinstallation Environment\amd64\WinPE_OCs\WinPE-Setup.cab"
DISM /add-package /image:C:\m\mount\boot /packagepath:"C:\Program Files (x86)\Windows Kits\10\Assessment and Deployment Kit\Windows Preinstallation Environment\amd64\WinPE_OCs\zh-cn\WinPE-Setup_zh-cn.cab"
DISM /add-package /image:C:\m\mount\boot /PackagePath:"C:\m\Program Files (x86)\Windows Kits\10\Assessment and Deployment Kit\Windows Preinstallation Environment\amd64\WinPE_OCs\WinPE-Setup-client.cab"
DISM /add-package /image:C:\m\mount\boot /packagepath:"C:\m\Program Files (x86)\Windows Kits\10\Assessment and Deployment Kit\Windows Preinstallation Environment\amd64\WinPE_OCs\zh-cn\WinPE-Setup-Client_zh-cn.cab"
(注意:这些 Windows 安装程序语言包仅适用于客户端版本的 Windows。对于 Windows Server,你必须使用 winpe-setup-server.cab 文件。)
4)将zh-cn的Windows安装盘中的zh-cn目录copy 到C:\m\my_distribution\sources:
Mkdir C:\m\my_distribution\sources\zh-cn
xcopy h:\sources\zh-cn C:\m\my_distribution\sources\zh-cn /cherkyi
Dism /image:C:\m\mount\boot /set-allIntl:zh-cn /Set-TimeZone:"China Standard Time"
Dism /image:C:\m\mount\boot /Get-Intl
Dism /Unmount-image /MountDir:C:\m\mount\boot /Commit
3.在Windows安装盘中集成winPE:
将windows distibution 中的bcd复制到c:\m\bcd下:
xcopy C:\m\my_Distribution\boot\bcd c:\m\bcd\
将winpe iso 文件中boot.sdi 复制到c:\m\bcd下并改名为peboot.sdi
bcdedit /store c:\m\bcd\bcd /v
bcdedit /store c:\m\bcd\bcd /timeout 60
bcdedit /store c:\m\bcd\bcd /create {ramdiskoptions}
bcdedit /store c:\m\bcd\bcd /set {ramdiskoptions} ramdisksdidevice boot
bcdedit /store c:\m\bcd\bcd /set {ramdiskoptions} ramdisksdipath \boot\peboot.sdi
bcdedit /store c:\m\bcd\bcd /create {e18d7416-d8dc-11e8-88da-701ce7e35f75} /d "WinPE x64" /application osloader
bcdedit /store c:\m\bcd\bcd /displayorder {e18d7416-d8dc-11e8-88da-701ce7e35f75} /addfirst
bcdedit /store c:\m\bcd\bcd /default {e18d7416-d8dc-11e8-88da-701ce7e35f75}
bcdedit /store c:\m\bcd\bcd /set {e18d7416-d8dc-11e8-88da-701ce7e35f75} device ramdisk=[boot]\sources\pe64.wim,{ae5534e0-a924-466c-b836-758539a3ee3a}
bcdedit /store c:\m\bcd\bcd /set {e18d7416-d8dc-11e8-88da-701ce7e35f75} path \windows\system32\boot\winload.exe
bcdedit /store c:\m\bcd\bcd /set {e18d7416-d8dc-11e8-88da-701ce7e35f75} description "WinPE x64"
bcdedit /store c:\m\bcd\bcd /set {e18d7416-d8dc-11e8-88da-701ce7e35f75} locale zh-CN
bcdedit /store c:\m\bcd\bcd /set {e18d7416-d8dc-11e8-88da-701ce7e35f75} osdevice ramdisk=[boot]\sources\pe64.wim,{ae5534e0-a924-466c-b836-758539a3ee3a}
bcdedit /store c:\m\bcd\bcd /set {e18d7416-d8dc-11e8-88da-701ce7e35f75} systemroot \windows
bcdedit /store c:\m\bcd\bcd /set {e18d7416-d8dc-11e8-88da-701ce7e35f75} detecthal Yes
bcdedit /store c:\m\bcd\bcd /set {e18d7416-d8dc-11e8-88da-701ce7e35f75} winpe Yes
bcdedit /store c:\m\bcd\bcd /create {d2cd2978-05fc-11e5-a17e-18a905d696d5} /d "WinPE x86" /application osloader
bcdedit /store c:\m\bcd\bcd /displayorder {d2cd2978-05fc-11e5-a17e-18a905d696d5} /addfirst
bcdedit /store c:\m\bcd\bcd /default {d2cd2978-05fc-11e5-a17e-18a905d696d5}
bcdedit /store c:\m\bcd\bcd /set {d2cd2978-05fc-11e5-a17e-18a905d696d5} device ramdisk=[boot]\sources\pe32.wim,{ae5534e0-a924-466c-b836-758539a3ee3a}
bcdedit /store c:\m\bcd\bcd /set {d2cd2978-05fc-11e5-a17e-18a905d696d5} path \windows\system32\boot\winload.exe
bcdedit /store c:\m\bcd\bcd /set {d2cd2978-05fc-11e5-a17e-18a905d696d5} description "WinPE x86"
bcdedit /store c:\m\bcd\bcd /set {d2cd2978-05fc-11e5-a17e-18a905d696d5} osdevice ramdisk=[boot]\sources\pe32.wim,{ae5534e0-a924-466c-b836-758539a3ee3a}
bcdedit /store c:\m\bcd\bcd /set {d2cd2978-05fc-11e5-a17e-18a905d696d5} locale zh-CN
bcdedit /store c:\m\bcd\bcd /set {d2cd2978-05fc-11e5-a17e-18a905d696d5} systemroot \windows
bcdedit /store c:\m\bcd\bcd /set {d2cd2978-05fc-11e5-a17e-18a905d696d5} detecthal Yes
bcdedit /store c:\m\bcd\bcd /set {d2cd2978-05fc-11e5-a17e-18a905d696d5} winpe Yes
bcdedit /store c:\m\bcd\bcd /v
xcopy C:\m\my_Distribution\efi\microsoft\boot\bcd c:\m\bcd\efi\bcd
bcdedit /store c:\m\bcd\efi\bcd /v
bcdedit /store c:\m\bcd\efi\bcd /timeout 60
bcdedit /store c:\m\bcd\efi\bcd /create {ramdiskoptions}
bcdedit /store c:\m\bcd\efi\bcd /set {ramdiskoptions} ramdisksdidevice boot
bcdedit /store c:\m\bcd\efi\bcd /set {ramdiskoptions} ramdisksdipath \boot\peboot.sdi
bcdedit /store c:\m\bcd\efi\bcd /create {e18d7416-d8dc-11e8-88da-701ce7e35f75} /d "WinPE x64" /application osloader
bcdedit /store c:\m\bcd\efi\bcd /displayorder {e18d7416-d8dc-11e8-88da-701ce7e35f75} /addfirst
bcdedit /store c:\m\bcd\efi\bcd /default {e18d7416-d8dc-11e8-88da-701ce7e35f75}
bcdedit /store c:\m\bcd\efi\bcd /set {e18d7416-d8dc-11e8-88da-701ce7e35f75} device ramdisk=[boot]\sources\pe64.wim,{ae5534e0-a924-466c-b836-758539a3ee3a}
bcdedit /store c:\m\bcd\efi\bcd /set {e18d7416-d8dc-11e8-88da-701ce7e35f75} path \windows\system32\boot\winload.efi
bcdedit /store c:\m\bcd\efi\bcd /set {e18d7416-d8dc-11e8-88da-701ce7e35f75} description "WinPE x64"
bcdedit /store c:\m\bcd\efi\bcd /set {e18d7416-d8dc-11e8-88da-701ce7e35f75} locale zh-CN
bcdedit /store c:\m\bcd\efi\bcd /set {e18d7416-d8dc-11e8-88da-701ce7e35f75} osdevice ramdisk=[boot]\sources\pe64.wim,{ae5534e0-a924-466c-b836-758539a3ee3a}
bcdedit /store c:\m\bcd\efi\bcd /set {e18d7416-d8dc-11e8-88da-701ce7e35f75} systemroot \windows
bcdedit /store c:\m\bcd\efi\bcd /set {e18d7416-d8dc-11e8-88da-701ce7e35f75} detecthal Yes
bcdedit /store c:\m\bcd\efi\bcd /set {e18d7416-d8dc-11e8-88da-701ce7e35f75} winpe Yes
bcdedit /store c:\m\bcd\efi\bcd /create {d2cd2978-05fc-11e5-a17e-18a905d696d5} /d "WinPE x86" /application osloader
bcdedit /store c:\m\bcd\efi\bcd /displayorder {d2cd2978-05fc-11e5-a17e-18a905d696d5} /addfirst
bcdedit /store c:\m\bcd\efi\bcd /default {d2cd2978-05fc-11e5-a17e-18a905d696d5}
bcdedit /store c:\m\bcd\efi\bcd /set {d2cd2978-05fc-11e5-a17e-18a905d696d5} device ramdisk=[boot]\sources\pe32.wim,{ae5534e0-a924-466c-b836-758539a3ee3a}
bcdedit /store c:\m\bcd\efi\bcd /set {d2cd2978-05fc-11e5-a17e-18a905d696d5} path \windows\system32\boot\winload.efi
bcdedit /store c:\m\bcd\efi\bcd /set {d2cd2978-05fc-11e5-a17e-18a905d696d5} description "WinPE x86"
bcdedit /store c:\m\bcd\efi\bcd /set {d2cd2978-05fc-11e5-a17e-18a905d696d5} osdevice ramdisk=[boot]\sources\pe32.wim,{ae5534e0-a924-466c-b836-758539a3ee3a}
bcdedit /store c:\m\bcd\efi\bcd /set {d2cd2978-05fc-11e5-a17e-18a905d696d5} locale zh-CN
bcdedit /store c:\m\bcd\efi\bcd /set {d2cd2978-05fc-11e5-a17e-18a905d696d5} systemroot \windows
bcdedit /store c:\m\bcd\efi\bcd /set {d2cd2978-05fc-11e5-a17e-18a905d696d5} detecthal Yes
bcdedit /store c:\m\bcd\efi\bcd /set {d2cd2978-05fc-11e5-a17e-18a905d696d5} winpe Yes
bcdedit /store c:\m\bcd\efi\bcd /v
xcopy c:\m\bcd\bcd C:\m\my_Distribution\boot\bcd /y
xcopy c:\m\bcd\peboot.sdi C:\m\my_Distribution\boot\ /y
xcopy c:\m\bcd\efi\bcd c:\m\my_Distribution\efi\microsoft\boot\ /y
dism /Export-Image /SourceImageFile:E:\wim\win7pro\install.wim /SourceIndex:1 /DestinationImageFile:C:\m\my_Distribution\sources\install.wim
dism /Export-Image /SourceImageFile:E:\wim\win10pro\install.wim /SourceIndex:1 /DestinationImageFile:C:\m\my_Distribution\sources\install.wim
dism /Export-Image /SourceImageFile:E:\wim\win10ltsb\install.wim /SourceIndex:1 /DestinationImageFile:C:\m\my_Distribution\sources\install.wim
dism /Export-Image /SourceImageFile:E:\wim\win10ent_ltsc2019\install.wim /SourceIndex:1 /DestinationImageFile:C:\m\my_Distribution\sources\install.wim
dism /Export-Image /SourceImageFile:E:\wim\win2008r2sp1\install.wim /SourceIndex:1 /DestinationImageFile:C:\m\my_Distribution\sources\install.wim
dism /Export-Image /SourceImageFile:E:\wim\winsvr2012r2\install.wim /SourceIndex:1 /DestinationImageFile:C:\m\my_Distribution\sources\install.wim
dism /Export-Image /SourceImageFile:E:\wim\winsvr2016\install.wim /SourceIndex:1 /DestinationImageFile:C:\m\my_Distribution\sources\install.wim
dism /Export-Image /SourceImageFile:E:\wim\winsvr2019\install.wim /SourceIndex:1 /DestinationImageFile:C:\m\my_Distribution\sources\install.wim
dism /Get-ImageInfo /ImageFile:C:\m\my_Distribution\sources\install.wim
免责声明:本站发布的内容(图片、视频和文字)以原创、转载和分享为主,文章观点不代表本网站立场,如果涉及侵权请联系站长邮箱:is@yisu.com进行举报,并提供相关证据,一经查实,将立刻删除涉嫌侵权内容。


