这篇文章主要介绍微信小程序如何实现虎年春节头像制作,文中介绍的非常详细,具有一定的参考价值,感兴趣的小伙伴们一定要看完!
先上最终效果图:
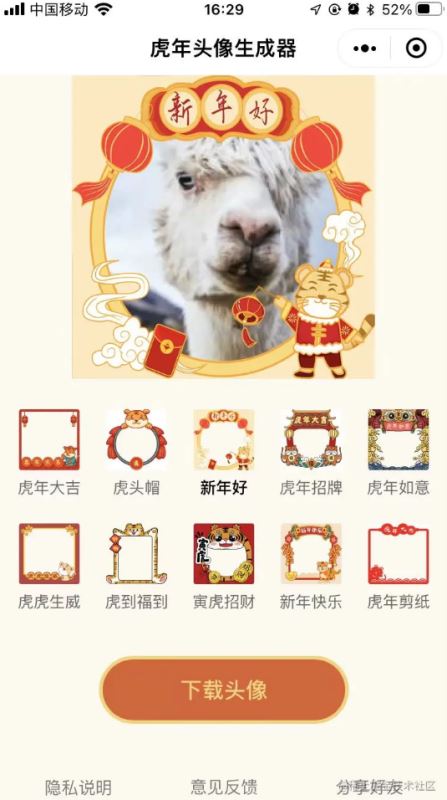
说下实现流程
第一步:先获取到当前微信的头像图片,主要代码如下,注意默认获取到的头像图片不是高清的,需要先转换成高清图片,避免生成之后很模糊。
 getUserProfile(e) {
    console.log(e)
    let that = this;
    wx.getUserProfile({
      desc: '仅用于生成头像使用',
      success: (res) => {
        var url = res.userInfo.avatarUrl;
        while (!isNaN(parseInt(url.substring(url.length - 1, url.length)))) {
          url = url.substring(0, url.length - 1)
        }
        url = url.substring(0, url.length - 1) + "/0";
        res.userInfo.avatarUrl = url;
        console.log(JSON.stringify(res.userInfo));
        that.setData({
          userInfo: res.userInfo,
          hasUserInfo: true
        })
        that.drawImg();
      }
    });
  },
第二步:合成头像,把素材图片和第一步获取到的头像图片,获取到本地文件,然后利用小程序的cavas组件进行合成。
drawImg() {
    let that = this;
    wx.showLoading({
      title: '生成头像中...',
    })
    let promise1 = new Promise(function (resolve, reject) {
      wx.getImageInfo({
        src: that.data.userInfo.avatarUrl,
        success: function (res) {
          resolve(res);
        }
      })
    });
    var mask_id = that.data.now_mask;
    let promise2 = new Promise(function (resolve, reject) {
      wx.getImageInfo({
        src: `../../assets/img/mask0${mask_id}.png`,
        success: function (res) {
          console.log(res)
          resolve(res);
        }
      })
    });
    Promise.all([
      promise1, promise2
    ]).then(res => {
      console.log(res)
      var windowWidth = wx.getSystemInfoSync().windowWidth
      var context = wx.createCanvasContext('myAvatar');
      var size = windowWidth /750 * 500
      // var size = 500
      context.drawImage(res[0].path, 0, 0, size, size);
      context.draw(true)
      context.save();
      context.drawImage('../../'+res[1].path, 0, 0, size, size);
      context.draw(true)
      context.save();

    })
    wx.hideLoading()
  },
第三步:下载合成的图片到本地相册。
canvasToTempFile(){
    if(!this.data.userInfo){
      wx.showModal({
        title: '温馨提示',
        content: '请先点击上方获取微信头像',
        showCancel: false,
      })
      return
    }
    var windowWidth = wx.getSystemInfoSync().windowWidth
    var size = 500
    // var dpr = 750 / windowWidth
    wx.canvasToTempFilePath({
      x: 0,
      y: 0,
      height: size,
      width: size,
      canvasId: 'myAvatar',
      success: (res) => {
        wx.saveImageToPhotosAlbum({
          filePath: res.tempFilePath,
          success: result => {
            wx.hideLoading();
            wx.showModal({
              content: '图片已保存到相册,请前往微信去设置哟!',
              showCancel: false,
              success: function(res) {
                if (res.confirm) {
                  console.log('用户点击确定');
                }
              }
            })
          }, fail(e) {
            wx.hideLoading();
            console.log("err:" + e);
          }
        })
      }
    });
  },
这样就实现了主要的功能了。
以上是“微信小程序如何实现虎年春节头像制作”这篇文章的所有内容,感谢各位的阅读!希望分享的内容对大家有帮助,更多相关知识,欢迎关注亿速云行业资讯频道!
免责声明:本站发布的内容(图片、视频和文字)以原创、转载和分享为主,文章观点不代表本网站立场,如果涉及侵权请联系站长邮箱:is@yisu.com进行举报,并提供相关证据,一经查实,将立刻删除涉嫌侵权内容。


