本文小编为大家详细介绍“Vuejs怎么通过Axios请求数据”,内容详细,步骤清晰,细节处理妥当,希望这篇“Vuejs怎么通过Axios请求数据”文章能帮助大家解决疑惑,下面跟着小编的思路慢慢深入,一起来学习新知识吧。
我们来搭建api接口调用工具Axios。Vue本身是不支持ajax调用的,如果你需要这些功能就需要安装对应的工具。
支持ajax请求的工具很多,像superagent和axios。今天我们用的就是axios,因为听说最近网上大部分的教程书籍都使用的是axios,本身axios这个工具就已经做了很好的优化和封装,但是在使用时,还是比较繁琐,所以我们来重新封装一下。
cnpm install axios -D
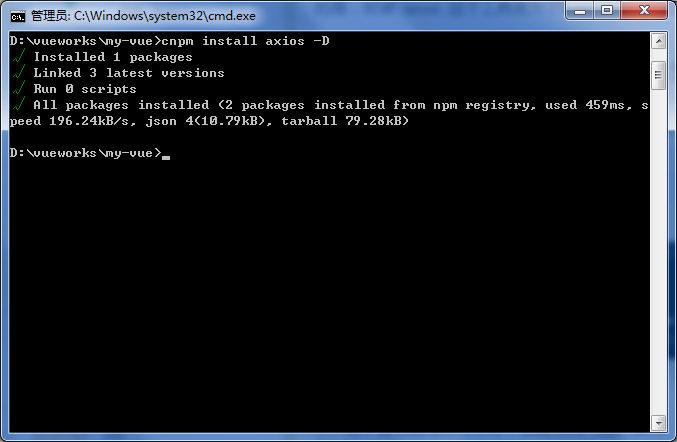
在安装的时候,一定要切换进入咱们的项目根目录,再运行安装命令,然后如提示以上信息,则表示安装完成。
编辑src/api/index.js文件(我们在上一章整理目录结构时,在src/api/目录新建了一个空的index.js文件),现在我们为该文件填写内容。
// 配置API接口地址
var root = 'https://cnodejs.org/api/v1'
// 引用axios
var axios = require('axios')
// 自定义判断元素类型JS
function toType (obj) {
    return ({}).toString.call(obj).match(/\s([a-zA-Z]+)/)[1].toLowerCase()
}
// 参数过滤函数
function filterNull (o) {
    for (var key in o) {
        if (o[key] === null) {
            delete o[key]
        }
        if (toType(o[key]) === 'string') {
            o[key] = o[key].trim()
        } else if (toType(o[key]) === 'object') {
            o[key] = filterNull(o[key])
        } else if (toType(o[key]) === 'array') {
            o[key] = filterNull(o[key])
        }
    }
    return o
}

/*
  接口处理函数
  这个函数每个项目都是不一样的,我现在调整的是适用于
  https://cnodejs.org/api/v1 的接口,如果是其他接口
  需要根据接口的参数进行调整。参考说明文档地址:
  https://cnodejs.org/topic/5378720ed6e2d16149fa16bd
  主要是,不同的接口的成功标识和失败提示是不一致的。
  另外,不同的项目的处理方法也是不一致的,这里出错就是简单的alert
*/
function apiAxios (method, url, params, success, failure) {
    if (params) {
        params = filterNull(params)
    }
    axios({
        method: method,
        url: url,
        data: method === 'POST' || method === 'PUT' ? params : null,
        params: method === 'GET' || method === 'DELETE' ? params : null,
        baseURL: root,
        withCredentials: false
    })
    .then(function (res) {
    if (res.data.success === true) {
        if (success) {
            success(res.data)
        }
    } else {
        if (failure) {
            failure(res.data)
        } else {
            window.alert('error: ' + JSON.stringify(res.data))
        }
    }
    })
    .catch(function (err) {
        let res = err.response
        if (err) {
            window.alert('api error, HTTP CODE: ' + res.status)
        }
    })
}

// 返回在vue模板中的调用接口
export default {
    get: function (url, params, success, failure) {
        return apiAxios('GET', url, params, success, failure)
    },
    post: function (url, params, success, failure) {
        return apiAxios('POST', url, params, success, failure)
    },
    put: function (url, params, success, failure) {
        return apiAxios('PUT', url, params, success, failure)
    },
    delete: function (url, params, success, failure) {
        return apiAxios('DELETE', url, params, success, failure)
    }
}
更多关于AxIos的解释请参见:https://github.com/mzabriskie/axios
我们在使用之前,需要在src/main.js中进行简单的配置,先来看一下原始的main.js文件
// The Vue build version to load with the `import` command
// (runtime-only or standalone) has been set in webpack.base.conf with an alias.
import Vue from 'vue'
import App from './App'
import router from './router'

Vue.config.productionTip = false

/* eslint-disable no-new */
    new Vue({
    el: '#app',
    router,
    template: '<App/>',
    components: { App }
})
修改为:
// The Vue build version to load with the `import` command
// (runtime-only or standalone) has been set in webpack.base.conf with an alias.
import Vue from 'vue'
import App from './App'
import router from './router'

// 引用API文件
import api from './api/index.js'
// 将API方法绑定到全局
Vue.prototype.$api = api

Vue.config.productionTip = false

/* eslint-disable no-new */
new Vue({
    el: '#app',
    router,
    template: '<App/>',
    components: { App }
})
通过以上的配置,我们就可以在项目中使用axios工具了,接下来我们来测试一下这个工具。
我们来修改一下 src/page/Index.vue 文件,将代码调整为以下代码:
<template>
<div>index page</div>
</template>
<script>
export default {
created () {
this.$api.get('topics', null, r => {
console.log(r)
})
}
}
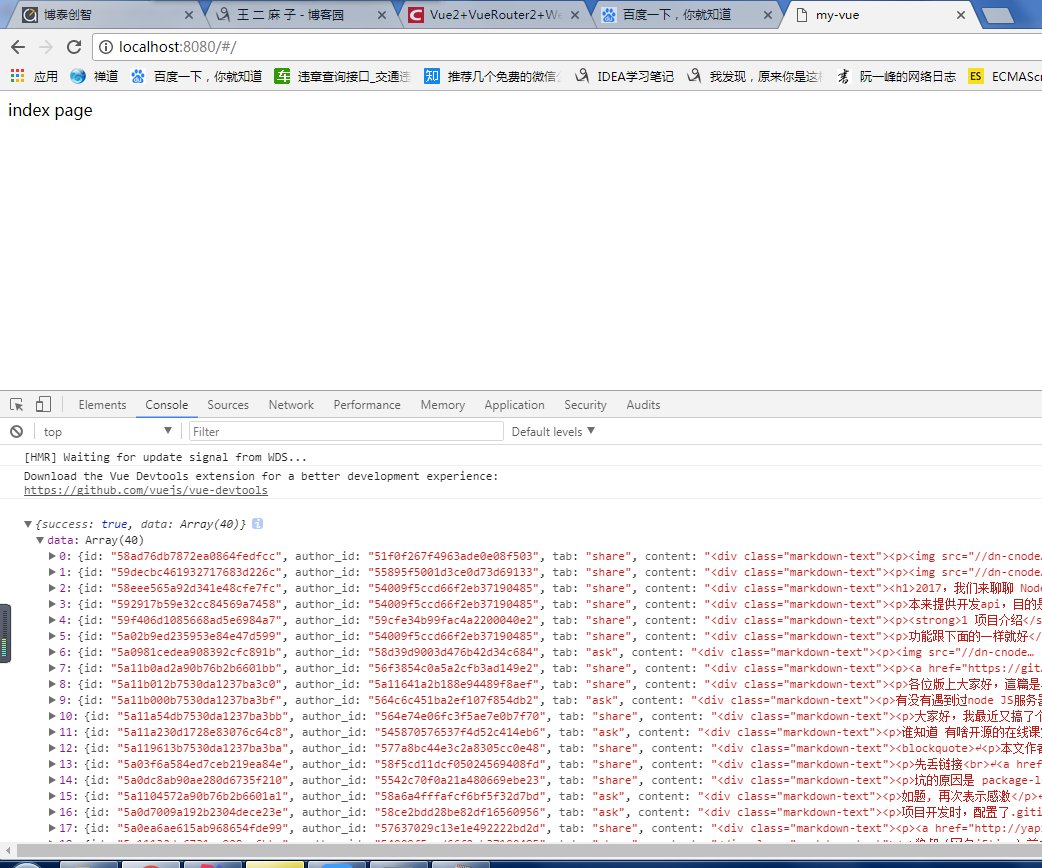
</script>我们在Index.vue中向浏览器的控制台输入一些接口请求到的数据,如果你和我也一样,那说明我们的接口配置完成正确。如下图:
如果你是按我的操作一步一步来,那最终结果应该和我一样。如果出错请仔细检查代码
Axios 是一个基于 Promise 的 HTTP 库,可以用在浏览器和 node.js 中。
Vue.js 2.0 版本推荐使用 axios 来完成 ajax 请求。
引入时不必纠结与vue的先后顺序,它并不依赖与vue
1.get请求
get中就只有一个参数,这个参数中包括前面的地址,后面传的参数用“?”拼接在地址后
        created() {
          axios
            .get(
              "http://wkt.myhope365.com/weChat/applet/course/banner/list?number=4"
            )
            .then((res) => {
                console.log(res);
              this.imgList = res.data.data;
            });
        },
2.post请求(form格式)
要先定义一个form把想要传的参数放进去
有两个参数:请求地址,form
         created() {

          let from = new FormData();
          from.append("type", "boutique");
          from.append("pageNum", 2);
          from.append("pageSize", 10);
          axios
            .post("http://wkt.myhope365.com/weChat/applet/course/list/type", from)
            .then((res) => {
              console.log(res);
              this.courseList = res.data.rows;
            //   console.log(this.courseList);
            });
        },
3.post请求(JOSN格式)
这种情况下,有两个参数:请求地址,{传的参数}
但传的参数要以JOSN的格式
created() {
          axios
            .post("http://wkt.myhope365.com/weChat/applet/subject/list", {
              enable: 1,
            })
            .then((res) => {
              console.log(res);
              this.list = res.data.rows;
              console.log(this.list);
            });
        },
读到这里,这篇“Vuejs怎么通过Axios请求数据”文章已经介绍完毕,想要掌握这篇文章的知识点还需要大家自己动手实践使用过才能领会,如果想了解更多相关内容的文章,欢迎关注亿速云行业资讯频道。
免责声明:本站发布的内容(图片、视频和文字)以原创、转载和分享为主,文章观点不代表本网站立场,如果涉及侵权请联系站长邮箱:is@yisu.com进行举报,并提供相关证据,一经查实,将立刻删除涉嫌侵权内容。


