Nagios 简介:
是一个开源软件,可以监控网络设备网络流量、Linux/windows主机状态,甚至可以监控打印机
它可以运行在Linux上或windows上
基于浏览器的web界面方便运维人员查看监控项目的状态
支持web界面配置、管理操作
支持短信、邮件通知
可以自定义脚本实现自定义化监控
Nagios官网 http://www.nagios.org/
Nagios 服务器端安装:
Centos6默认的yum源里没有nagios相关的rpm包,但是我们可以安装一个epel的扩展源: rpm -ivh http://www.lishiming.net/data/p_w_upload/forum/month_1211/epel-release-6-7.noarch.rpm
yum install -y httpd nagios nagios-plugins nagios-plugins-all nrpe nagios-plugins-nrpe
#楼主是在LNMP 下的环境来做实验的,httpd 已经安装了,epel 也安装了,省去了安装步骤。
[root@LNMP ~]# yum install -y nagios nagios-plugins nagios-plugins-all nrpe nagios-plugins-nrpe
[root@LNMP ~]# htpasswd -c /etc/nagios/passwd nagiosadmin #设置登录nagios后台的用户和密码
New password:
Re-type new password: (zaq12wsx)
Adding password for user nagiosadmin
[root@LNMP ~]# nagios -v /etc/nagios/nagios.cfg #检测配置文件,最下方输出0,则没有问题
Total Warnings: 0
Total Errors: 0
[root@LNMP ~]# service httpd restart #重启httpd
Stopping httpd: [ OK ]
Starting httpd: [ OK ]
[root@LNMP ~]# service nagios restart #重启nagios
Running configuration check...done.
Stopping nagios: done.
Starting nagios: done.
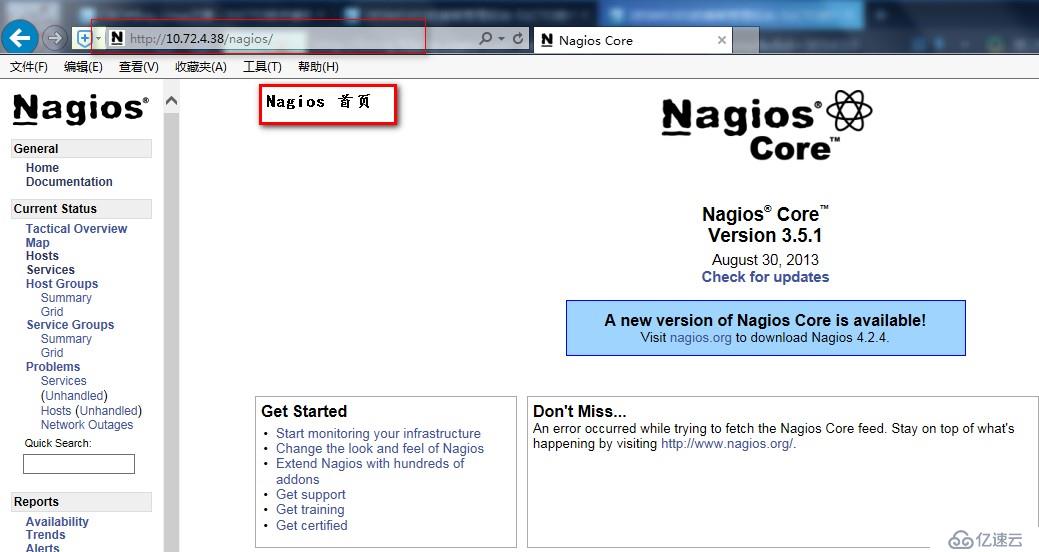
通个IE 访问 http://10.72.4.38/nagios/

 -----------------------------------分割线---------------------------------
Nagios 客户端的安装配置:(楼主客户端环境LAMP,之前做实验搭的)
在客户端机器上yum源:
rpm -ivh http://www.lishiming.net/data/p_w_upload/forum/month_1211/epel-release-6-7.noarch.rpm
[root@OBird ~]# yum install -y nagios-plugins nagios-plugins-all nrpe nagios-plugins-nrpe
[root@OBird ~]# vim /etc/nagios/nrpe.cfg #编辑配置文件
allowed_hosts=127.0.0.1 #更改为allowed_hosts=10.72.4.38,服务端IP
dont_blame_nrpe=0 #更改为 dont_blame_nrpe=1
[root@OBird ~]# /etc/init.d/nrpe start #客服端和服务端的中间介质
Starting nrpe: [ OK ]
[root@LNMP ~]# cd /etc/nagios/conf.d/ #在服务端的配置
[root@LNMP conf.d]# vim 10.72.4.43.cfg #加入以下内容
define host{
use linux-server ; Name of host template to use
; This host definition will inherit all variables that are defined
; in (or inherited by) the linux-server host template definition.
host_name 10.72.4.43
alias 4.43
address 10.72.4.43
}
define service{
use generic-service
host_name 10.72.4.43
service_description check_ping
check_command check_ping!100.0,20%!200.0,50%
max_check_attempts 5
normal_check_interval 1
}
define service{
use generic-service
host_name 10.72.4.43
service_description check_ssh
check_command check_ssh
max_check_attempts 5
---------------------------------------------
定义的配置文件中一共监控了三个service:ssh, ping, http 这三个项目是使用本地的nagios工具去连接远程机器,也就是说即使客户端没有安装nagios-plugins以及nrpe也是可以监控到的。其他的一些service诸如负载、磁盘使用等是需要服务端通过nrpe去连接到远程主机获得信息,所以需要远程主机安装nrpe服务以及相应的执行脚本(nagios-plugins)
max_check_attempts 5 #当nagios检测到问题时,一共尝试检测5次都有问题才会告警,如果该数值为1,那么检测到问题立即告警
normal_check_interval 1#重新检测的时间间隔,单位是分钟,默认是3分钟
notification_interval 60 #在服务出现异常后,故障一直没有解决,nagios再次对使用者发出通知的时间。单位是分钟。如果你认为,所有的事件只需要一次通知就够了,可以把这里的选项设为0。
--------------------------------------------
检测 配置文件
[root@LNMP conf.d]# nagios -v /etc/nagios/nagios.cfg #出现两个OK
Total Warnings: 0
Total Errors: 0
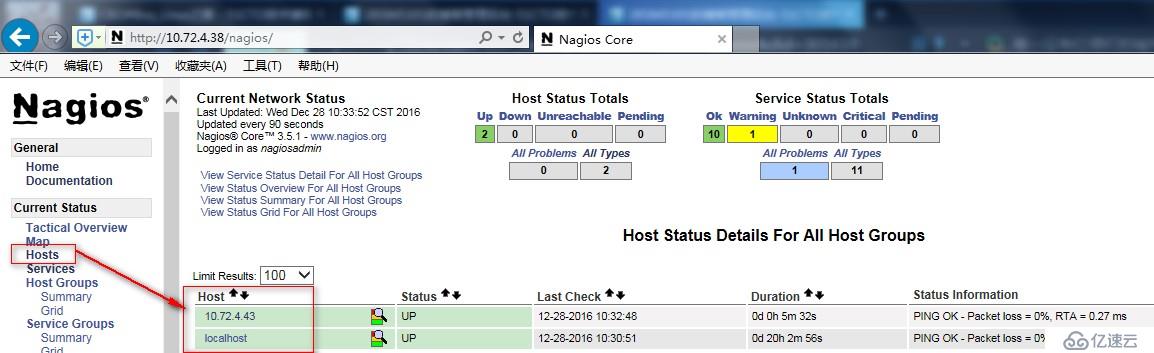
[root@LNMP ~]# service nagios restart #重启nagios 服务,在网页端查看被监控的客户端4.43

------------------------------分割线-------------------- ----------
Nagios 客户端的安装配置2:
[root@LNMP ~]# vim /etc/nagios/objects/commands.cfg #服务端,增加一个调用客户端的服务的命令获得状态,check_nrpe 和对客户端通信。
define command{
command_name check_nrpe
command_line $USER1$/check_nrpe -H $HOSTADDRESS$ -c $ARG1$
}
[root@LNMP ~]# vim /etc/nagios/conf.d/10.72.4.43.cfg #增加服务
define service{
use generic-service
host_name 10.72.4.43
service_description check_load
check_command check_nrpe!check_load #客户端调用,下同
max_check_attempts 5
normal_check_interval 1
}
define service{
use generic-service
host_name 10.72.4.43
service_description check_disk_sda1
check_command check_nrpe!check_hda1
max_check_attempts 5
normal_check_interval 1
}
define service{
use generic-service
host_name 10.72.4.43
service_description check_disk_sdb5
check_command check_nrpe!check_hda5
max_check_attempts 5
normal_check_interval 1
}
[root@OBird ~]# df -h
Filesystem Size Used Avail Use% Mounted on
/dev/sda3 18G 4.0G 13G 24% /
tmpfs 495M 0 495M 0% /dev/shm
/dev/sda1 194M 29M 155M 16% /boot
/dev/sdb5 2.0G 68M 1.9G 4% /mnt
/dev/sdb1 2.0G 74M 1.9G 4% /home/liven/123
--------------------------------------------------------
[root@OBird ~]# vim /etc/nagios/nrpe.cfg #客户端被调用的脚本,用户是可以在此处自定义脚本的
# The following examples use hardcoded command arguments...
command[check_users]=/usr/lib64/nagios/plugins/check_users -w 5 -c 10
command[check_load]=/usr/lib64/nagios/plugins/check_load -w 15,10,5 -c 30,25,20
command[check_hda1]=/usr/lib64/nagios/plugins/check_disk -w 20% -c 10% -p /dev/hda1
#chech_hda1 ,楼主实验环境是sda1,要改为一致 ,用df -h 查看
command[check_hda5]=/usr/lib64/nagios/plugins/check_disk -w 20% -c 10% -p /dev/sda1
#增加一行sdb5
command[check_zombie_procs]=/usr/lib64/nagios/plugins/check_procs -w 5 -c 10 -s Z
command[check_total_procs]=/usr/lib64/nagios/plugins/check_procs -w 150 -c 200
[root@OBird ~]# /etc/init.d/nrpe restart #重启客户端&nrpe 服务
Shutting down nrpe: [ OK ]
Starting nrpe: [ OK ]
检测 配置文件
[root@LNMP conf.d]# nagios -v /etc/nagios/nagios.cfg #出现两个OK
Total Warnings: 0
Total Errors: 0
[root@LNMP ~]# service nagios restart #重启服务端nagios服务
Running configuration check...done.
Stopping nagios: done.
Starting nagios: done.
LNMP 服务端hHTTP一直 WARNING(403).解决办法:
编写网站的访问目录echo 111>/var/www/html/index.html
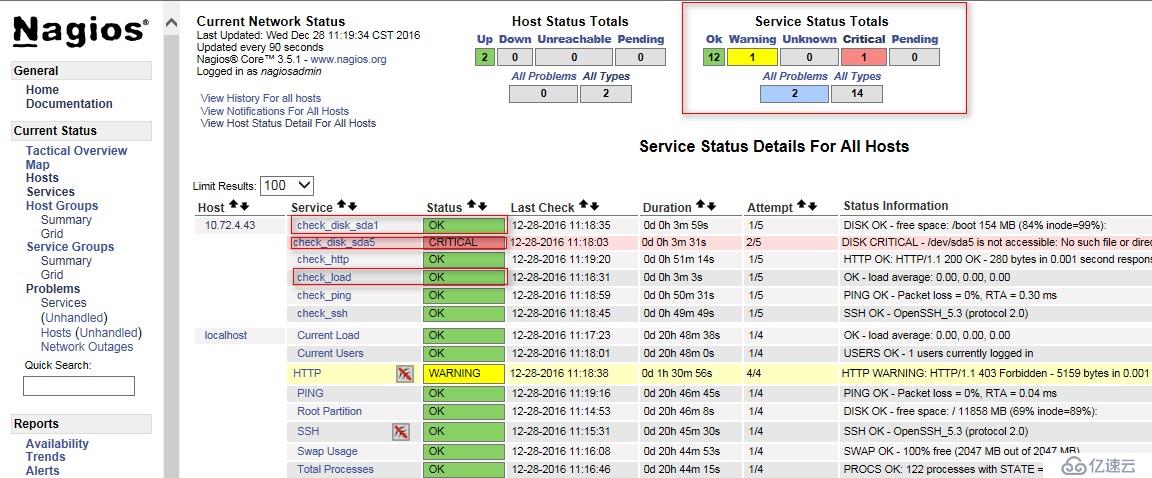
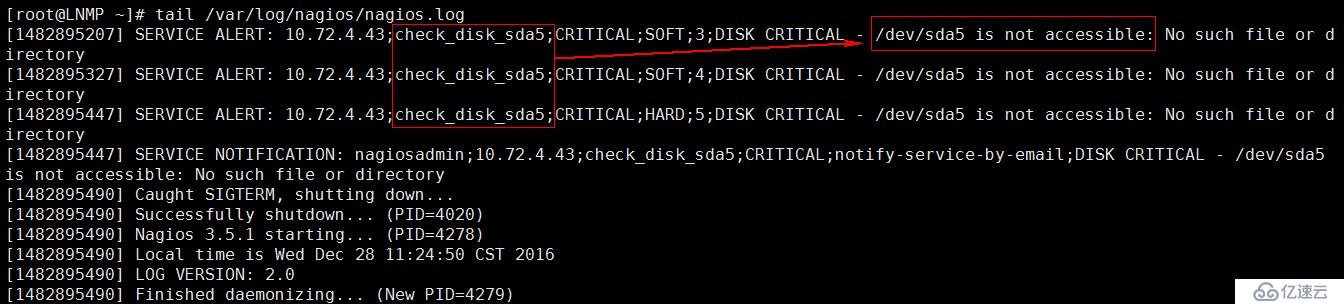
[root@LNMP ~]# tail /var/log/nagios/nagios.log #查看nagios 日志,
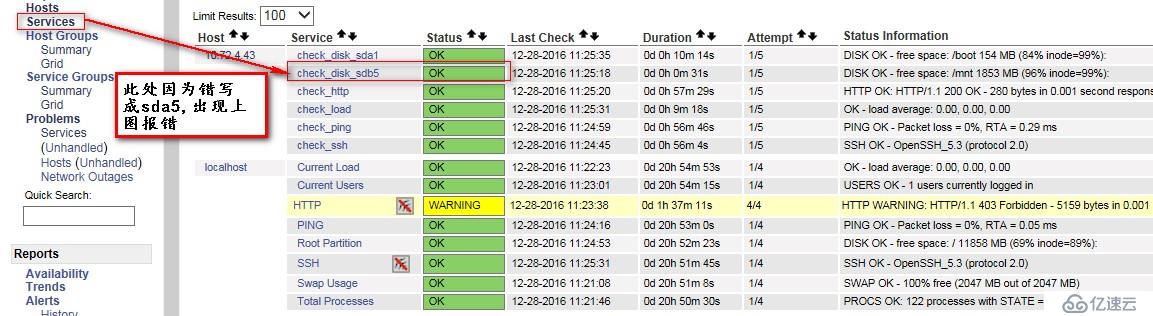
[1482895207] SERVICE ALERT: 10.72.4.43;check_disk_sda5;CRITICAL;SOFT;3;DISK CRITICAL - /dev/sda5 is not accessible: No such file or directory
-------------------------------分割线------------------------------
配置邮件警告:
define contactgroup{
contactgroup_name admins
alias Nagios Administrators
members nagiosadmin,222,333 #用户
}
define contact{
contact_name 222 #用户1
use generic-contact
alias linux
email test2@qq.com #报警邮箱
}
define contact{
contact_name 333
use generic-contact
alias linux
email test3@qq.com
}
define contactgroup{ #定义组
contactgroup_name common #组名
alias common #别名
members 222,333 #组员
}
[root@LNMP ~]# vim /etc/nagios/conf.d/10.72.4.43.cfg #设置告警,测试
define service{
use generic-service
host_name 10.72.4.43
service_description check_disk_sda1
check_command check_nrpe!check_hda1
max_check_attempts 5
normal_check_interval 1
contact_groups common #加入告警设置
notification_period 24x7 #告警时间24x7
notification_options c,r #告警级别
}
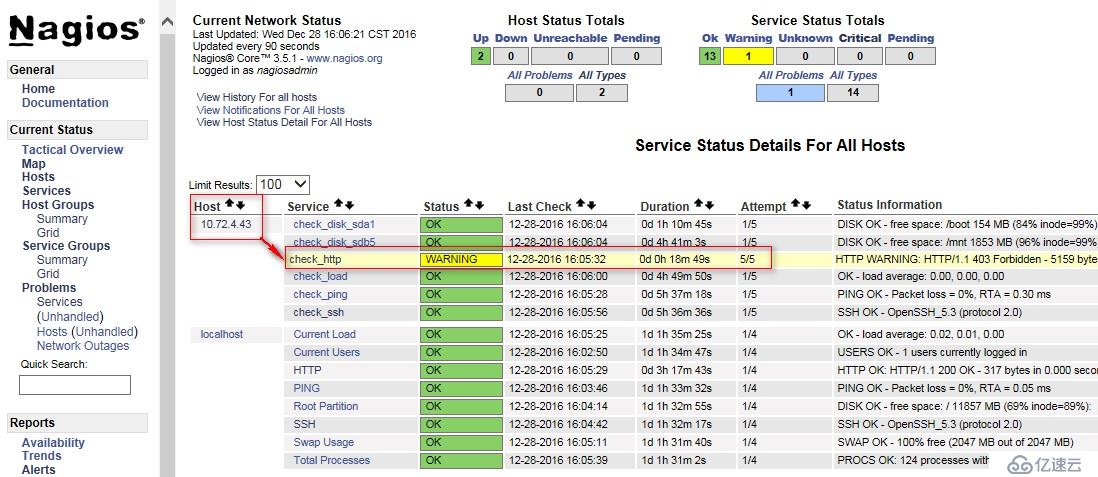
define service{
use generic-service
host_name 10.72.4.43
service_description check_http
check_command check_http
max_check_attempts 5
normal_check_interval 1
contact_groups common
notifications_enabled 1 #加入告警设置
notification_period 24x7
notification_options w,c,r
}
[root@OBird ~]# /usr/lib64/nagios/plugins/check_disk -w 99% -c 99% -p /dev/sda1
DISK CRITICAL - free space: /boot 154 MB (84% inode=99%);| /boot=28MB;1;1;0;193
楼主在客户端用脚本产生告警,但是并没有发出邮件。楼主百度去了。。。
http://dl528888.blog.51cto.com/2382721/763079(参考这个博客详细内容在下端)
操作:
[root@LNMP ~]# vim /etc/hosts #加入本机IP&主机名
10.72.4.38 LNMP
让客户端(10.72.4.43)的http服务告警:
[root@LNMP ~]# tail /var/log/nagios/nagios.log #查看服务端事件,如果内容有service notification这样的话,就代表nagios发送了邮件报警
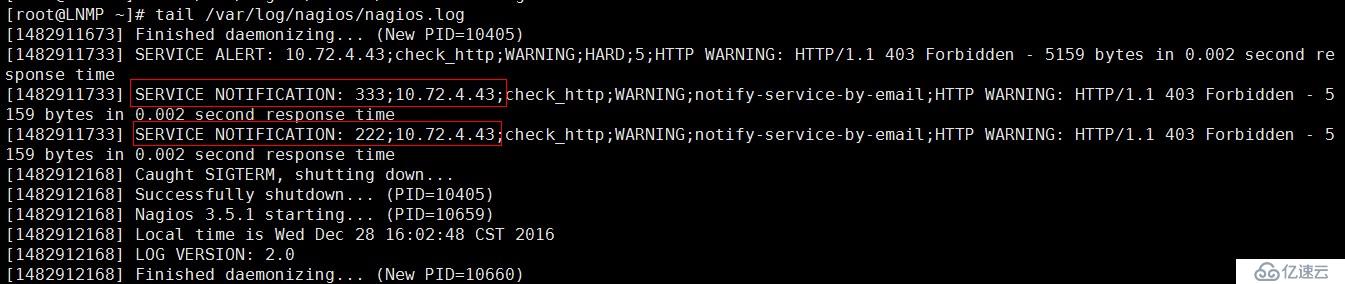
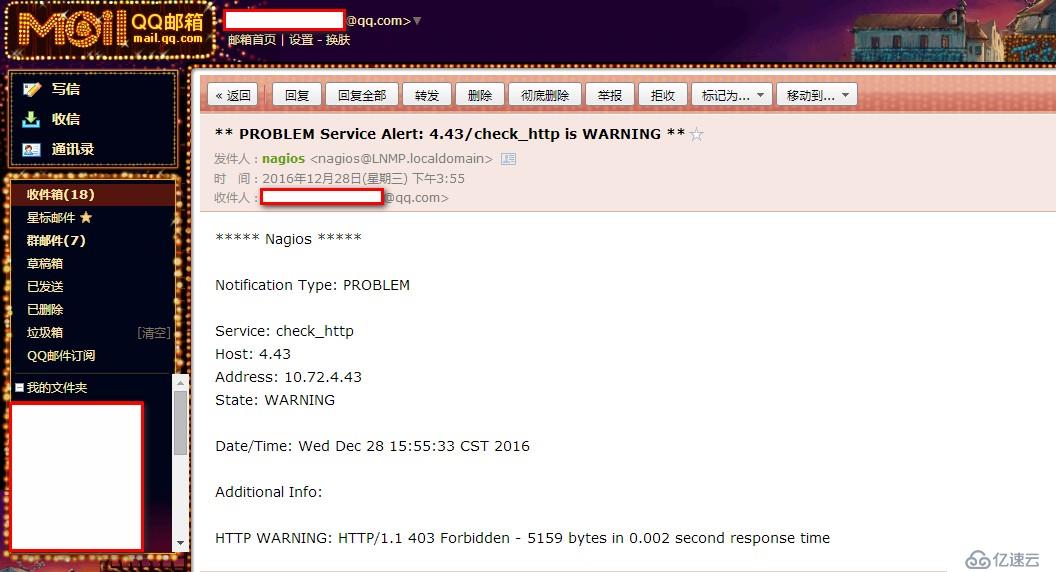
楼主亲测,收到了邮件。楼主用的两台虚拟机,网络是桥接模式。有图有真相。

--------------------------------------------
下文摘抄至下面的博客:
经过测试,虚拟机不能直接发邮件,但是阿里云主机可以,原因是没有公网IP,如果有问题参考以下三个步骤:http://dl528888.blog.51cto.com/2382721/763079(参考这个博客)
(1)hosts里的配置
[root@nagios ~]# cat /etc/hosts
172.16.4.3 nagios.com nagios ##一定要有本机的ip对应
(2)hostname与/etc/sysconfig/network里的hostname一致,并与hosts里的一致
(3)去nagios的web里,选择报警的服务(如果httpd),点击http旁边的这个摁钮,如果你看到notification状态为disabled,那么你可以选择右侧的enabled notification for this services,确认对话框出来后,查看日志tail /var/log/nagios/nagios.log
如果内容有service notification这样的话,就代表nagios发送了邮件报警
免责声明:本站发布的内容(图片、视频和文字)以原创、转载和分享为主,文章观点不代表本网站立场,如果涉及侵权请联系站长邮箱:is@yisu.com进行举报,并提供相关证据,一经查实,将立刻删除涉嫌侵权内容。


