在选择好意中的前端开发基本框架后,接下来一个重要任务就是选择一款好的UI组件库。其中,UIkit组件库是一款基于Less+JS的一款轻量级、模块化、响应式的前端UI组件库。特别是,从版本3.0.0 beta 31开始完全脱离了jQuery框架。
UIkit组件库的一个重要特点是,其提供的组件大部分是非常基础性的,但是也有一部分组件相当实用,例如Slideshow组件、Upload组件、Video组件等,在github网站上的评价星数是13K,相当不错。
另一个vuikit库尚非常年轻,其目标是基于流行的UIkit打造针对Vue.js的组件库。建议目前先不要选择这个。
有关最新的Vue框架中使用UIkit库的资料在网络上极其少见。本人经过几天的分析实验总结了在目前最新的Vue CLI 3开发中使用UIkit 3组件库的基本思路。有了这个基本示例,结合你所熟悉的Vue开发技巧,就能快速实现常见的基于Vue前端框架的项目。
这个Vue官方网站上和其他许多地方都有介绍,非常简单,此处不再赘述。
你可以使用:
npm install -g @vue/cli或者:
yarn global add @vue/cli但是,安装之前,官方资料强调必须先卸载以前的版本,命令如下:
yarn global remove vue-cliVue CLI 3与Vue CLI 2大不一样了。因此,很多网站提供的教程都已经过时,仅供参考。
2. 添加UIkit组件库
在使用命令vue create <项目名称>创建一个Vue前端工程框架后,你就可以使用下面命令把UIkit组件库添加到当前Vue工程中:
yarn add uikit
为了简单起见,我们直接使用UIkit官方网站上提供的例子作为说明(主要介绍步骤)。
代码如下:
<template>
<div id="app">
<div id="nav">
<router-link to="/">Home</router-link> |
<router-link to="/about">About</router-link>
</div>
<router-view/>
</div>
</template>
<script>
import UIkit from 'uikit';
import Icons from 'uikit/dist/js/uikit-icons';
UIkit.use(Icons);
export default {
    name: 'App',
};
</script>>
<style lang="less">
@import "../node_modules/uikit/src/less/uikit.less";
</style>
请特别关注上述代码中的加粗部分!
修改后完整的代码如下:
<template>
<div class="hello">
<form>
<fieldset class="uk-fieldset">
            <legend class="uk-legend">Legend</legend>

            <div class="uk-margin">
                <input class="uk-input" type="text" placeholder="Input">
            </div>

            <div class="uk-margin">
                <select class="uk-select">
                    <option>Option 01</option>
                    <option>Option 02</option>
                </select>
            </div>

            <div class="uk-margin">
                <textarea class="uk-textarea" rows="5" placeholder="Textarea"></textarea>
            </div>

            <div class="uk-margin uk-grid-small uk-child-width-auto uk-grid">
                <label><input class="uk-radio" type="radio" name="radio2" checked> A</label>
                <label><input class="uk-radio" type="radio" name="radio2"> B</label>
            </div>

            <div class="uk-margin uk-grid-small uk-child-width-auto uk-grid">
                <label><input class="uk-checkbox" type="checkbox" checked> A</label>
                <label><input class="uk-checkbox" type="checkbox"> B</label>
            </div>

            <div class="uk-margin">
                <input class="uk-range" type="range" value="2" min="0" max="10" step="0.1">
            </div>

        </fieldset>
    </form>
</div>
</template>
<script>
export default {
name: 'HelloWorld',
props: {
msg: String,
},
};
</script>
<!-- Add "scoped" attribute to limit CSS to this component only -->
**<style scoped lang="less">
</style>**
再强调一下,我直接使用了UIkit官方网站上关于form组件的基本示例代码,如下:
<form>
<fieldset class="uk-fieldset">
    <legend class="uk-legend">Legend</legend>

    <div class="uk-margin">
        <input class="uk-input" type="text" placeholder="Input">
    </div>

    <div class="uk-margin">
        <select class="uk-select">
            <option>Option 01</option>
            <option>Option 02</option>
        </select>
    </div>

    <div class="uk-margin">
        <textarea class="uk-textarea" rows="5" placeholder="Textarea"></textarea>
    </div>

    <div class="uk-margin uk-grid-small uk-child-width-auto uk-grid">
        <label><input class="uk-radio" type="radio" name="radio2" checked> A</label>
        <label><input class="uk-radio" type="radio" name="radio2"> B</label>
    </div>

    <div class="uk-margin uk-grid-small uk-child-width-auto uk-grid">
        <label><input class="uk-checkbox" type="checkbox" checked> A</label>
        <label><input class="uk-checkbox" type="checkbox"> B</label>
    </div>

    <div class="uk-margin">
        <input class="uk-range" type="range" value="2" min="0" max="10" step="0.1">
    </div>

</fieldset>
</form>
注意到,与上面模板部分代码的区别是,我添加了<template>和<div class="hello">两个外层,非常简单吧。
我使用的是WebStorm IDE。于是,在系统内置的命令行下运行:
yarn serve启动对项目的热编译和内置Web服务器。然后,再Google Chrome中打开http://localhost:8080/,效果如下图所示: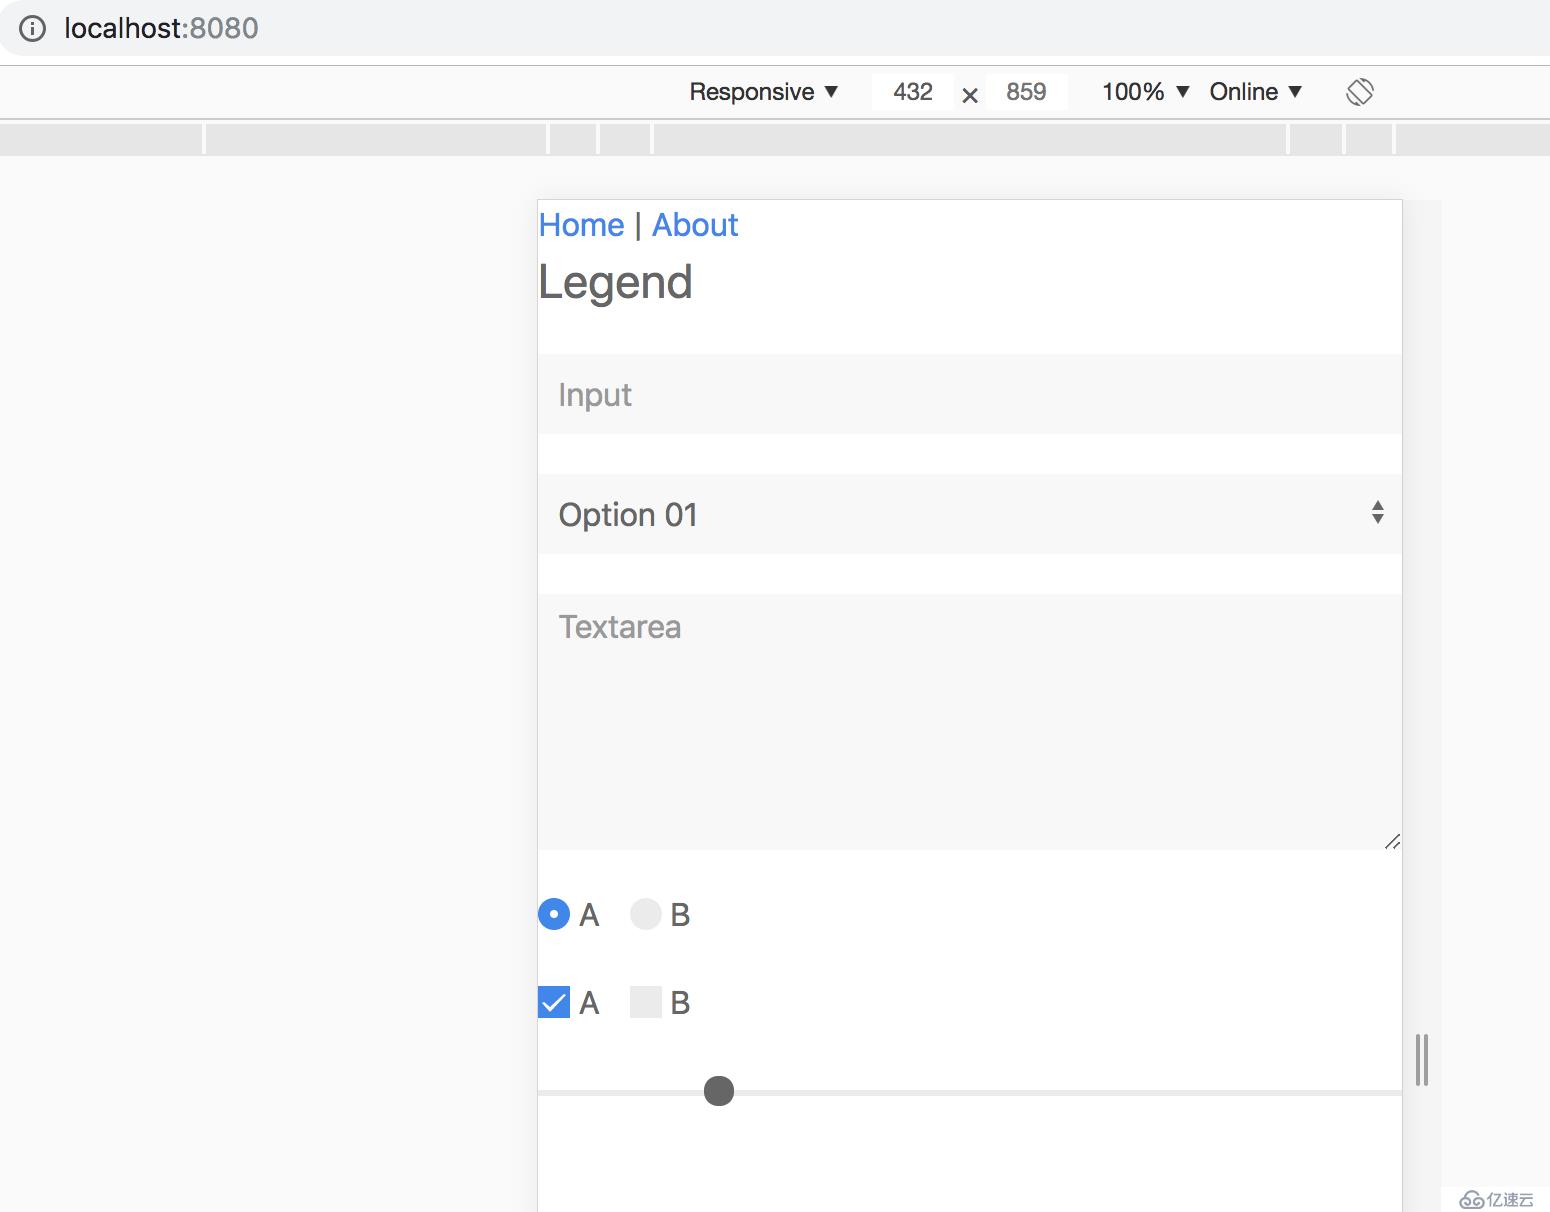
1,https://github.com/vuikit/vuikit
2,https://github.com/uikit/uikit
3,https://vuejs.org/
免责声明:本站发布的内容(图片、视频和文字)以原创、转载和分享为主,文章观点不代表本网站立场,如果涉及侵权请联系站长邮箱:is@yisu.com进行举报,并提供相关证据,一经查实,将立刻删除涉嫌侵权内容。


