nagiosд»Ӣз»ҚеҸҠServerе®үиЈ…(еӣӣ)
жү№йҮҸж·»еҠ дё»жңәе’ҢжңҚеҠЎ
 centreonзҡ„жЁЎжқҝеҠҹиғҪжҳҜеҒҡзҡ„йқһеёёејәеӨ§зҡ„пјҢиҖҢдё”дјҳеҢ–иҝҮзҡ„nagiosй…ҚзҪ®еҚҒеҲҶз®ҖеҚ•пјҢеҠ hostзҡ„ж—¶еҖҷеҸӘйңҖиҰҒиҫ“е…ҘдәҶhostnameпјҢaliasе’Ңip ең°еқҖе°ұеҸҜд»ҘеҠ дёҖеҸ°hostдёҠеҺ»пјҢserviceй…ҚеңЁhostgroupдёҠпјҢиҝҷж ·еҸӘиҰҒжҠҠhostж·»еҠ еҲ°hostgroupдёҠе°ұеҸҜд»ҘдәҶ еҸӘж·»еҠ hostпјҢserviceе’ҢhostgroupиҮӘе·ұй…ҚгҖӮиҝҗиЎҢи„ҡжң¬д№ӢеүҚпјҢиҰҒе…ҲеҮҶеӨҮеҘҪеҮ 件дәӢжғ…пјҡ
1гҖҒиҰҒжңүдёҖдёӘhostзҡ„жЁЎжқҝпјҢе°ҶжүҖжңүзҡ„еұһжҖ§еҹәжң¬дёҠе®ҡд№үе®Ңж•ҙпјҢдҪҝз”Ёи„ҡжң¬ж·»еҠ зҡ„hostдјҡе’ҢжЁЎжқҝдёҖжЁЎдёҖж ·пјҢеҸӘжңүipең°еқҖе’Ңhostnameжңүе·®еҲ« (жҺЁиҚҗиҮӘе®ҡд№үдёҖдёӘhostжЁЎзүҲ)
2гҖҒиҰҒзЎ®и®ӨдәҶhostиҰҒж·»еҠ еҲ°е“ӘеҸ°nagiosдёҠпјҢеңЁcentreonйҮҢеҸ«poller
3гҖҒиҰҒжңүдёҖдёӘhostsж–Ү件пјҢйҮҢйқўеҶ…е®№дёәиҰҒжү№йҮҸж·»еҠ зҡ„hostnameе’Ңipең°еқҖпјҢзұ»дјј/etc/hostsзҡ„ж јејҸпјҢ第дёҖж ҸipпјҢ第дәҢж Ҹhostname
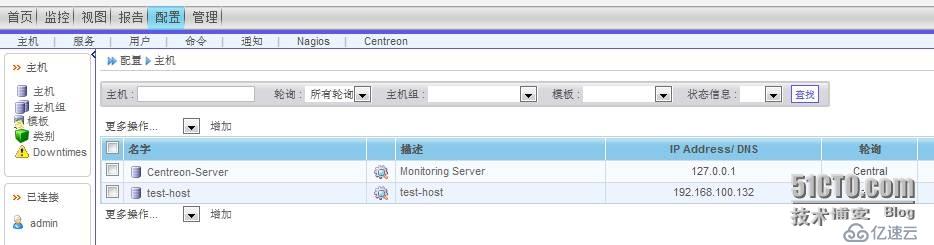
дёӢйқўејҖе§Ӣжј”зӨәж·»еҠ дё»жңәпјҡж·»еҠ еүҚпјҡ
еј•з”Ёд»Јз Ғпјҡ
и„ҡжң¬з”ЁperlеҶҷзҡ„пјҢжңҖеүҚйқўdbзҡ„йғЁеҲҶйңҖиҰҒдҝ®ж”№пјҢд»Јз ҒеҰӮдёӢпјҡ
#!/usr/bin/perl
### ====================================================
## File name: insert_host.pl
## Use: insert host into centreondatabase
### ====================================================
use strict;
use warnings;
use DBI;
use DBD::mysql;
# ----------------------------------------------------
my $DB_HOST = "10.199.95.165";
my $DB_USER = "centreon";
my $DB_PASSWD = "centreon";
my $DB_NAME = "centreon";
my $dbh= DBI->connect("DBI:mysql:database=$DB_NAME;host=$DB_HOST","$DB_USER", "$DB_PASSWD", { RaiseError=> 1 });
# ----------------------------------------------------
my $file_path = "hosts";
my $tpl_name= "generic-host";
my $nagios_name= "Central";
while (defined(my $arg= shift)) {
if ($arg eq '-f') {
$file_path= shift;
}
# == name of template ==
elsif($arg eq '-t') {
$tpl_name= shift;
}
# == name of nagiosname ==
elsif($arg eq '-n') {
$nagios_name= shift;
}
else {
&print_help();
exit 1;
}
}
# -----------------------------------------------------
open (HOST, "$file_path")|| die "Cannot open $file_path for read $!";
my $sql;
my $sth;
my $line;
my ($host, $ipaddr);
my ($host_id,$tpl_id,$nagios_id)= (0, 0, 0);
while (defined($line = <HOST>)) {
# == skip blank lines =================
next if ($line =~ /^\s*$/);
# == skip if # ========================
next if ($line =~ /^\s*#/);
# == get host and ipaddress===========
($ipaddr,$host) = split(/\s+/, $line);
next if ($ipaddr eq '' || $host eq '');
# == insert the host to table host ====
$sql="insert host set host_template_model_htm_id='2',host_name='$host',host_alias='$host',host_address='$ipaddr',host_active_checks_enabled='2',host_passive_checks_enabled='2',host_checks_enabled='2',host_event_handler_enabled='2',host_flap_detection_enabled='2',host_process_perf_data='2',host_retain_status_information='2',host_retain_nonstatus_information='2',host_notifications_enabled='2',host_register='1',host_activate='1',host_obsess_over_host='2',host_check_freshness='2'";
$sth= $dbh->do($sql);
sleep(1);
# == get host_id======================
$sql= "select host_id from host where host_name='$host'";
$sth= $dbh->prepare($sql);
$sth->execute();
while (my $ref = $sth->fetchrow_hashref()){
$host_id= $ref->{'host_id'};
print "host_idis $host_id\n";
}
next if ($host_id== 0);
# == insert extended_host_information==
$sql= "insert extended_host_information set host_host_id='$host_id'";
$sth= $dbh->do($sql);
# == insert host_template_relation=====
$sql= "select host_id from host where host_name='$tpl_name'";
$sth= $dbh->prepare($sql);
$sth->execute();
while (my $ref = $sth->fetchrow_hashref()){
$tpl_id= $ref->{'host_id'};
print"template id is $tpl_id\n";
}
next if ($tpl_id== 0);
$sql= "insert host_template_relation set host_host_id='$host_id',host_tpl_id='$tpl_id',`order`='1'";
$sth= $dbh->prepare($sql);
$sth->execute();
# == insert ns_host_relation===========
$sql= "select id from nagios_server where name='$nagios_name'";
$sth = $dbh->prepare($sql);
$sth->execute();
while (my $ref = $sth->fetchrow_hashref()){
$nagios_id=$ref->{'id'};
print "nagiosid is $nagios_id\n";
}
next if ($nagios_id== 0);
$sql = "insert ns_host_relation set host_host_id='$host_id',nagios_server_id='$nagios_id'";
$sth = $dbh->prepare($sql);
$sth->execute();
# == insert complete ==
print "insert $host to centreon complete\n";
}
close(HOST);
$dbh->disconnect();
exit 0;
#--------------------------------------------------------------------------------
sub print_help{
print "Usage ./insert_host.pl [-f path of host file][-n nagiosname] [-t template name]\n";
print "\n";
}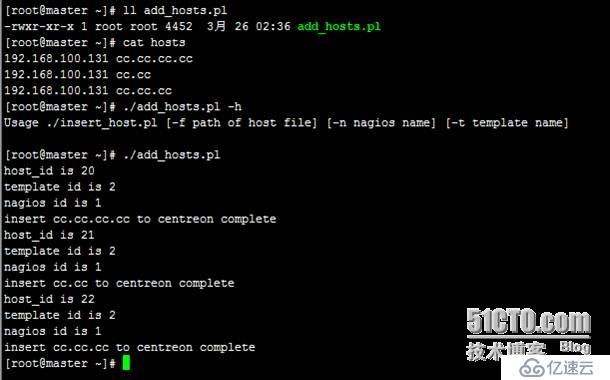
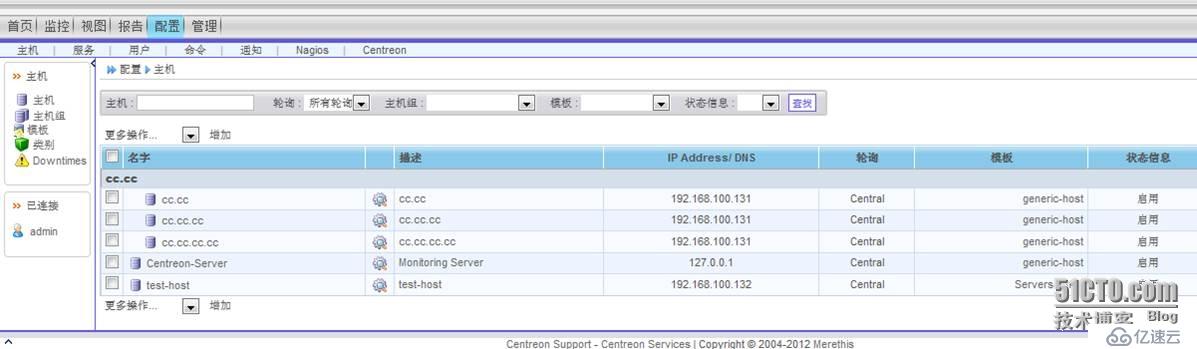
ж·»еҠ еҗҺпјҡеҲ·ж–°WEBйЎөйқўпјҡеӨҡдәҶдёүеҸ°пјӣ
жү№йҮҸз”ҹжҲҗе’Ңдё»жңәзӣёе…іиҒ”зҡ„жңҚеҠЎ
дёҠйқўзҡ„и„ҡжң¬иғҪеӨҹжү№йҮҸж·»еҠ дё»жңәпјҢдҪҶжҳҜдёҚиғҪиҮӘеҠЁз”ҹжҲҗе’Ңдё»жңәзӣёе…іиҒ”зҡ„жңҚеҠЎ
дҪҝз”Ё CentreonCLAPI еҸҜд»Ҙи§ЈеҶіиҝҷдёӘй—®йўҳпјҢCentreonCLAPI жҳҜcentreon е‘Ҫд»ӨиЎҢжҺҘеҸЈпјҢеҸҜд»Ҙжӣҝд»ЈеңЁзҪ‘йЎөдёҠзҡ„и®ёеӨҡе·ҘдҪңпјҢиҝҷйҮҢжҲ‘们еҸӘд»Ӣз»ҚдёӢжҖҺд№Ҳи§ЈеҶіжҲ‘们зҡ„й—®йўҳгҖӮдәҶи§ЈжӣҙеӨҡиҜ·зңӢзҪ‘еқҖпјҡ
http://forge.centreon.com/projects/centreon-clapi/wiki
иҝӣиЎҢе®үиЈ…
http://download.centreon.com/Modules/CLAPI/centreon-clapi-1.1.tar.gz
tar zxvfcentreon-clapi-1.1.tar.gz
cd centreon-clapi-1.1
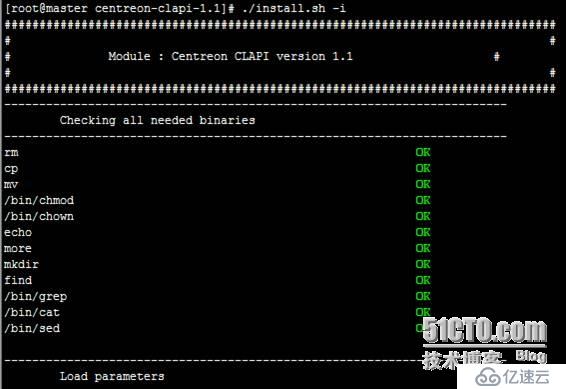
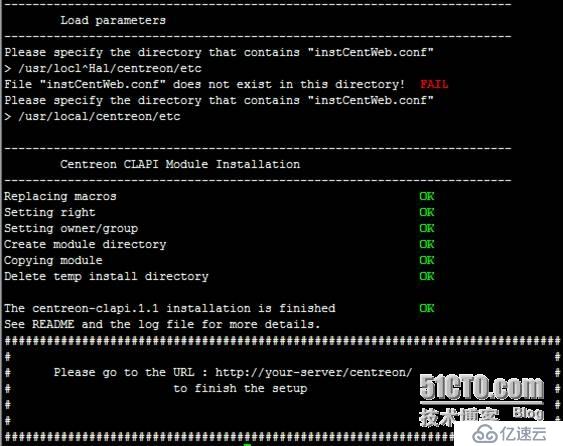
жҸҗзӨәиҫ“е…ҘinstCentWeb.confй…ҚзҪ®ж–Ү件зҡ„и·Ҝеҫ„пјҡ/usr/local/centreon/etc/
е®үиЈ…е®ҢжҲҗеҗҺпјҡ
cd /usr/local/centreon/www/modules/centreon-clapi/core/
vimcentreon +64
require_once "$centreon_etc/centreon.conf.php";
ж”№дёә:
require_once "/usr/local/centreon/etc/centreon.conf.php";
cd /usr/local/centreon/www/modules/centreon-clapi/core/
vim centreon +64
require_once"$centreon_etc/centreon.conf.php";
ж”№дёә:
require_once"/usr/local/centreon/etc/centreon.conf.php";
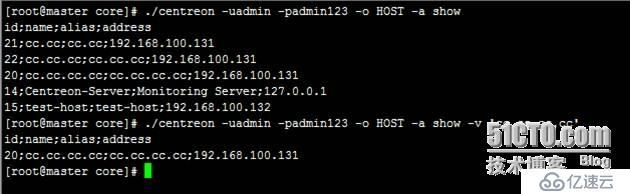
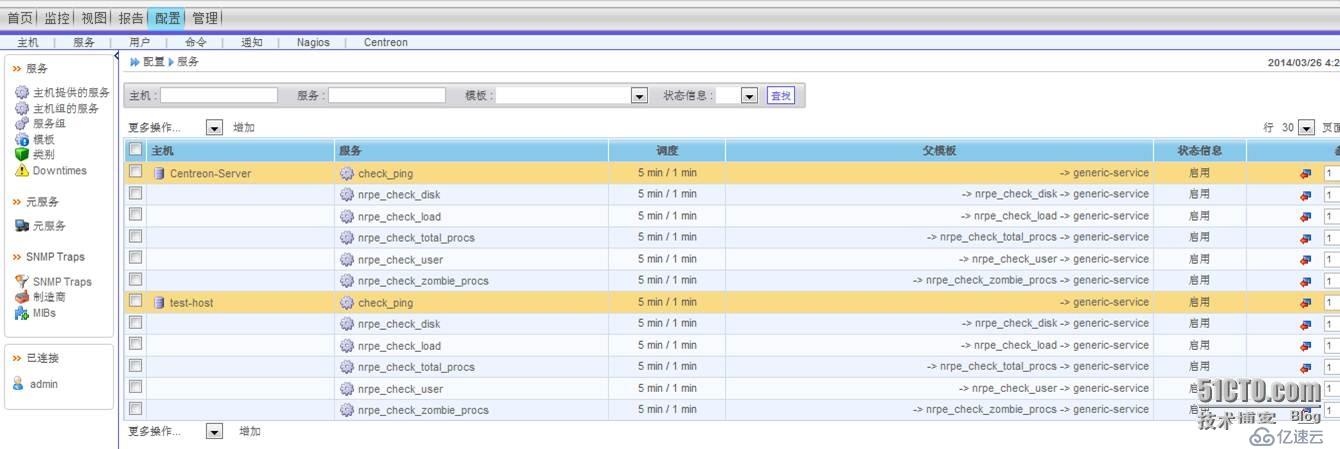
еҜ№clientдё»жңәеә”з”ЁжүҖе…іиҒ”зҡ„жЁЎжқҝжңҚеҠЎпјҡ
е…іиҒ”еүҚпјҡ
иҝӣиЎҢе…іиҒ”пјҡ
[root@mastercore]# ./centreon -uadmin-padmin123 -o HOST -a applytpl -v"cc.cc.cc.cc"

жҹҘзңӢйЎөйқў:
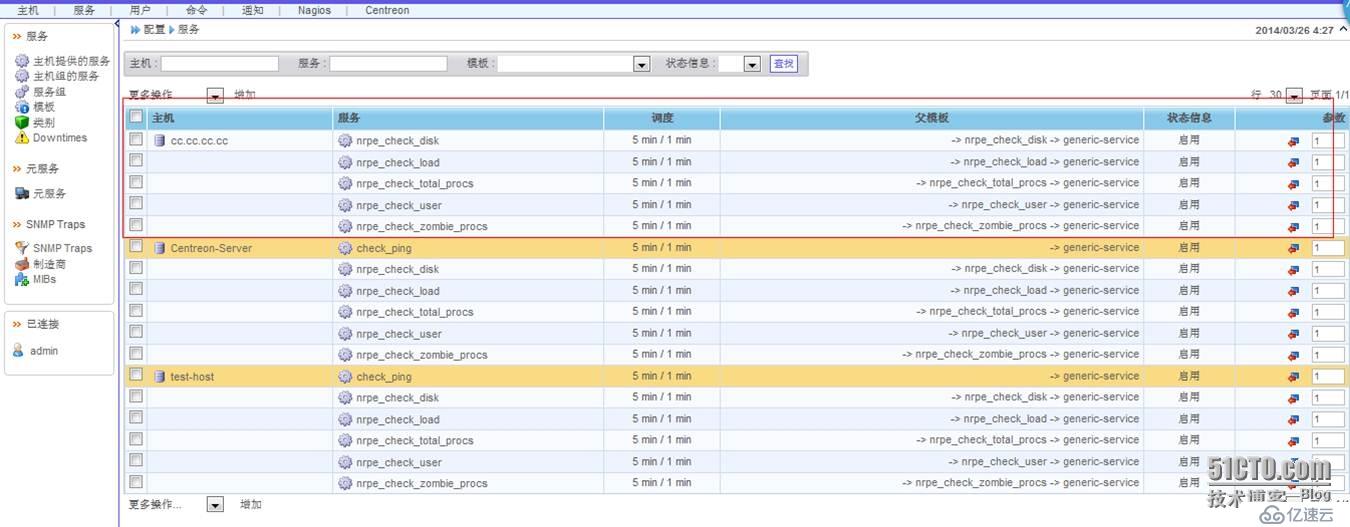
йҖҡиҝҮд»ҘдёҠе‘Ҫд»ӨеҸҜд»Ҙе…іиҒ”жЁЎжқҝзҡ„жңҚеҠЎпјҢеҰӮжһңйңҖиҰҒжү№йҮҸж·»еҠ пјҢеҸӘйңҖеҶҷдёӘз®ҖеҚ•зҡ„и„ҡжң¬е°ұиғҪе®һзҺ°пјҢи§ҒдёӢеӣҫпјҢжү§иЎҢеүҚеҸҜеҲ йҷӨеҲҡжүҚжүӢеҠЁжү§иЎҢзҡ„е‘Ҫд»Өж·»еҠ зҡ„clientжңҚеҠЎпјҡ
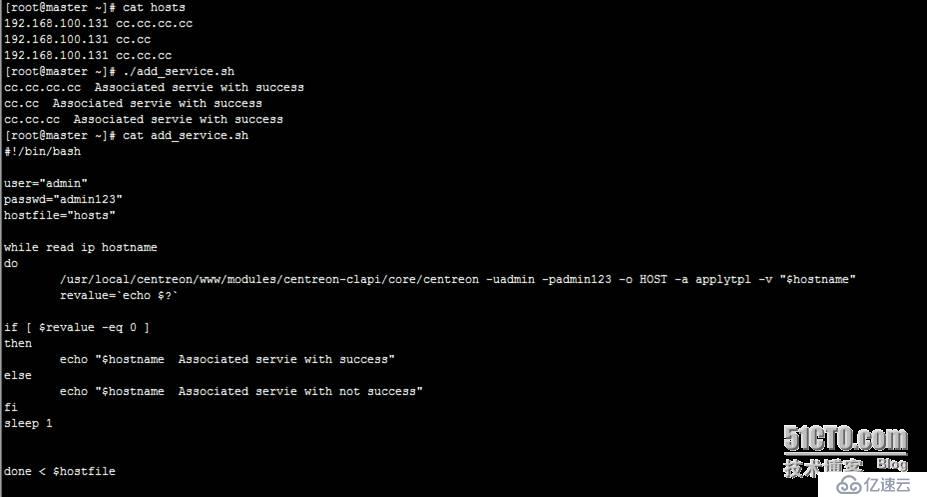
еҲ·ж–°йЎөйқўжҹҘзңӢпјҡ
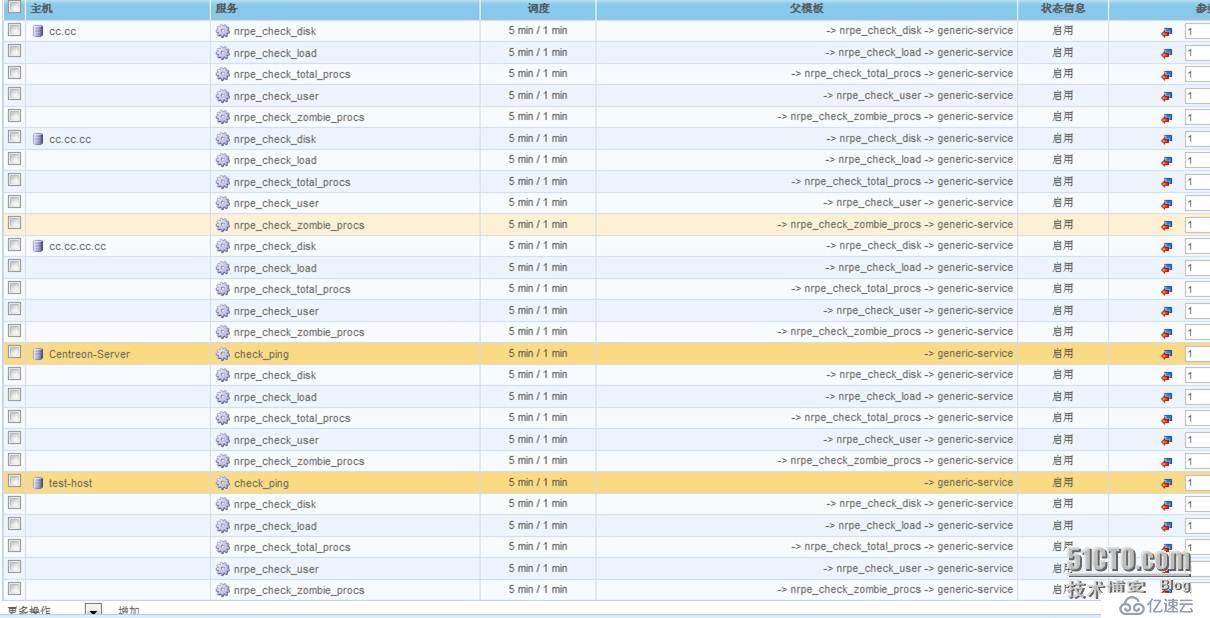
жү№йҮҸж·»еҠ е®Ңдё»жңәе’ҢжңҚеҠЎиҰҒйңҖиҰҒйҮҚж–°з”ҹжҲҗnagiosй…ҚзҪ®еҗҺз”ҹж•ҲгҖӮ


