本篇文章和大家了解一下nestjs实现图形校验和单点登录的方法。有一定的参考价值,有需要的朋友可以参考一下,希望对大家有所帮助。
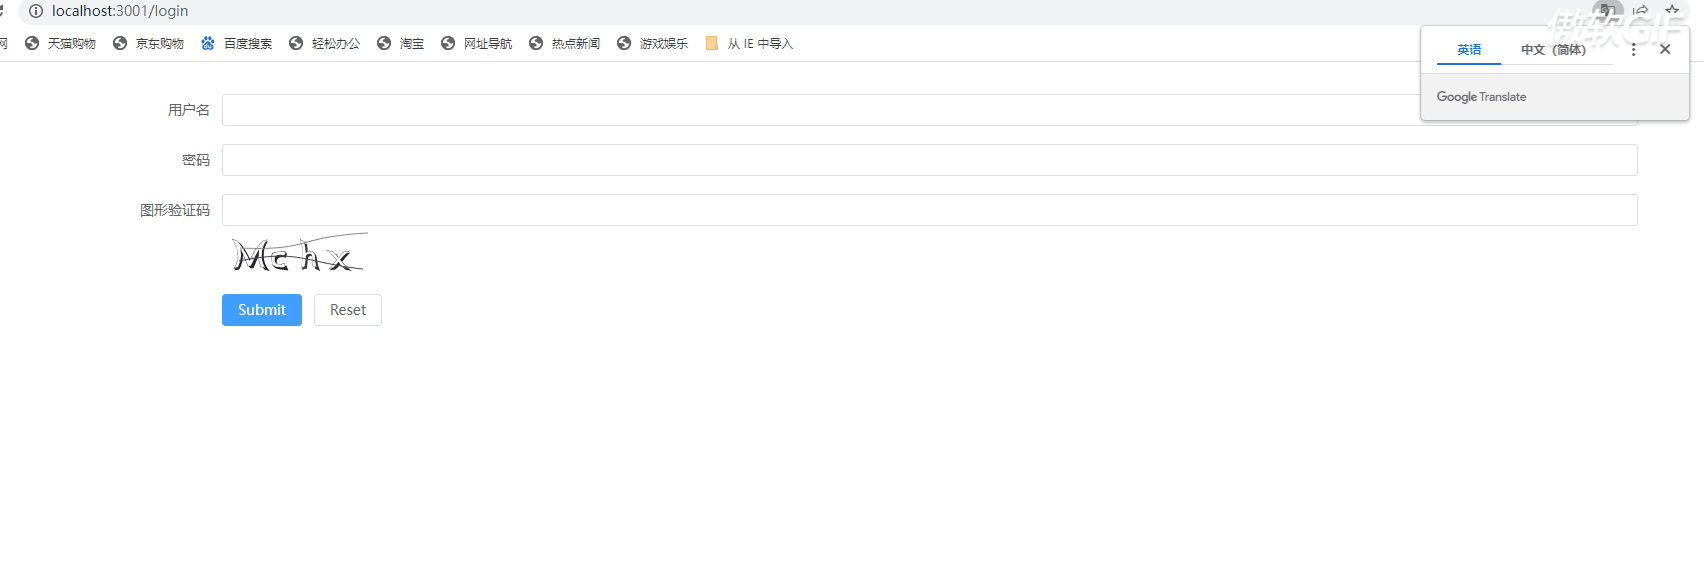
效果图
学习一下 nest
新建项目
 npm i -g @nestjs/cli
 nest new project-name
 npm run start:dev //启动服务
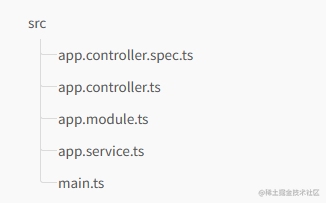
目录结构
controllers
负责处理传入的请求并将响应返回给客户端。(定义路由等)
import { Controller, Get } from '@nestjs/common';
@Controller()
export class AppController {
  constructor() {}
  @Get()
  getHello(): string {
    return 'hello world';
  }
}
controllers 常用装饰器
常用装饰器
| @Controller(path) | @Get(path) | @Post(path) | @Request(), @Req() | @Response(), @Res() | @Session() | @Param(key?: string) | @Body(key?: string) | @Query(key?: string) | @Headers(name?: string) |
|---|---|---|---|---|---|---|---|---|---|
| 定义 root 路径 | 定义 get 请求和路径 | 定义 post 请求和路径 | 请求体(req) | 响应体(res) | session | 获取 req.params 参数 | 获取 req.body 参数 | 获取 req.query 参数 | 获取 req.headers 参数 |
@Global()
@Module({
  providers: [MyService],
  exports: [MyService],
})
export class AppModule {}
providers 属性用来声明模块所提供的依赖注入 (DI) 提供者,它们将在整个模块中共享。
exports 属性用于导出模块中的提供者以供其他模块使用。
global 标识符用于创建一个全局模块。在任何地方都可以使用 @Inject() 装饰器来注入其提供者。
imports 选项用于引入其他模块中提供的依赖关系。
import { Injectable } from '@nestjs/common';
@Injectable()
export class AppService {
  getHello(): string {
    return 'Hello World!';
  }
}
业务逻辑具体实现
需要用到 svg-captcha 这个库
npm i svg-captcha
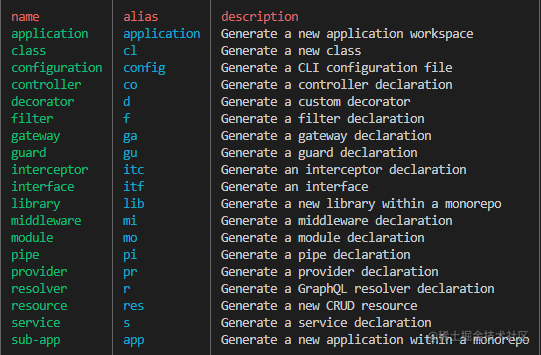
nest 命令行创建一个 captcha 模块nest g res captchanest 命令行:
import { Controller, Get, Response, Session } from '@nestjs/common';
import * as svgCaptcha from 'svg-captcha';
@Controller('captcha')
export class CaptchaController {
@Get()
async getCaptcha(@Response() res, @Session() session) {
const captcha = svgCaptcha.create({
size: 4,
noise: 2,
});
session.captcha = captcha.text;
res.type('svg');
res.send(captcha.data);
}
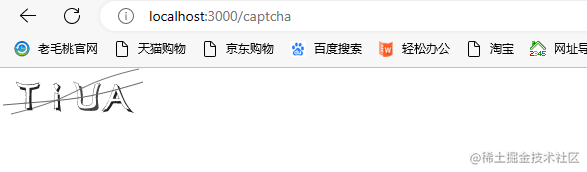
}通过 session 将当前会话的 captcha 存起来此时能通过:http://localhost:3000/captcha查看到效果图
npm i express-session
npm i -D @types/express-session
并且再 main.ts 中引入
import * as session from 'express-session';
// somewhere in your initialization file
app.use(
  session({
    secret: 'my-secret',
    resave: false,
    saveUninitialized: false,
  }),
);在本机下载 mogodb mogodb 官网下载
安装 mongoose
npm install --save mongoose
在 app.modele 中引入
import { Module } from '@nestjs/common';
import { MongooseModule } from '@nestjs/mongoose';
import { AppController } from './app.controller';
import { AppService } from './app.service';
@Module({
  imports: [MongooseModule.forRoot('mongodb://127.0.0.1:27017/nest')],
  controllers: [AppController],
  providers: [AppService],
})
export class AppModule {}
创建 schemas
import { Document } from 'mongoose';
import * as mongoose from 'mongoose';
export interface User {
  account: string;
  password: string;
}
export interface UserDoc extends User, Document {}
export const UserSchema = new mongoose.Schema({
  password: { type: String, required: true },
  account: {
    type: String,
    required: true,
    unique: true,
  },
});
export const UserModel = mongoose.model<UserDoc>('User', UserSchema);
创建 auth 模块
nest g res auth
实现注册和登录方法controller
import {
  Controller,
  Get,
  Body,
  Post,
  UseInterceptors,
  Req,
  Request,
  Res,
} from '@nestjs/common';
import { AuthService } from './auth.service';
import { CreateUserDto } from './dto/index';
import { ApiCreatedResponse } from '@nestjs/swagger';
import { CaptchaMiddleware } from 'src/middleware/captcha-middleware/captcha-middleware.middleware';
@Controller('auth')
export class AuthController {
  constructor(private readonly authService: AuthService) {}
  @ApiCreatedResponse({
    description: 'The record has been successfully created.',
    type: CreateUserDto,
  })
  @Post('register')
  async created(@Body() data: CreateUserDto) {
    const user = await this.authService.created(data);
    return user;
  }
  @UseInterceptors(CaptchaMiddleware)
  @Post('login')
  async login(
    @Body() data: CreateUserDto,
    @Req() request: Request,
    @Res() res,
  ) {
    const user = await this.authService.login(data, request);
    res.sendResponse(user);
  }
}
引入uuid 生成随机数和userId做键值对映射,为单点登录打下基础。
引入jwt 生成token进行校验。
import { Injectable, UnauthorizedException } from '@nestjs/common';
import { JwtService } from '@nestjs/jwt';
import mongoose, { Model } from 'mongoose';
import { InjectModel } from '@nestjs/mongoose';
import { UserDoc } from '../schemas/user.schema';
import { loginMapDoc } from '../schemas/login.mapping';
import { CreateUserDto } from './dto/index';
import { v4 as uuid } from 'uuid';
@Injectable()
export class AuthService {
  constructor(
    private jwtService: JwtService,
    @InjectModel('user') private readonly userModel: Model<UserDoc>,
    @InjectModel('loginmapModel')
    private readonly loginmapModel: Model<loginMapDoc>,
  ) {}
  async created(data: CreateUserDto) {
    const user = await new this.userModel(data);
    return user.save();
  }
  async login(data: any, req) {
    const { account, password, code } = data;
    if (code.toLocaleLowerCase() !== req.session?.captcha.toLocaleLowerCase()) {
      return {
        code: 400,
        message: '验证码错误',
      };
    }
    const user = await this.userModel.findOne({
      account,
      password,
    });
    if (!user) {
      throw new UnauthorizedException();
    }
    const loginId = uuid();
    const payload = {
      userId: user.id,
      username: user.account,
      loginId: loginId,
    };
    const token = this.jwtService.sign(payload);
    const foundCollection = await mongoose.connection.collections[
      'loginmapModel'
    ];
    if (!foundCollection) {
      // 如果该 collection 不存在,则创建它
      await new this.loginmapModel();
      console.log('新建成功');
    }
    await this.loginmapModel.findOneAndUpdate(
      { userId: user.id },
      { userId: user.id, loginId },
      { upsert: true, new: true, runValidators: true },
    );
    return { token, loginId };
  }
  async viladate(data: any) {
    const { userId, loginId } = data;
    const map = await this.loginmapModel.findOne({ userId, loginId });
    return loginId == map.loginId;
  }
}
最后创建一个guard,对用户是否登录进行拦截判断
nest g gu middleware/auth
import {
  CanActivate,
  ExecutionContext,
  Injectable,
  Request,
  UnauthorizedException,
} from '@nestjs/common';
import { Reflector } from '@nestjs/core';
import { JwtService } from '@nestjs/jwt';
import { jwtConstants } from '@/auth/constants';
import { AuthService } from '@/auth/auth.service';
@Injectable()
export class AuthGuardGuard implements CanActivate {
  constructor(
    private jwtService: JwtService,
    private reflector: Reflector,
    private authService: AuthService,
  ) {}
  async canActivate(context: ExecutionContext): Promise<boolean> {
    const skipAuth = this.reflector.get<boolean>(
      'skipAuth',
      context.getHandler(),
    ); // 返回 Boolean 值或 undefined,即是否跳过校验
    if (skipAuth) {
      return true;
    }
    const request: Request = context.switchToHttp().getRequest();
    const token = this.extractTokenFromHeader(request);
    if (!token) {
      throw new UnauthorizedException();
    }
    try {
      const payload = await this.jwtService.verifyAsync(token, {
        secret: jwtConstants.secret,
      });
      const isRemoteLogin = await this.authService.viladate(payload);
      console.log(isRemoteLogin, 'payload', payload);
      if (!isRemoteLogin) {
        throw new UnauthorizedException('异地登录');
      }
      // ???? We're assigning the payload to the request object here
      // so that we can access it in our route handlers
      request['user'] = payload;
    } catch {
      throw new UnauthorizedException();
    }
    return true;
  }
  private extractTokenFromHeader(request: any): string | undefined {
    const [type, token] = request.headers.authorization?.split(' ') ?? [];
    return type === 'Bearer' ? token : undefined;
  }
}
以上就是nestjs实现图形校验和单点登录的方法的简略介绍,当然详细使用上面的不同还得要大家自己使用过才领会。如果想了解更多,欢迎关注亿速云行业资讯频道哦!
免责声明:本站发布的内容(图片、视频和文字)以原创、转载和分享为主,文章观点不代表本网站立场,如果涉及侵权请联系站长邮箱:is@yisu.com进行举报,并提供相关证据,一经查实,将立刻删除涉嫌侵权内容。


