这篇文章将为大家详细讲解有关vue引入bootstrap的案例,小编觉得挺实用的,因此分享给大家做个参考,希望大家阅读完这篇文章后可以有所收获。
一、引入jquery
步骤:
1、安装jquery
$ npm install jquery --save-dev
2、在webpack.config.js 添加内容
+ const webpack = require("webpack");
module.exports = {
    entry: './index.js',
    output: {
        path: path.join(__dirname, './dist'),
        publicPath: '/dist/',
        filename: 'index.js'
    },
  + plugins: [
        new webpack.ProvidePlugin({
            jQuery: 'jquery',
            $: 'jquery'
        })
    ]
}
3、在入口文件index.js 里面添加内容
import $ from 'jquery' ;
4、测试一下是否安装成功,看看能否弹出'123'
<template>
  <div>
   Hello world!
  </div>
</template>

<script>
$(function () {
    alert(123);
 });
export default {
};
</script>
<style>
</style>
二、引入Bootstrap
1、安装Bootstrap
$ npm install --save-dev bootstrap
2、在入口文件index.js里引入相关
import './node_modules/bootstrap/dist/css/bootstrap.min.css';
import './node_modules/bootstrap/dist/js/bootstrap.min.js';
3、添加一段Bootstrap代码
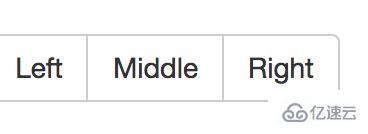
<div class="btn-group" role="group" aria-label="...">
      <button type="button" class="btn btn-default">Left</button>
      <button type="button" class="btn btn-default">Middle</button>
      <button type="button" class="btn btn-default">Right</button>
    </div>
4.运行,查看效果 这些按钮已经变成Bootstrap按钮组了
关于vue引入bootstrap的案例就分享到这里了,希望以上内容可以对大家有一定的帮助,可以学到更多知识。如果觉得文章不错,可以把它分享出去让更多的人看到。
免责声明:本站发布的内容(图片、视频和文字)以原创、转载和分享为主,文章观点不代表本网站立场,如果涉及侵权请联系站长邮箱:is@yisu.com进行举报,并提供相关证据,一经查实,将立刻删除涉嫌侵权内容。


