最近在学着用MarkDown写文档,对传图片深恶痛绝。准备自己用PowerShell造个轮子,还好提前搜索,找到了很多大哥的文档。
整个要做的事情流程是
- 鼠标复制个剪贴板图片
- 进入程序处理逻辑
- 处理剪贴板图片,保存成本地文件(png或者jpg)
- 上传到一个图床,获取图床的连接
- 把图床的链接构造成MarkDown要求的格式,塞回剪贴板。
- 回到MarkDown编辑器,直接剪贴。
目标是2阶段的内容,完全用脚本实现。
PowerShell对文件的操作进行创建修改是比较简单的,关键的地方在这里,用到了.net的方法直接去操作图片
$img = [Windows.Clipboard]::GetImage()根据这个关键字,我们看一下
Clipboard Class,里面有介绍到这个具体的方法
| GetImage() | Returns a BitmapSource object from the Clipboard that contains data in the Bitmap format. |
|---|
这里不光可以get,还可以set,不光是图片,文字音频都可以操作,算是针对剪贴板的一整套方案都有了。原文输出的格式是PNG的,我想试试如何输出JPG
刚才只是搞定了剪贴板的内容,接下来针对剪贴板数据,还需要保存成图片。
这个可以学习下
ImageCodecInfo.GetImageEncoders Method
#剪贴板直接保存png
Add-Type -Assembly PresentationCore
$img = [Windows.Clipboard]::GetImage()
if ($null -eq $img ) {
  Write-Host "剪贴板无图"
  Exit
}
$fcb = New-Object Windows.Media.Imaging.FormatConvertedBitmap($img, [Windows.Media.PixelFormats]::Rgb24, $null, 0)
$filename = ((Get-Date -f s) -replace '[-T:]', '')
$file = "c:/img/{0}.jpg" -f $filename
Write-Host ("`n 找到图片. {0}x{1} 像素,保存到{2}`n" -f $img.PixelWidth, $img.PixelHeight, $file)
$stream = [IO.File]::Open($file, "OpenOrCreate")
$encoder = New-Object Windows.Media.Imaging.PngBitmapEncoder
$encoder.Frames.Add([Windows.Media.Imaging.BitmapFrame]::Create($fcb))
$encoder.Save($stream)
# $stream.Dispose(){
Bitmap bmp1 = new Bitmap(typeof(Button), "Button.bmp");
bmp1.Save(@"c:\button.png", ImageFormat.Png);
}
#相对简单存储图片
#https://stackoverflow.com/questions/41665/bmp-to-jpg-png-in-c-sharp
#高级存储图片
#https://stackoverflow.com/questions/1484759/quality-of-a-saved-jpg-in-c-sharp
#官方例子
#https://docs.microsoft.com/en-us/dotnet/api/system.drawing.imaging.imagecodecinfo.getimageencoders?view=netframework-4.8
这里用到了一个技巧,就是 Add-Type -AssemblyName system.drawing
    Add-Type -AssemblyName system.drawing
    $Source=“C:\img\tt2.png”
    $imageFormat = "System.Drawing.Imaging.ImageFormat" -as [type]
    $image = [drawing.image]::FromFile($Source)
    # 创建新图像
    $NewImage = [System.Drawing.Bitmap]::new($Image.Width,$Image.Height)
    $NewImage.SetResolution($Image.HorizontalResolution,$Image.VerticalResolution)
    #根据新图像添加图形
    $Graphics = [System.Drawing.Graphics]::FromImage($NewImage)
    $Graphics.Clear([System.Drawing.Color]::White) # Set the color to white
    $Graphics.DrawImageUnscaled($image,0,0) # Add the contents of $image
    #存储
    $NewImage.Save("c:\img\vvv.jpg",$imageFormat::Jpeg)
Add-Type -AssemblyName System.Drawing
$img = New-Object System.Drawing.Bitmap(96, 96)
([System.Drawing.Graphics]::FromImage($img)).DrawImage([System.Drawing.Image]::FromFile((Get-Item C:\img\20191104135629.jpg)), 0, 0, 128, 128)
$jpegCodecInfo = [System.Drawing.Imaging.ImageCodecInfo]::GetImageEncoders() | where {$_.MimeType -eq 'image/jpeg'} $encoderParams = New-Object System.Drawing.Imaging.EncoderParameters(1)
$encoderParams.Param[0] = New-Object System.Drawing.Imaging.EncoderParameter([System.Drawing.Imaging.Encoder]::Quality, 90)
$img.Save("c:\img\bouska2.jpg", $jpegCodecInfo, $encoderParams)
$img.Dispose() github是个不要钱的图床,它支持用git来上传下载文件。
git config --global user.name "用户名"
git config --global user.email "用户邮箱"
cd ~/.ssh
ssh-keygen -t rsa -C "用户邮箱"
#上面这一步是生成一个证书,用来和github通信。打开这里,在右侧菜单栏中找到SSH and GPG keys,选择new SSH key,输入title,下面key的内容就是本机ssh key,也就是刚才生成的公钥,直接将id_rsa.pub中的内容粘贴过来就可以,然后点击下面的add SSH key即可完成。
输入这个命令cat id_rsa.pub,会出来类似下面的东西,复制出来,这就是密钥ssh-rsa AAAAB3NzaC1yc2EAAAADAQABAAABgQDRyubAWD7PfF+baIYAYVpdtTag7YZYdmCNz2mkoMjxkP6aN5C/Rnxxxxxxxxxxxxxxxxxxxxx5sSNV42co5S4Tc5W3eBB9bPBIoObqZ/g8JkCVrEIgUXTO1rn9p7h6erQ0/TcC/tIQ+HVxVx+mV7Y/wcYY05+Bbm8Cv60= a9y@live.cn
git remote add origin https://github.com/kukisama/kukisama.github.io加个本地目录
git add c:/gitupdate/picupdate/tt.txt上传本地文件
git commit -m "来个描述"
git push origin master拉回来
git pull origin master上传
前置条件准备的差不多了,可以看看完整代码。
#剪贴板直接保存png
Add-Type -Assembly PresentationCore
$img = [Windows.Clipboard]::GetImage()
if ($null -eq $img ) {
Write-Host "剪贴板无图"
}
$rootpath="C:/kukisama.github.io/picupdate/"
$fcb = New-Object Windows.Media.Imaging.FormatConvertedBitmap($img, [Windows.Media.PixelFormats]::Rgb24, $null, 0)
$filename = ((Get-Date -f s) -replace '[-T:]', '')
$file = "$rootpath{0}.png" -f $filename
Write-Host ("`n 找到图片. {0}x{1} 像素,保存到{2}`n" -f $img.PixelWidth, $img.PixelHeight, $file)
$stream = [IO.File]::Open($file, "OpenOrCreate")
$encoder = New-Object Windows.Media.Imaging.PngBitmapEncoder
$encoder.Frames.Add([Windows.Media.Imaging.BitmapFrame]::Create($fcb))
$encoder.Save($stream)
$stream.Dispose()
$rootpath="C:/kukisama.github.io/picupdate/"
cd $rootpath
cd ..
$lastfile=(ls $rootpath |sort LastWriteTime -Descending)[0].name
$MARKDOWNpic=New-Object System.Collections.ArrayList
$MARKDOWNpic.add('')|out-null
$MARKDOWNpic.Add(' ')|out-null
$MARKDOWNpic|Set-Clipboard
Write-Host "盆友,现在可以在MarkDown编辑器里面复制文本地址了"
git add $rootpath$lastfile
git commit -m $lastfile
git push -u origin master|Out-Null -ErrorAction SilentlyContinue
#git rm -r C:/kukisama.github.io/picupdate/
功能逻辑基本算是完工了,但是突然我搜到这么一篇神帖
看帖子的时间,2015年就已经有这逻辑了……………………
这里有一个原生命令,Set-Clipboard 以及Get-Clipboard
所以保存文件只需要两步
$PNGfile=Get-Clipboard -Format Image
$PNGfile.Save($file)
所以修改后的逻辑是这样的
$PNGfile=Get-Clipboard -Format Image
if ($PNGfile)
{
$rootpath="C:/kukisama.github.io/picupdate/"
$internetURL="http://github.ny9s.com/picupdate/"
$filename = ((Get-Date -f s) -replace '[-T:]', '')
$file = "$rootpath{0}.png" -f $filename
$PNGfile.Save($file)
cd $rootpath;cd ..
$MARKDOWNpic=New-Object System.Collections.ArrayList
#$MARKDOWNpic.add('')
#上面这个地址是github page的地址,但是实际来看,这个地址刷新的速度很慢,所以我直接取了文件的时间地址
$MARKDOWNpic.add('')
$MARKDOWNpic.Add(' ')
$MARKDOWNpic|Set-Clipboard
Write-Host "盆友,现在可以在MarkDown编辑器里面复制文本地址了"
git add $file
git commit -m $filename
git push
}还收获了一个小技巧:针对对象输出的屏幕字符,可以先转换成字符串,然后输出到剪贴板
dir | Out-String | Set-Clipboard github page的图床真的是不能明着说,反正国内就是不稳定。这里初步想法是使用最妥的FTP来完成图片的保存工作,自己架设一个FTP服务器,假设名字是 xxx.ny9s.com
实际对应web站点 ny9s.com/pic 实际要做的就是把图片传到FTP,然后生成对应的web端的字符串。 再次修改下脚本。
先照着Ubuntu16.04安装ftp服务器去配置一下
sudo apt-get install vsftpd
创建用户目录 sudo mkdir picupdate
创建用户 sudo useradd -d /var/www/html/picupdate -s /bin/bash uftp
sudo mkdir picupdate
sudo vi /etc/vsftpd.conf
#编辑vsftpd.conf文件

userlist_deny=NO
userlist_enable=YES
#允许登录的用户
userlist_file=/etc/allowed_users
seccomp_sandbox=NO
#默认ftp下载目录
local_root=/home/uftp/
local_enable=YES
#设置文件上传
write_enable=YES
#使用utf8
utf8_filesystem=YES
添加允许登录的用户
sudo gedit /etc/allowed_users

修改完之后保存,然后可以重启服务
sudo /etc/init.d/vsftpd start
sudo /etc/init.d/vsftpd stop
sudo /etc/init.d/vsftpd restart

 如果是开被动模式的花,
打开xxx/vsftpd/vsftpd.conf,在末尾添加:

pasv_enable=YES   //开启PASV模式
pasv_min_port=40000   //最小端口号
pasv_max_port=40000   //最大端口号
pasv_promiscuous=YES

再配置下权限
sudo chown uftp:uftp /var/www/html/picupdate/
# create the FtpWebRequest and configure it
$ftp = [System.Net.FtpWebRequest]::Create("ftp://localhost/me.png")
$ftp = [System.Net.FtpWebRequest]$ftp
$ftp.Method = [System.Net.WebRequestMethods+Ftp]::UploadFile
$ftp.Credentials = new-object System.Net.NetworkCredential("anonymous","anonymous@localhost")
$ftp.UseBinary = $true
$ftp.UsePassive = $true
# read in the file to upload as a byte array
$content = [System.IO.File]::ReadAllBytes("C:\me.png")
$ftp.ContentLength = $content.Length
# get the request stream, and write the bytes into it
$rs = $ftp.GetRequestStream()
$rs.Write($content, 0, $content.Length)
# be sure to clean up after ourselves
$rs.Close()
$rs.Dispose()
sudo vi /etc/vsftpd.conf
sudo vi /etc/services
sudo /etc/init.d/vsftpd restart

vsftpd启动后,默认的ftp端口是21,现在我想把ftp端口改成 801 ,修改后能保证用户上传下载不受影响
1.编辑 /etc/vsftpd/vsftpd.conf 文件,在该配置文件中添加此行:listen_port=801
2.编辑 /etc/services 文件,将其中的
ftp 21/tcp 改为 ftp 801/tcp
ftp 21/udp改为 ftp 801/udp
3.执行 /etc/init.d/vsftpd restart 重新启动 vsftpd 服务。启动完成后可以使用 netstat -ntpl | grep vsftpd 命令可以查看到系统现
监听的 vsftpd 的端口为 801
4.使用 lftp 192.168.0.1:801(192.168.0.1 是 vsftpd 服务器的地址 ),这样就可以访问到 ftp 服务器了。

开启防火墙
ufw enable
关闭防火墙
ufw disable
然而上面的问题虽然看起来步骤应该很详细了,但是问题是在我的环境配置失败了……
花了很多时间在FTP上,开始继续寻找解决方案。经过测试,最简单的方法是安装Posh-SSH模块,用SSH的方式去上传下载文件。这个模块在github可以下载到。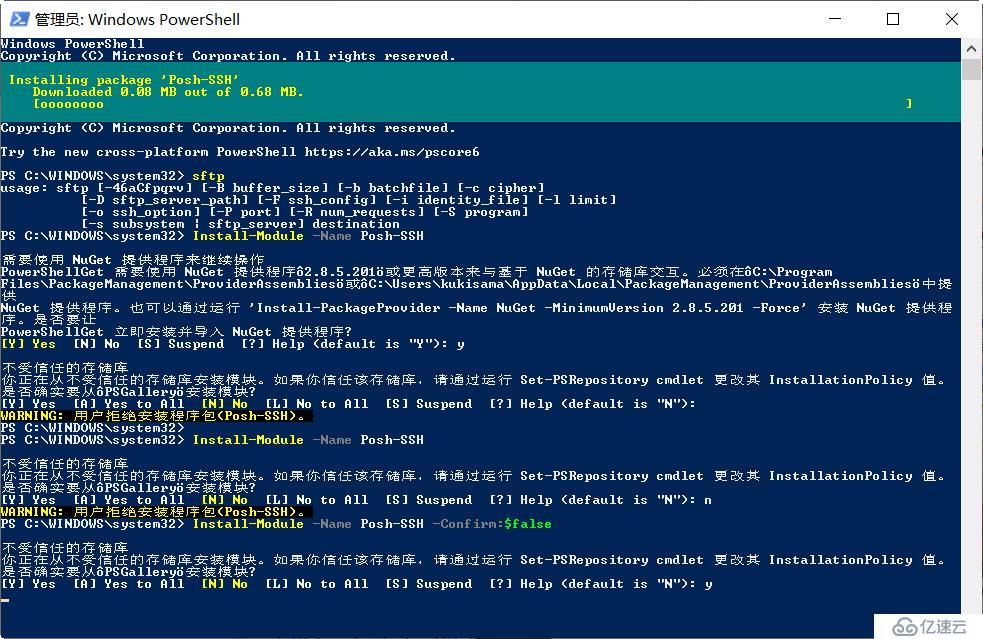
另外也可以使用Install-Module -Name Posh-SSH -RequiredVersion 2.0.2直接安装,我觉得优点如下:
$cred=Get-Credential
#同意KEY,从远程下载文件
Get-SCPFile -ComputerName "ny9s.com" -Port 12121 -Credential $cred  -RemoteFile "/home/kukisama/IOid.jpg" -LocalFile 'C:\img\ppp.jpg' -AcceptKey
#上传
 Set-SCPFile -ComputerName "ny9s.com" -Port 12121 -Credential $cred  -Remotepath "/home/kukisama" -LocalFile 'C:\img\ppp.jpg'
如果是在线安装的话,模块会位于C:\Program Files\WindowsPowerShell\Modules\Posh-SSH如果不要了,直接删除就相当于卸载。
整体目录有2.26MB,有500K的帮助文件,测试后,发现删除没影响(en-US目录)。
为了静默连接SSH,所以用到一个密码逻辑,它可将所需要用到的$cred加密放在本地文件夹中,使用的时候会比较简单
#步骤1、将密码加密后保持到c:\xxx.txt。
$mysecret="xxxxxx" #此处放密码
$mysecret|ConvertTo-SecureString -AsPlainText -Force |ConvertFrom-SecureString|Out-File C:\picupdate\pass.txt -Encoding utf8
#步骤2、将密文密码转换成powershell可以使用的格式
$securestring=(Get-Content C:\picupdate\pass.txt).ToString() | ConvertTo-SecureString
$ptr = [System.Runtime.InteropServices.Marshal]::SecureStringToGlobalAllocUnicode($secureString)
$serverpass = [System.Runtime.InteropServices.Marshal]::PtrToStringUni($ptr)
$Password = ConvertTo-SecureString $serverpass -AsPlainText –Force
#步骤3、使用
$UserName = "admin"   #定义管理员账户名称
$cred = New-Object System.Management.Automation.PSCredential($UserName,$Password) $PNGfile=Get-Clipboard -Format Image
if ($PNGfile)
{$start=Get-Date
$rootpath="C:/picupdate/"
$internetURL="http://ny9s.com/picupdate/"
$filename = ((Get-Date -f s) -replace '[-T:]', '')
$file = "$rootpath{0}.png" -f $filename
$PNGfile.Save($file)
cd $rootpath
$MARKDOWNpic=New-Object System.Collections.ArrayList
$MARKDOWNpic.add('')
$MARKDOWNpic.Add(' ')
$MARKDOWNpic|Set-Clipboard
Write-Host "盆友,现在可以在MarkDown编辑器里面复制文本地址了"
Import-Module D:\Posh-SSH\Posh-SSH.psd1 #注意模块,我这里是没有安装到系统中使用的
$securestring=(Get-Content C:\picupdate\pass.txt).ToString() | ConvertTo-SecureString
$ptr = [System.Runtime.InteropServices.Marshal]::SecureStringToGlobalAllocUnicode($secureString)
$serverpass = [System.Runtime.InteropServices.Marshal]::PtrToStringUni($ptr)
$Password = ConvertTo-SecureString $serverpass -AsPlainText –Force
$UserName = "kukisama" #定义管理员账户名称
$cred = New-Object System.Management.Automation.PSCredential($UserName,$Password)
#上传
Set-SCPFile -ComputerName "ny9s.com" -Port 62222 -Credential $cred -Remotepath "/var/www/html/picupdate" -LocalFile $($rootpath+$filename+'.png')
$end=Get-Date
echo $('消耗时间'+($end-$start).TotalSeconds)
}
考虑到图片上传怎么样都需要个几秒钟,所以逻辑上可以先生成MarkDown所需要的字符串,然后定期去上传,比如一分钟或者十分钟一次。这样体验上会好一些。
当然,上传完毕也要做一些标志位的检测,比如上传成功后,再也不会上传,记录上传时间,消耗时间什么的
免责声明:本站发布的内容(图片、视频和文字)以原创、转载和分享为主,文章观点不代表本网站立场,如果涉及侵权请联系站长邮箱:is@yisu.com进行举报,并提供相关证据,一经查实,将立刻删除涉嫌侵权内容。


