小编这次要给大家分享的是docker如何安装Elasticsearch7.6集群并设置密码,文章内容丰富,感兴趣的小伙伴可以来了解一下,希望大家阅读完这篇文章之后能够有所收获。
Elasticsearch从6.8开始, 允许免费用户使用X-Pack的安全功能, 以前安装es都是裸奔。接下来记录配置安全认证的方法。
为了简化物理安装过程,我们将使用docker安装我们的服务。
一些基础配置
es需要修改linux的一些参数。
设置vm.max_map_count=262144
sudo vim /etc/sysctl.conf
vm.max_map_count=262144
不重启, 直接生效当前的命令
sysctl -w vm.max_map_count=262144
es的data和logs目录需要给1000的用户授权, 我们假设安装3个实力的es集群,先创建对应的数据存储文件
mkdir -p es01/data
mkdir -p es01/logs
mkdir -p es02/data
mkdir -p es02/logs
mkdir -p es03/data
mkdir -p es03/logs

## es的用户id为1000,这里暂且授权给所有人好了
sudo chmod 777 es* -R
关于版本和docker镜像
Elasticsearch分几种licenses,其中Open Source和Basic是免费的, 而在6.8之后安全功能才开始集成在es的Basic授权上。
Basic对应docker镜像为
docker pull docker.elastic.co/elasticsearch/elasticsearch:7.6.2
同时dockerhub同步为elasticsearch. 我们直接拉取elasticsearch:7.6.2就好。
开始
安装文件均放在GitHub: https://github.com/Ryan-Miao/docker-china-source/tree/master/docker-elasticsearch
首先,创建docker-compose.yml
version: '2.2'
services:
 es01:
  image: elasticsearch:7.6.2
  container_name: es01
  environment:
   - node.name=es01
   - cluster.name=es-docker-cluster
   - discovery.seed_hosts=es02,es03
   - cluster.initial_master_nodes=es01,es02,es03
   - bootstrap.memory_lock=true
   - "ES_JAVA_OPTS=-Xms512m -Xmx512m"
  ulimits:
   memlock:
    soft: -1
    hard: -1
  volumes:
   - ./es01/data:/usr/share/elasticsearch/data
   - ./es01/logs:/usr/share/elasticsearch/logs
   - ./elasticsearch.yml:/usr/share/elasticsearch/config/elasticsearch.yml
   - ./elastic-certificates.p12:/usr/share/elasticsearch/config/elastic-certificates.p12
  ports:
   - 9200:9200
  networks:
   - elastic

 es02:
  image: elasticsearch:7.6.2
  container_name: es02
  environment:
   - node.name=es02
   - cluster.name=es-docker-cluster
   - discovery.seed_hosts=es01,es03
   - cluster.initial_master_nodes=es01,es02,es03
   - bootstrap.memory_lock=true
   - "ES_JAVA_OPTS=-Xms512m -Xmx512m"
  ulimits:
   memlock:
    soft: -1
    hard: -1
  volumes:
   - ./es02/data:/usr/share/elasticsearch/data
   - ./es02/logs:/usr/share/elasticsearch/logs
   - ./elasticsearch.yml:/usr/share/elasticsearch/config/elasticsearch.yml
   - ./elastic-certificates.p12:/usr/share/elasticsearch/config/elastic-certificates.p12
  ports:
   - 9201:9200
  networks:
   - elastic

 es03:
  image: elasticsearch:7.6.2
  container_name: es03
  environment:
   - node.name=es03
   - cluster.name=es-docker-cluster
   - discovery.seed_hosts=es01,es02
   - cluster.initial_master_nodes=es01,es02,es03
   - bootstrap.memory_lock=true
   - "ES_JAVA_OPTS=-Xms512m -Xmx512m"
  ulimits:
   memlock:
    soft: -1
    hard: -1
  volumes:
   - ./es03/data:/usr/share/elasticsearch/data
   - ./es03/logs:/usr/share/elasticsearch/logs
   - ./elasticsearch.yml:/usr/share/elasticsearch/config/elasticsearch.yml
   - ./elastic-certificates.p12:/usr/share/elasticsearch/config/elastic-certificates.p12
  ports:
   - 9202:9200
  networks:
   - elastic

 kib01:
  depends_on:
   - es01
  image: kibana:7.6.2
  container_name: kib01
  ports:
   - 5601:5601
  environment:
   ELASTICSEARCH_URL: http://es01:9200
   ELASTICSEARCH_HOSTS: http://es01:9200
  volumes:
   - ./kibana.yml:/usr/share/kibana/config/kibana.yml
  networks:
   - elastic

networks:
 elastic:
  driver: bridge
关于elasticsearch.yml
内容如下
network.host: 0.0.0.0
xpack.security.enabled: true
xpack.security.transport.ssl.enabled: true
xpack.security.transport.ssl.keystore.type: PKCS12
xpack.security.transport.ssl.verification_mode: certificate
xpack.security.transport.ssl.keystore.path: elastic-certificates.p12
xpack.security.transport.ssl.truststore.path: elastic-certificates.p12
xpack.security.transport.ssl.truststore.type: PKCS12

xpack.security.audit.enabled: true
关于证书elastic-certificates.p12
es提供了生成证书的工具elasticsearch-certutil,我们可以在docker实例中生成它,然后复制出来,后面统一使用。
首先运行es实例
sudo docker run -dit --name=es elasticsearch:7.6.2 /bin/bash
进入实例内部
sudo docker exec -it es /bin/bash
生成ca: elastic-stack-ca.p12
[root@25dee1848942 elasticsearch]# ./bin/elasticsearch-certutil ca
This tool assists you in the generation of X.509 certificates and certificate
signing requests for use with SSL/TLS in the Elastic stack.

The 'ca' mode generates a new 'certificate authority'
This will create a new X.509 certificate and private key that can be used
to sign certificate when running in 'cert' mode.

Use the 'ca-dn' option if you wish to configure the 'distinguished name'
of the certificate authority

By default the 'ca' mode produces a single PKCS#12 output file which holds:
  * The CA certificate
  * The CA's private key

If you elect to generate PEM format certificates (the -pem option), then the output will
be a zip file containing individual files for the CA certificate and private key

Please enter the desired output file [elastic-stack-ca.p12]:
Enter password for elastic-stack-ca.p12 :
再生成cert: elastic-certificates.p12
[root@25dee1848942 elasticsearch]# ./bin/elasticsearch-certutil cert --ca elastic-stack-ca.p12
This tool assists you in the generation of X.509 certificates and certificate
signing requests for use with SSL/TLS in the Elastic stack.

The 'cert' mode generates X.509 certificate and private keys.
这个生成elastic-certificates.p12 就是我们需要使用的。
复制出证书, ctrl+d退出容器内部
sudo docker cp es:/usr/share/elasticsearch/elastic-certificates.p12 .
# 关闭这个容器
sudo docker kill es
sudo docker rm es
如此获取了证书。
生成密码
我们首先要启动es集群,去里面生成密码。
sudo docker-compose up
然后进入其中一台
sudo docker exec -it es01 /bin/bash
生成密码用auto, 自己设置用 interactive
[root@cfeeab4bb0eb elasticsearch]# ./bin/elasticsearch-setup-passwords -h
Sets the passwords for reserved users

Commands
--------
auto - Uses randomly generated passwords
interactive - Uses passwords entered by a user

Non-option arguments:
command

Option       Description
------       -----------
-E <KeyValuePair> Configure a setting
-h, --help     Show help
-s, --silent    Show minimal output
-v, --verbose   Show verbose output


[root@cfeeab4bb0eb elasticsearch]# ./bin/elasticsearch-setup-passwords auto
Initiating the setup of passwords for reserved users elastic,apm_system,kibana,logstash_system,beats_system,remote_monitoring_user.
The passwords will be randomly generated and printed to the console.
Please confirm that you would like to continue [y/N]y


Changed password for user apm_system
PASSWORD apm_system = YxVzeT9B2jEDUjYp66Ws

Changed password for user kibana
PASSWORD kibana = 8NnThbj0N02iDaTGhidU

Changed password for user logstash_system
PASSWORD logstash_system = 9nIDGe7KSV8SQidSk8Dj

Changed password for user beats_system
PASSWORD beats_system = qeuVaf1VEALpJHfEUOjJ

Changed password for user remote_monitoring_user
PASSWORD remote_monitoring_user = DtZCrCkVTZsinRn3tW3D

Changed password for user elastic
PASSWORD elastic = q5f2qNfUJQyvZPIz57MZ
使用密码
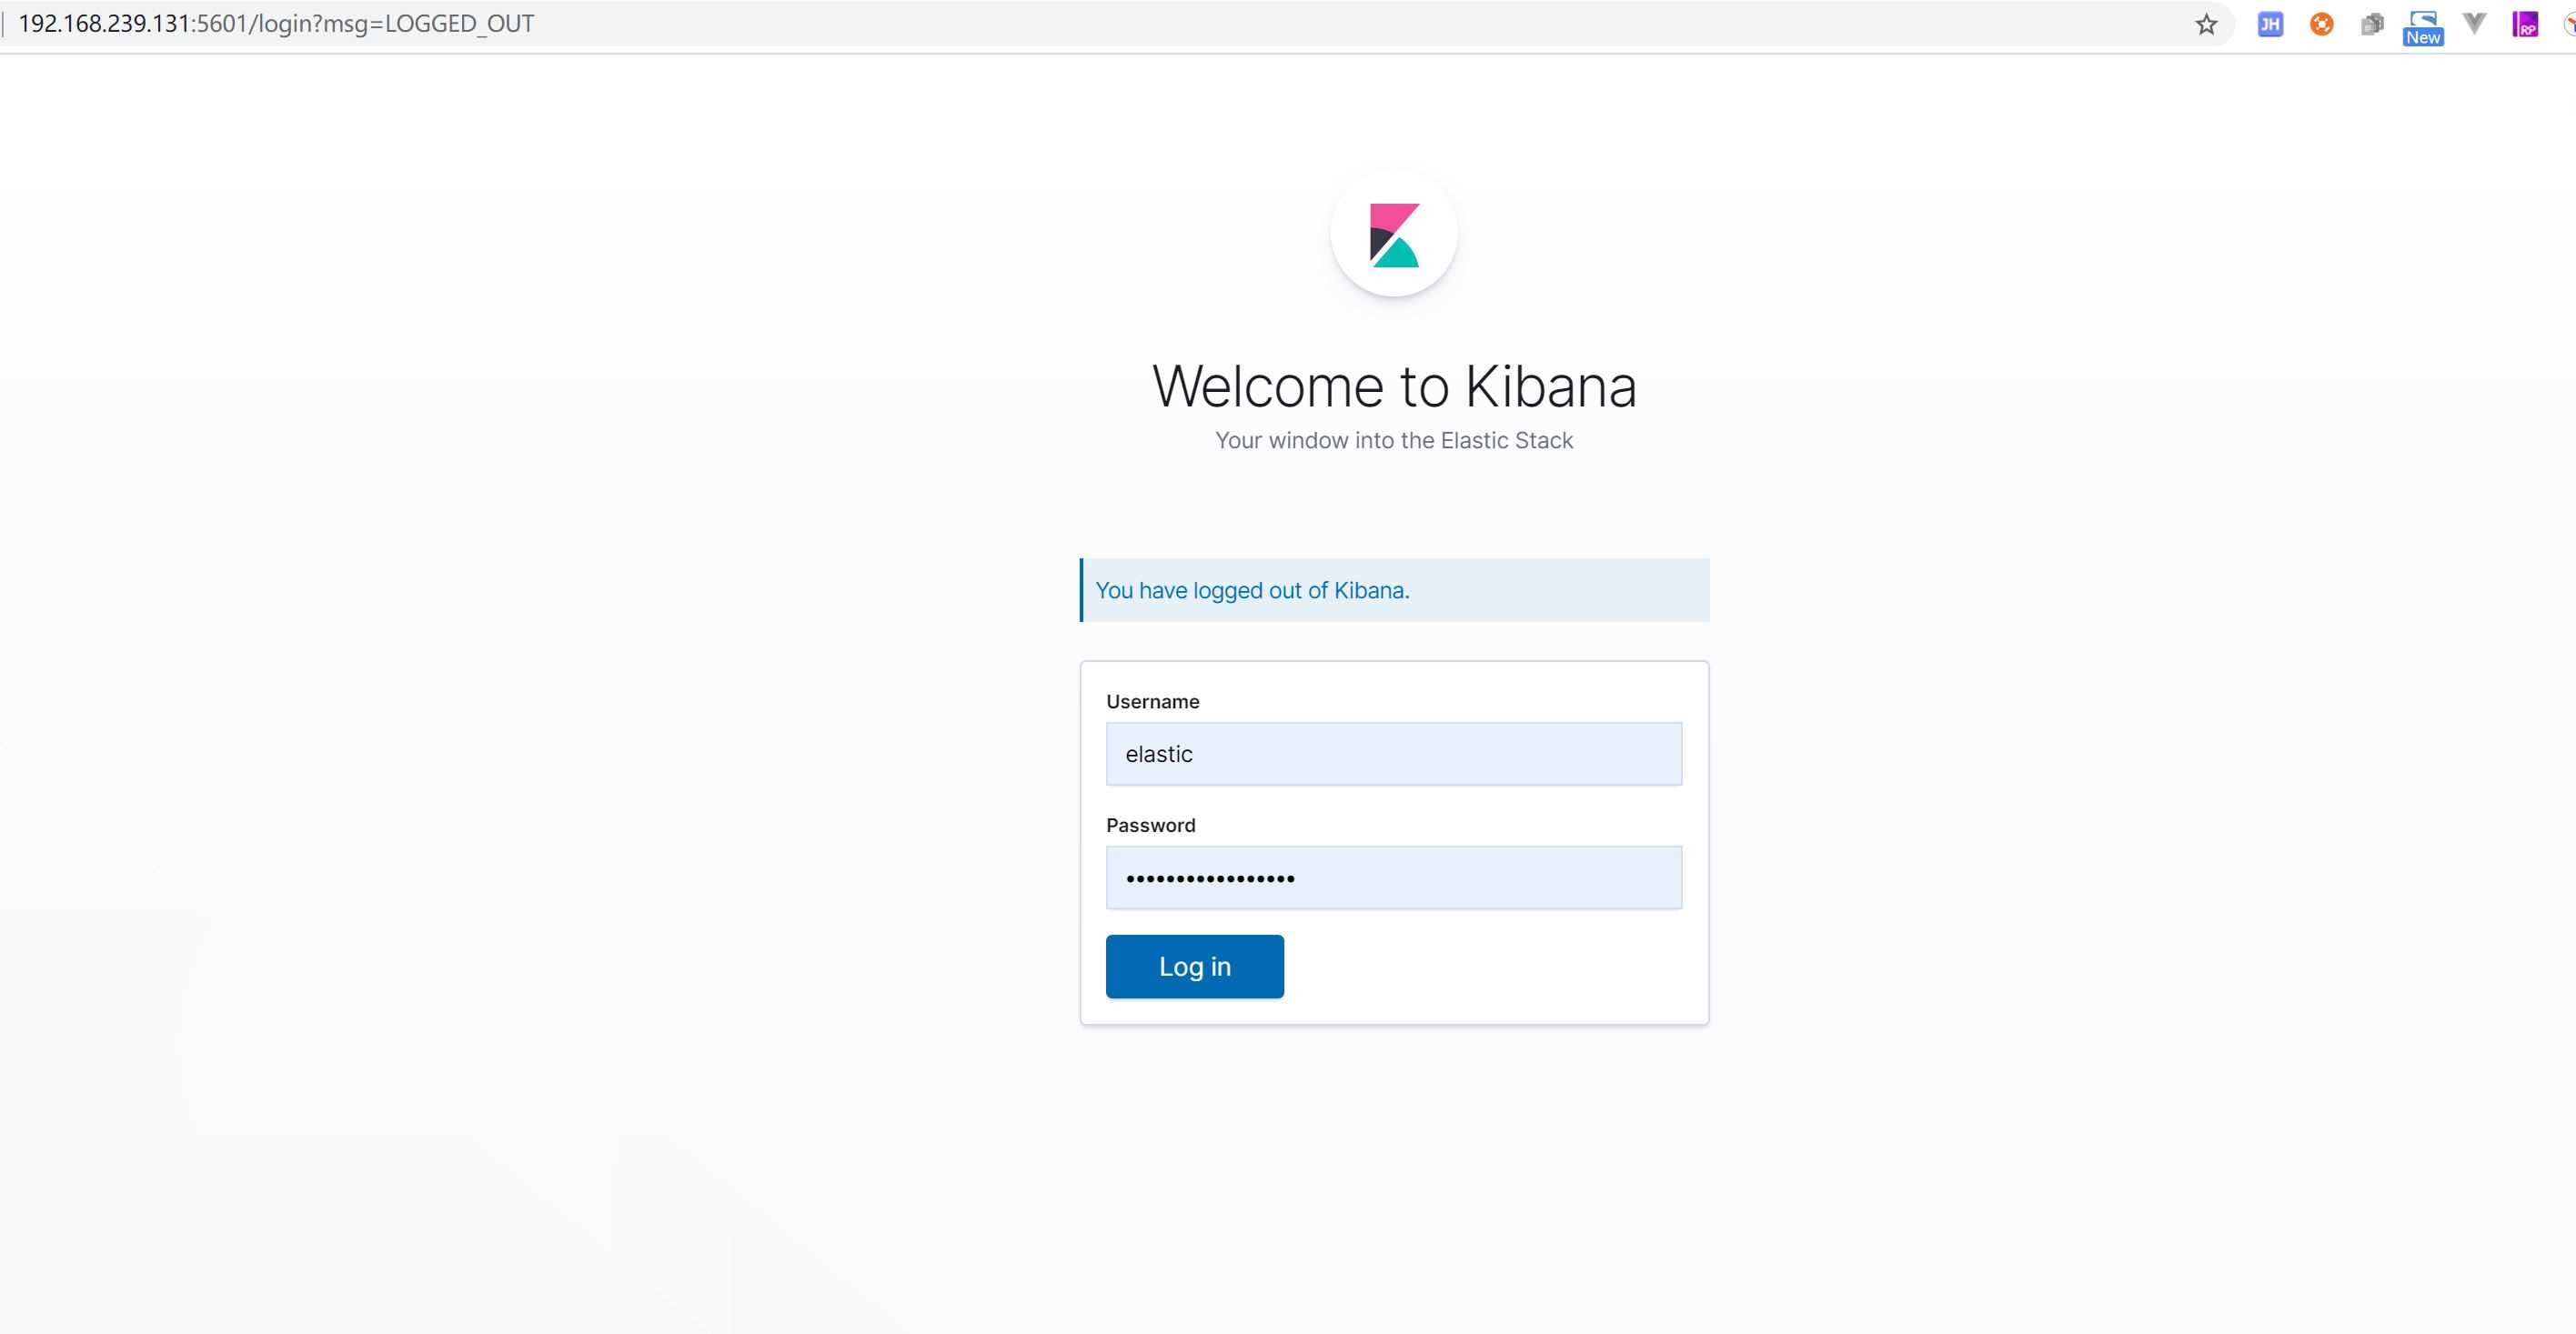
浏览器访问localhost:9200/9201/9202 需要输入账号
输入对应的elastic/password就好
浏览器访问localhost:5601
忘记密码
如果生成后忘记密码了怎么办, 可以进入机器去修改。
进入es的机器
sudo docker exec -it es01 /bin/bash
创建一个临时的超级用户RyanMiao
./bin/elasticsearch-users useradd ryan -r superuser
Enter new password:
ERROR: Invalid password...passwords must be at least [6] characters long
[root@cfeeab4bb0eb elasticsearch]# ./bin/elasticsearch-users useradd ryan -r superuser
Enter new password:
Retype new password:
用这个用户去修改elastic的密码:
curl -XPUT -u ryan:ryan123 http://localhost:9200/_xpack/security/user/elastic/_password -H "Content-Type: application/json" -d '
{
 "password": "q5f2qNfUJQyvZPIz57MZ"
}'
看完这篇关于docker如何安装Elasticsearch7.6集群并设置密码的文章,如果觉得文章内容写得不错的话,可以把它分享出去给更多人看到。
免责声明:本站发布的内容(图片、视频和文字)以原创、转载和分享为主,文章观点不代表本网站立场,如果涉及侵权请联系站长邮箱:is@yisu.com进行举报,并提供相关证据,一经查实,将立刻删除涉嫌侵权内容。


