这篇文章为大家带来有关jumpserver的安装和使用教程。文中详细介绍了jumpserver的简介、jumpserver的安装部署以及jumpserver的简单使用,感兴趣的小伙伴可以参考下。
在特定网络环境中(如内网和外网),为了保证公司网络中的服务器数据不受外界的和破坏,运用各种技术手段收集和监控公司服务器的状态,安全时间、以便集中报警,并且及时处理。
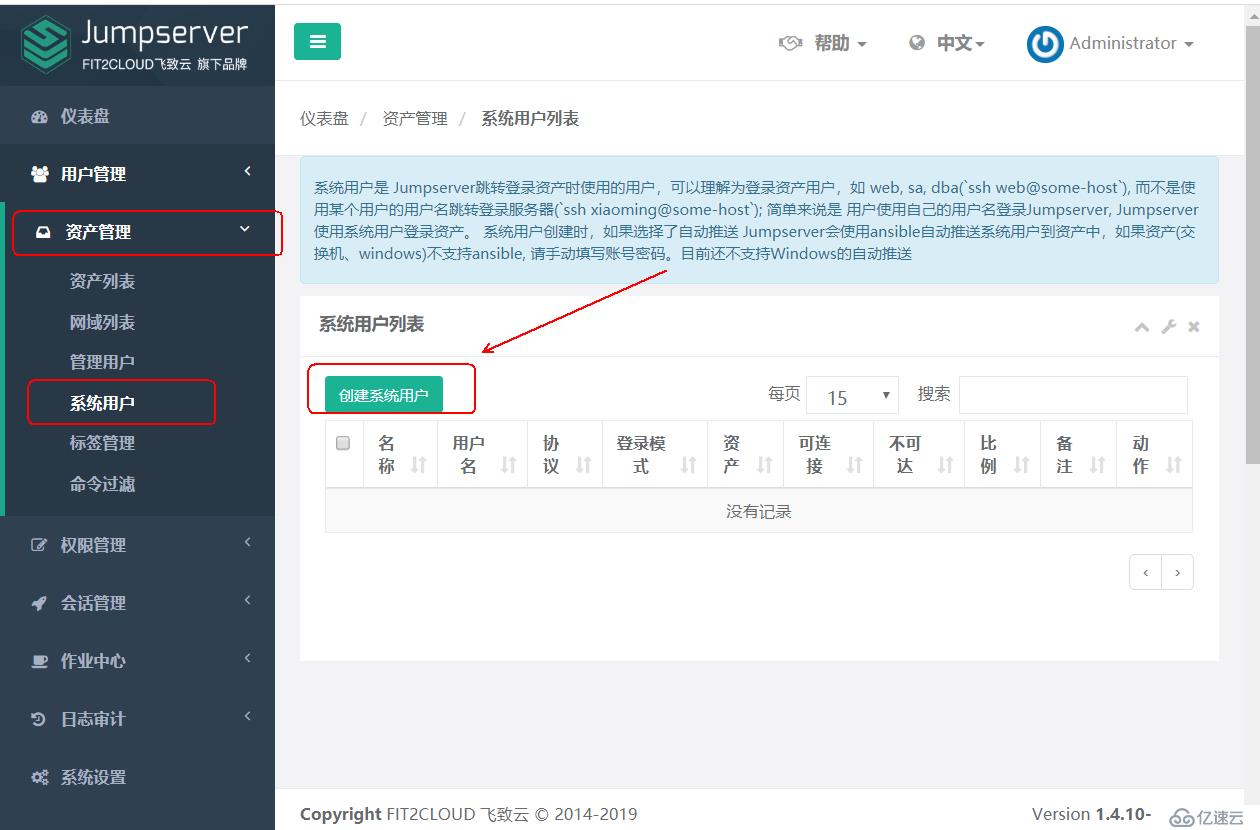
我们又把堡垒机叫做跳板机,简易的跳板机功能简单,主要核心功能是远程登陆服务器和日志审计比较优秀的开源软件jumpserver,功能齐全如: 认证、授权、审计、自动化、资产管理(内网服务器资源分配)等。
1.完全开源;
2.Python编写,易于二次开发
3.实现跳板机的基本功能、认证、授权、审计
4.集成了Ansiable,实现批量操作命令等
5.支持web终端
6.Bootstrap编写,界面美观
7.自动收集硬件信息
8.录像回放、命令搜索、实时监控

用户通过浏览器访问到nginx代理服务器页面,nginx服务器在jump架构中是作为一台代理服务器,用来代理jumpserver程序、coco程序、luna程序、guacamole程序的web页面,方便用户使用,如果不采用nginx做代理服务器的话,用户访问页面时比较麻烦(如coco程序需要用到8080端口、guncamole需要别的端口,使用起来不方便,而且后续的页面跳转有可能会导致not found),nginx调取luna程序设置终端采用ssh协议连接后端资产(后端服务器)。
Jumpserver:jumpserver的管理后台
Coco:实现了ssh server 和 web终端的组件,提供ssh和websocket接口
Luna:是web Terminal 的前端(用来展示给用户和与用户进行交互)前端页面都是由该项目完成的
Guacamole:apache的跳板机项目,jumpserver使用其组件实现RDP(远程桌面)功,能,jumpserver在guacamole中添加额外插件,不修改其本身,实现调用
下载软件包
安装硬件介绍centos 7 4G以上内存 至少双核处理器
安装依赖环境:python3.6以上版本 后端数据库 redis
[root@localhost ~]# localedef -c -f UTF-8 -i zh_CN zh_CN.UTF-8 // -c 强制执行 -f 指定设置的字符集 -i 从那个源 [root@localhost ~]# export LC_ALL=zh_CN.UTF-8 // 将字符集设置成环境变量 [root@localhost ~]# echo 'LANG="zh_CN.UTF-8"' > /etc/locale.conf // 加入到字符配置文件[root@bogon ~]# yum -y install wget sqlite-devel xz gcc automake zlib-devel openssl-devel epel-release git [root@bogon ~]# tar xf Python-3.6.1.tar.xz -C /usr/src/ [root@bogon ~]# cd /usr/src/Python-3.6.1/ [root@bogon Python-3.6.1]# ./configure && make && make install[root@bogon ~]# cd /opt/ [root@bogon opt]# python3 -m venv py3 // venv python中的虚拟环境 py3虚拟环境名称 [root@bogon opt]# source /opt/py3/bin/activate (py3) [root@bogon opt]# (py3) [root@bogon opt]# cd /opt/ (py3) [root@bogon opt]# git clone https://github.com/kennethreitz/autoenv.git //将github网站的项目克隆到本地 项目路径https://github.com/kennethreitz/autoenv 正克隆到 'autoenv'... remote: Enumerating objects: 16, done. remote: Counting objects: 100% (16/16), done. remote: Compressing objects: 100% (13/13), done. remote: Total 688 (delta 5), reused 9 (delta 3), pack-reused 672 接收对象中: 100% (688/688), 111.91 KiB | 108.00 KiB/s, done. 处理 delta 中: 100% (362/362), done. (py3) [root@bogon opt]# echo 'source /opt/autoenv/activate.sh' >> /root/.bashrc (py3) [root@bogon opt]# source ~/.bashrc (py3) [root@bogon opt]# (py3) [root@bogon requirements]# unzip jumpserver.zip (py3) [root@bogon requirements]# echo "source /opt/py3/bin/activate" > /opt/jumpserver/.env (py3) [root@bogon requirements]# cd jumpserver/ //安装依赖包rpm //输入y (py3) [root@bogon requirements]# yum -y install $(cat rpm_requirements.txt) (py3) [root@bogon requirements]# pip install --upgrade pip Collecting pip Downloading https://files.pythonhosted.org/packages/54/0c/d01aa759fdc501a58f431eb594a17495f15b88da142ce14b5845662c13f3/pip-20.0.2-py2.py3-none-any.whl (1.4MB) 100% |████████████████████████████████| 1.4MB 883kB/s Installing collected packages: pip Found existing installation: pip 9.0.1 Uninstalling pip-9.0.1: Successfully uninstalled pip-9.0.1 Successfully installed pip-20.0.2 (py3) [root@bogon requirements]# pip install wheel Collecting wheel Downloading wheel-0.34.2-py2.py3-none-any.whl (26 kB) Installing collected packages: wheel Successfully installed wheel-0.34.2 (py3) [root@bogon requirements]# pip install -r requirements.txt -i https://mirrors.aliyun.com/pypi/simple/ //pip install <安装包名> -r 将文件里面的内容当作安装包 -i 指定连接下载安装包 Pip是python中安装软件包的命令,相当于yum命令 (安装需要等待几分钟)(py3) [root@bogon requirements]# yum -y install mariadb mariadb-devel mariadb-server (py3) [root@bogon requirements]# systemctl start mariadb (py3) [root@bogon requirements]# mysqladmin -u root password 1234.com (py3) [root@bogon requirements]# mysql -u root -p1234.com //登陆数据库创建jumpserver库用来存放jumpserver数据 MariaDB [(none)]> create database jumpserver default charset 'utf8' ; //创建一个名为jumpserver的数据库 MariaDB [(none)]> grant all on jumpserver.* to jumpserver@127.0.0.1 identified by '1234.com'; //jumpserver对数据库拥有所有权限,密码为123.com MariaDB [(none)]> flush privileges; MariaDB [(none)]> exit (py3) [root@bogon requirements]# ss -lnt | grep 3306 LISTEN 0 50 *:3306 *:* (py3) [root@bogon requirements]# yum -y install redis (py3) [root@bogon requirements]# systemctl start redis (py3) [root@bogon requirements]# netstat -anpt | grep redis tcp 0 0 127.0.0.1:6379 0.0.0.0:* LISTEN 75890/redis-server (py3) [root@bogon requirements]# cd /opt/jumpserver/ (py3) [root@bogon jumpserver]# cp config_example.yml config.yml //生成SECRET_KEY写入配置文件 (py3) [root@bogon jumpserver]# cat /dev/urandom | tr -dc A-Za-z0-9 | head -c 50 //把这个命令生成得码复制到配置文件 (py3) [root@bogon jumpserver]# cat /dev/urandom | tr -dc A-Za-z0-9 | head -c 16 //把这个命令生成得码复制到配置文件


(py3) [root@bogon requirements]# unzip coco.zip (py3) [root@bogon requirements]# cd coco (py3) [root@bogon requirements]# echo "source /opt/py3/bin/activate" > /opt/coco/.env (py3) [root@bogon requirements]# cd requirements/ (py3) [root@bogon requirements]# yum -y install $(cat rpm_requirements.txt) (py3) [root@bogon requirements]# pip install -r requirements.txt (py3) [root@bogon requirements]# cd .. (py3) [root@bogon coco]# cp config_example.yml config.yml (py3) [root@bogon coco]# vim /opt/jumpserver/config.yml //把这个文件中得16位码复制上 (py3) [root@bogon coco]# vim config.yml 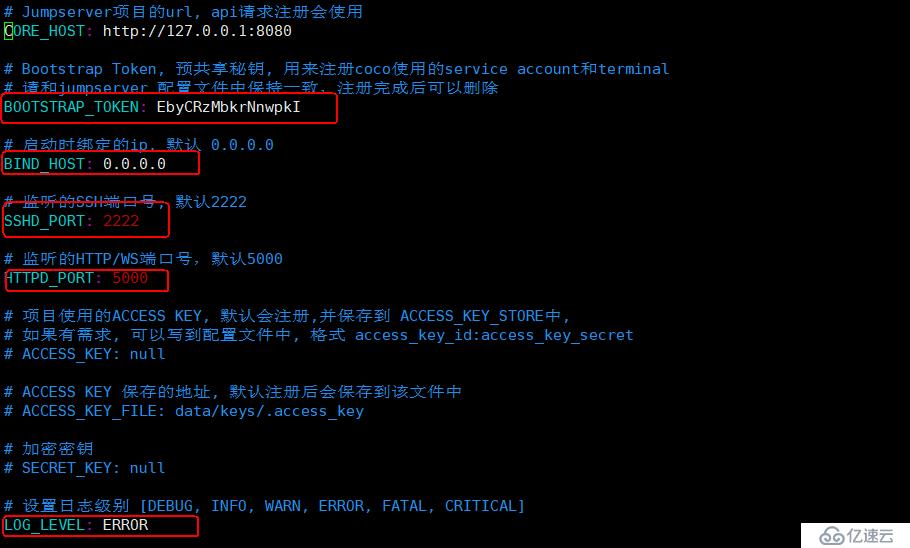
(py3) [root@bogon coco]# ./cocod start -d Use eventlet dispatch Start coco process (py3) [root@bogon coco]# netstat -anpt | grep 2222 tcp 0 0 0.0.0.0:2222 0.0.0.0:* LISTEN 33439/python3 (py3) [root@jumpserver ~]# yum install -y yum-utils device-mapper-persistent-data lvm2 (py3) [root@jumpserver ~]# yum-config-manager --add-repo http://mirrors.aliyun.com/docker-ce/linux/centos/docker-ce.repo (py3) [root@jumpserver ~]# yum makecache fast (py3) [root@jumpserver ~]# yum -y install docker-ce (py3) [root@jumpserver ~]# systemctl start docker (py3) [root@jumpserver ~]# docker load < guacamole.tar (py3) [root@jumpserver ~]# docker run --name jms_guacamole -d \ -p 8081:8080 -v /opt/guacamole/key:/config/guacamole/key \ -e JUMPSERVER_KEY_DIR=/config/guacamole/key \ -e JUMPSERVER_SERVER=http://192.168.1.10:8080 \ jumpserver/guacamole:latest (py3) [root@jumpserver ~]# ss -lnt | grep 8081 LISTEN 0 128 :::8081 :::* (py3) [root@jumpserver ~]# tar zxf luna.tar.gz -C /opt(py3) [root@jumpserver ~]# tar zxf nginx-1.2.4.tar.gz -C /usr/src (py3) [root@jumpserver ~]# cd /usr/src/nginx-1.2.4/ (py3) [root@jumpserver nginx-1.2.4]# ./configure && make && make install (py3) [root@jumpserver nginx-1.2.4]# ln -sf /usr/local/nginx/sbin/nginx /usr/local/bin/ (py3) [root@jumpserver nginx-1.2.4]# cd /usr/local/nginx/conf/ (py3) [root@jumpserver conf]# cp nginx.conf nginx.conf.bak (py3) [root@jumpserver conf]# mv /root/nginx.conf . mv:是否覆盖"./nginx.conf"? y //博文开头得软件包中得nginx.conf复制到这个nginx主配置文件中就可以了 (py3) [root@jumpserver conf]# nginx -t nginx: the configuration file /usr/local/nginx/conf/nginx.conf syntax is ok nginx: configuration file /usr/local/nginx/conf/nginx.conf test is successful (py3) [root@jumpserver conf]# nginx (py3) [root@jumpserver conf]# ss -lnt | grep -w 80 LISTEN 0 128 *:80 *: ``
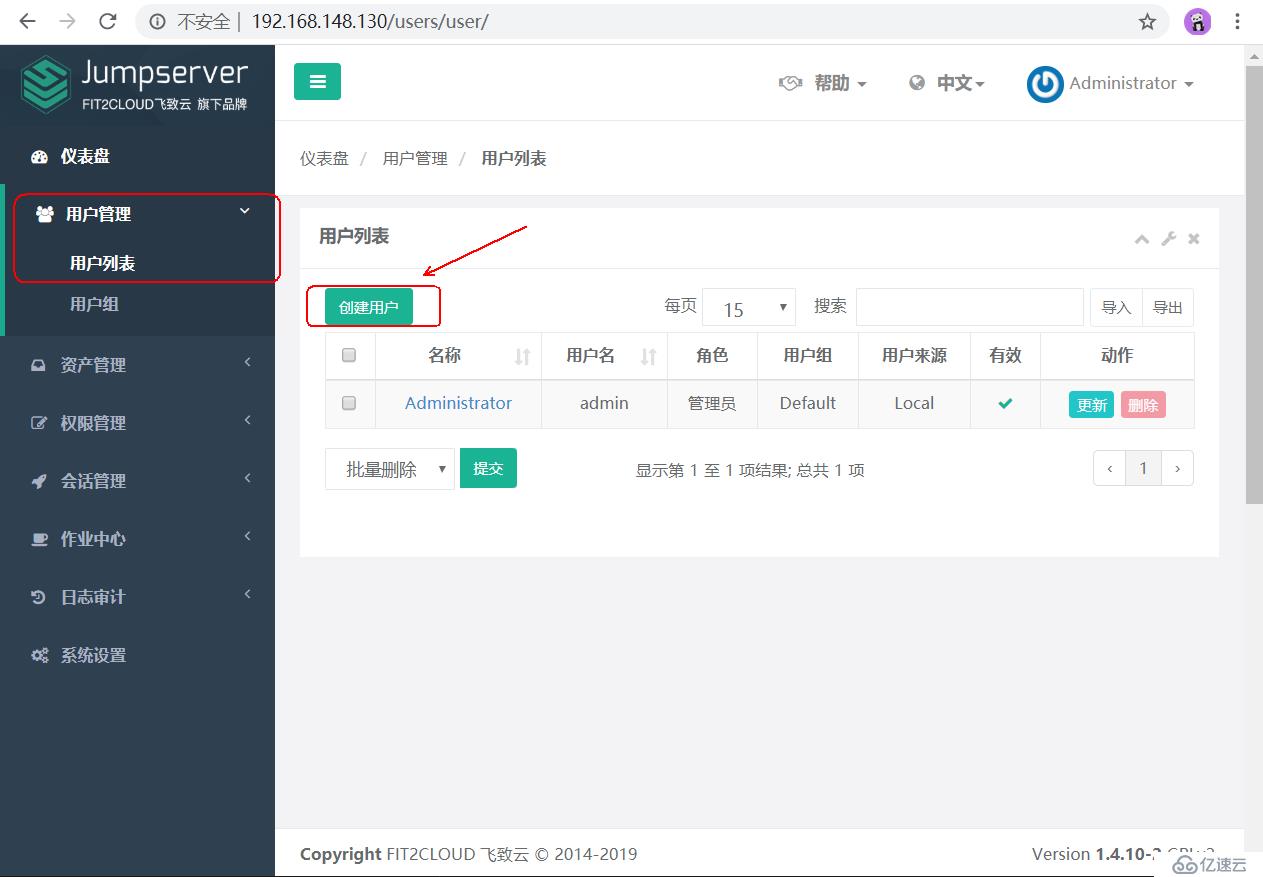
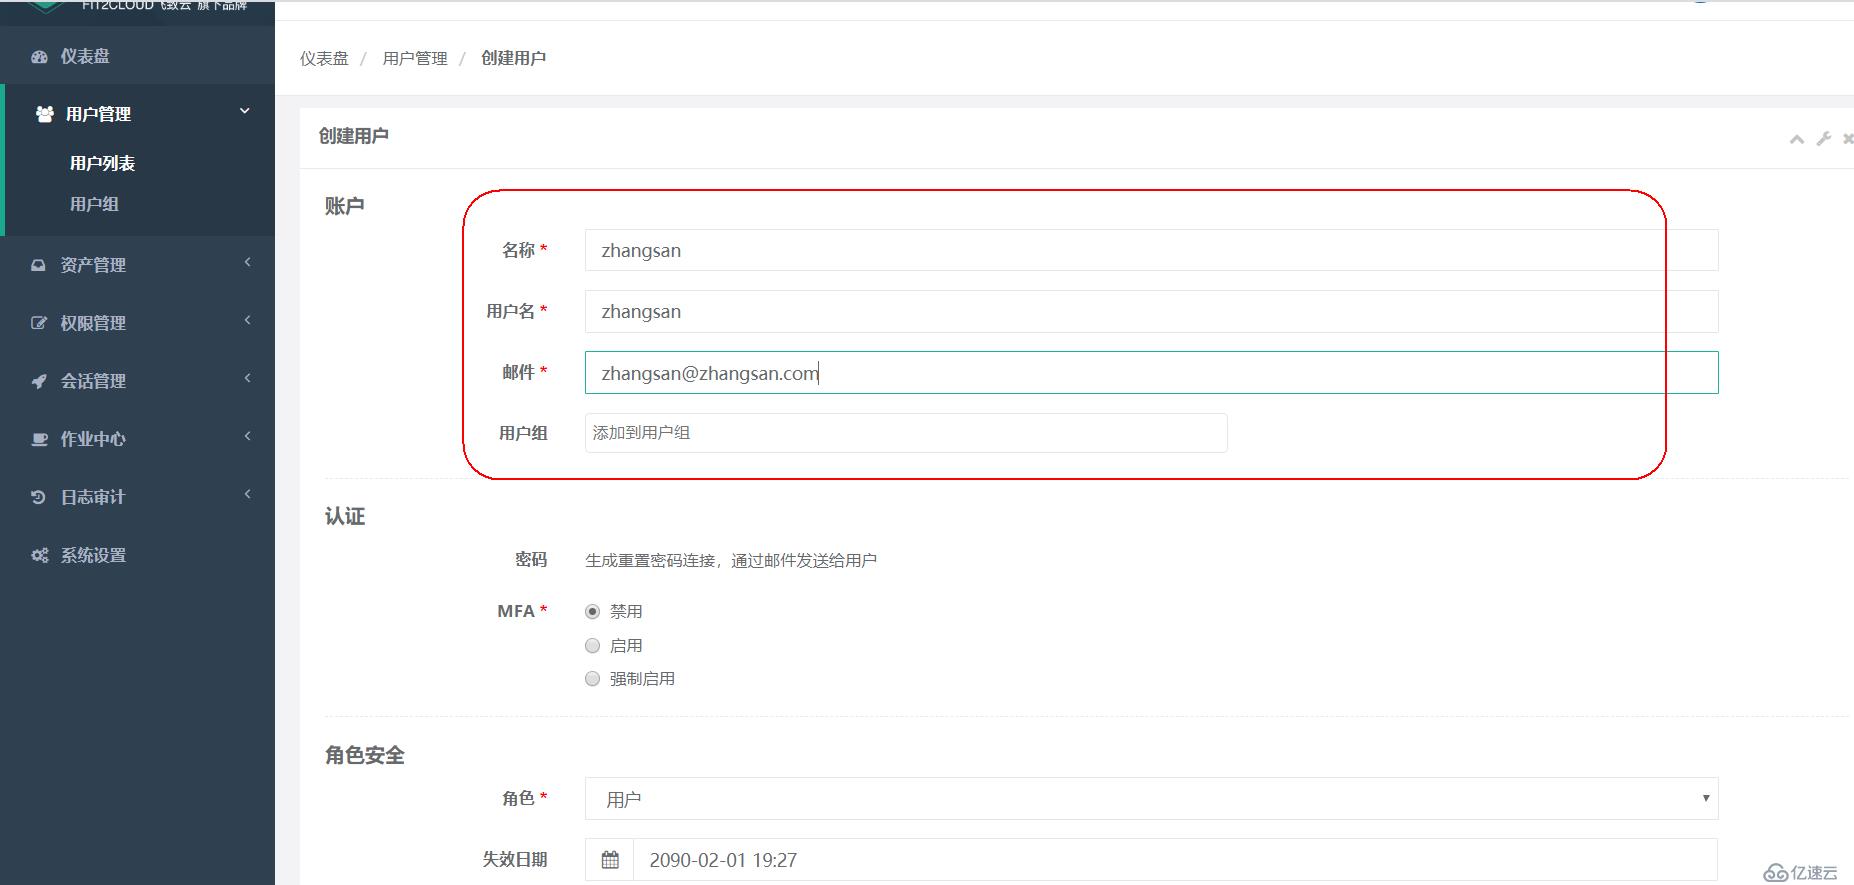
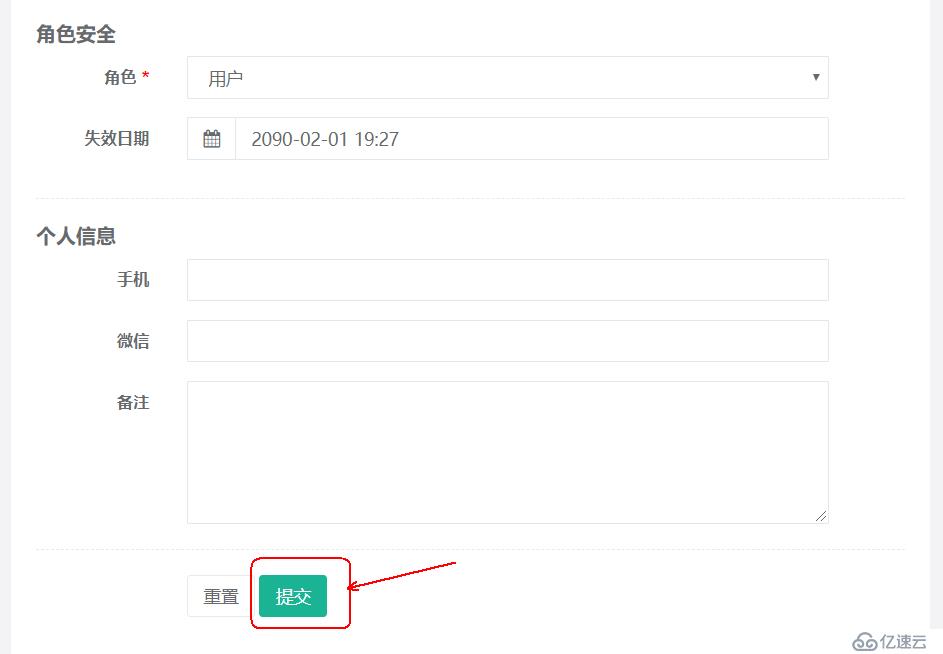

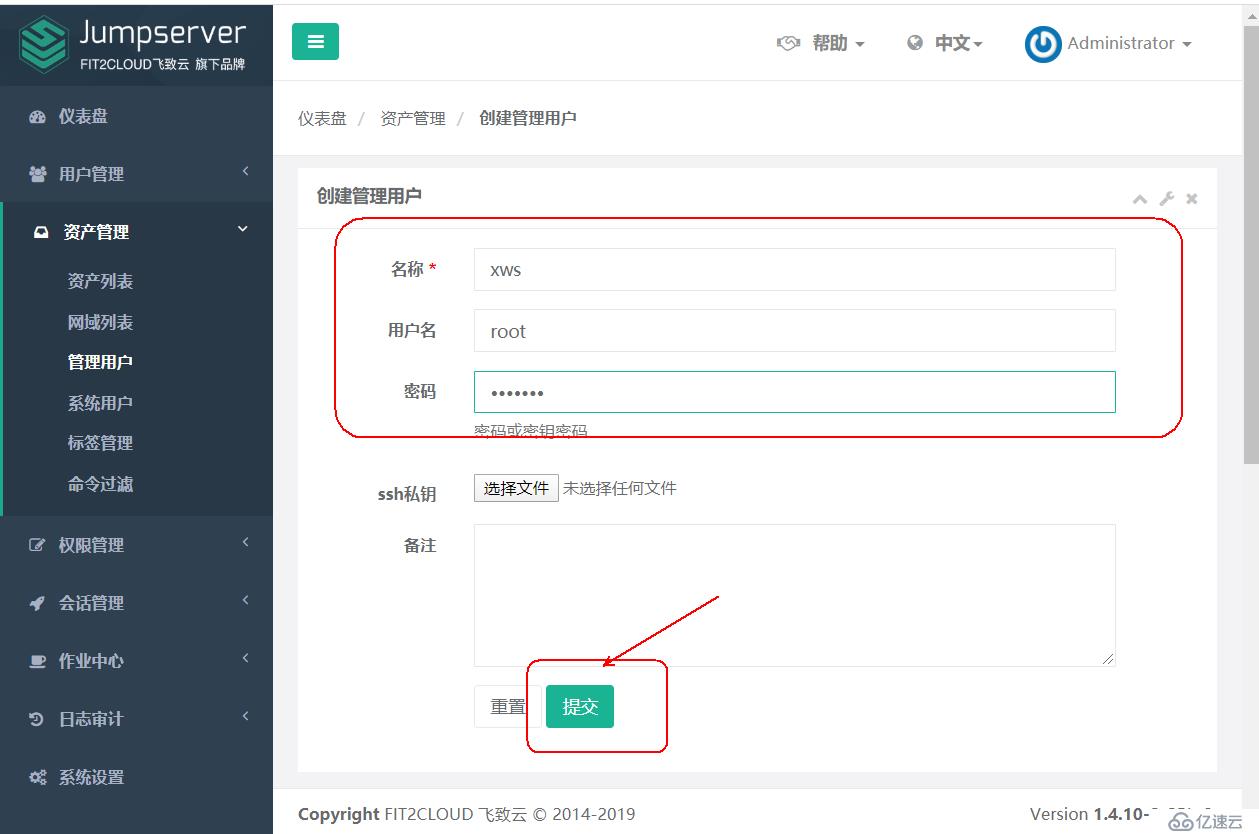
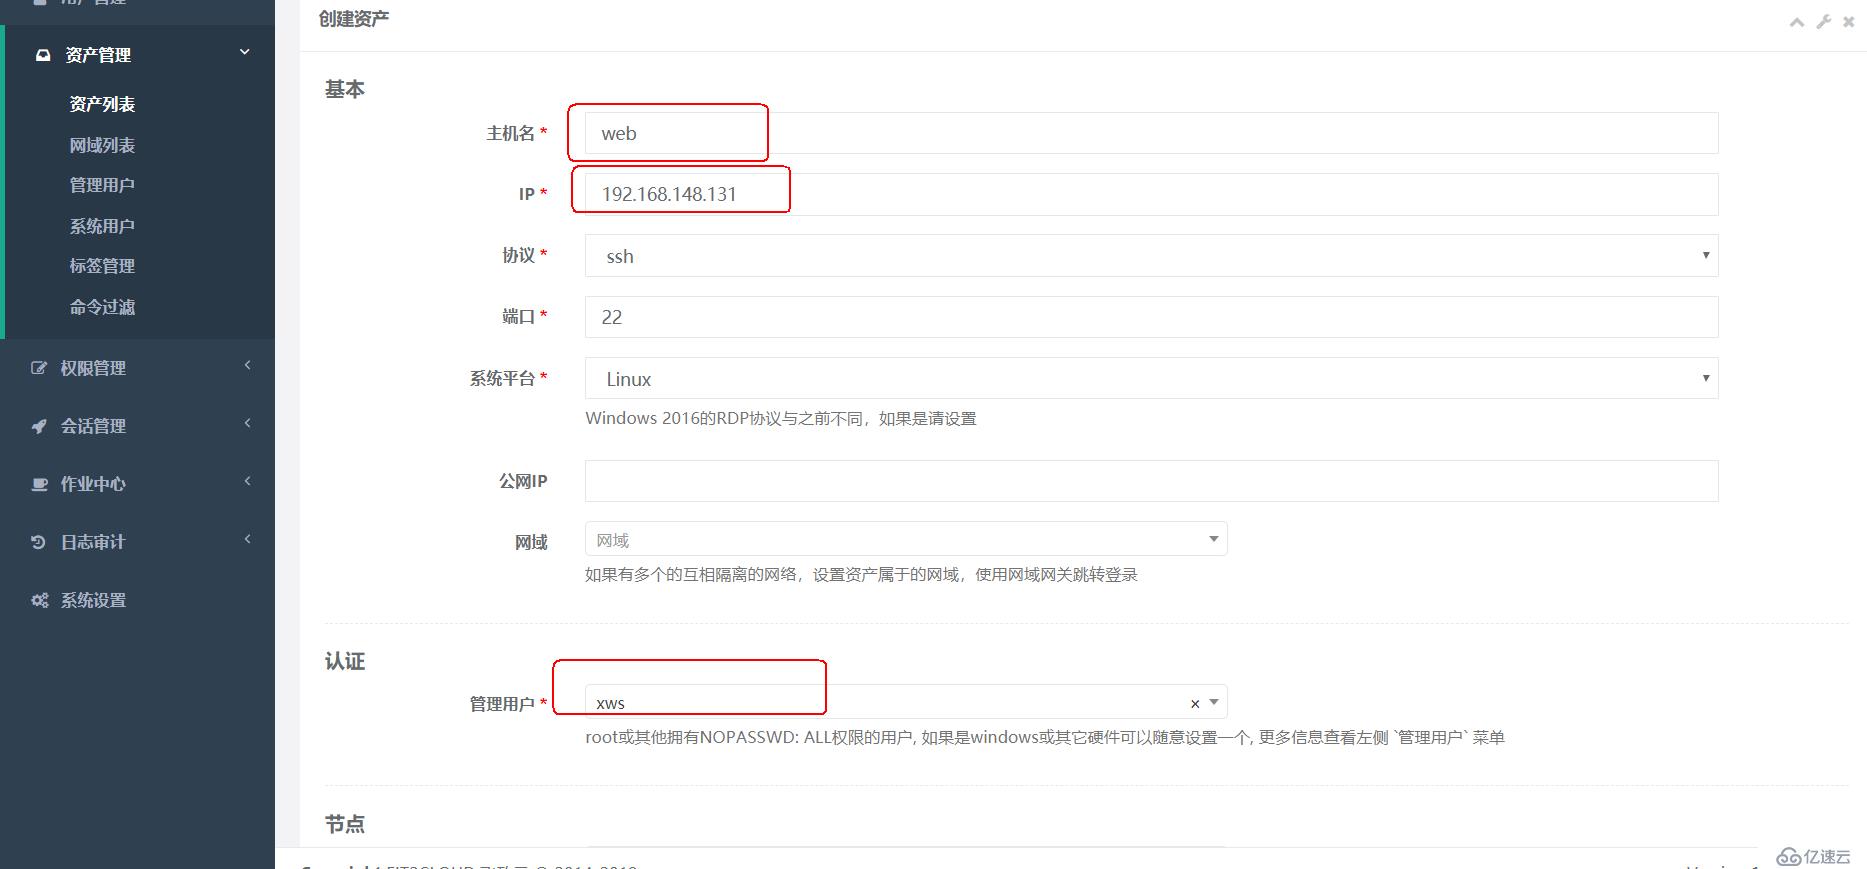
实验环境,所以就开启一台虚拟机192.168.1.131作为测试(web页面的客户端与后端资产肯定不在同一网段,因为用户是通过公网登录到jumpserver才可以对后端服务器进行操作的)!
关于jumpserver的安装和使用教程就分享到这里了,希望以上内容可以对大家有一定的帮助,可以学到更多知识。如果喜欢这篇文章,不如把它分享出去让更多的人看到。
免责声明:本站发布的内容(图片、视频和文字)以原创、转载和分享为主,文章观点不代表本网站立场,如果涉及侵权请联系站长邮箱:is@yisu.com进行举报,并提供相关证据,一经查实,将立刻删除涉嫌侵权内容。


