小编给大家分享一下Vue.directive如何实现元素scroll逻辑复用,希望大家阅读完这篇文章之后都有所收获,下面让我们一起去探讨吧!
继上篇Vue 滚动触底 mixins,将对于文档滚动触底的逻辑迁移到某个dom上,将会用到 Vue.directive 来实现代码逻辑复用。
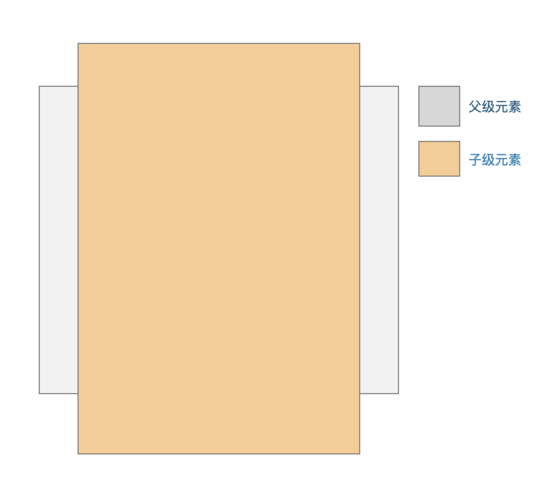
元素滚动
如何实现滚动
元素实现滚动的条件有两个:
有父子两个元素
子元素的高度 > 父元素的高度, 并且父元素设置 overflow:scroll / auto;
scrollHeight 计算
Element.scrollHeight这个只读属性是一个元素内容高度的度量,包括由于溢出导致的视图中不可见内容。
可以简单的理解为,滚动高度是元素可以滚动的最大值,分为两种情况
滚动高度 = 当前元素的 clientHeight = height + padding
滚动高度 = 当前元素的padding + 子元素的clientHeight + 子元素的(padding,margin,border) + 伪元素(:after,:before)
scrollTop
Element.scrollTop 属性可以获取或设置一个元素的内容垂直滚动的像素数。
需要注意的是,scrollTop 是针对产生滚动条的元素而言,所以分为两种情况
不符合滚动条件, scrollTop 为0
符合滚动条件,可以通过 Element.scrollTop 来获取它的子元素的顶部到父级元素顶部的距离,不包括(border,padding)。
判断触底
为了简单起见,假设 father 和 child 都只设置了宽高。
<div class="father" ref="father">
 <div class="child" ref="child"></div>
</div>
// 若为真说明触底
father.clientHeight + father.scrollTop >= child.scrollHeight
抽离成 Vue-directive
基本语法
参数1
指令名称,如focus 使用的时候就通过 v-focus 去绑定指定dom
参数2
options配置项,包含以下的钩子函数,分别在对应的生命周期触发
// 注册一个全局自定义指令 `v-focus`
Vue.directive('focus', {
 bind(){
 // 只调用一次,指令第一次绑定到元素时调用。在这里可以进行一次性的初始化设置。
 },
 // 当被绑定的元素插入到 DOM 中时……
 inserted: function (el) {
 // 聚焦元素
 el.focus()
 },
 update(){
 // 所在组件的 VNode 更新时调用
 },
 componentUpdated(){
 // 指令所在组件的 VNode 及其子 VNode 全部更新后调用。
 },
 unbind(){
 // 只调用一次,指令与元素解绑时调用。
 }
})
钩子函数的回调参数
上面的钩子函数都接受 el、binding、vnode 和 oldVnode 这些回调参数,对常用的参数做下解释
el : 指令所 绑定的元素 ,可以用来直接操作 DOM 。
binding : { name,value ,arg}
是绑定组件的data中的变量名
来说下 value 和 arg 的区别,假设我们想向指令传递特定的数据,可以通过下面的方式 arg传递值,和 value绑定值只能使用一种
// 通过 binding.value 接收
<div v-test="title">这里是测试</div>
// 通过 binding.arg 接收
<div v-test:id1>测试2</div>
如何注册指令
全局注册
// 在单独一个文件中单独管理所有 directive
import Vue from 'vue'
import inputClear from './input-clear'
import forNested from './picker-item-for-nested'
import copy from "./copy";

const directives = {
 copy,
 'input-clear':inputClear,
 'for-nested':forNested
}
Object.keys(directives).forEach(key=>{
 Vue.directive(key,directives[key])
})
局部注册,通过directives选项来注册
export default {
 directives:{
 // 自定义指令的名字
 autoFocus:{
  inserted(el){
  el.focus()
  console.log( 'inserted' );
  }
 }
 }
}
Vue.install的方式来安装
// directive.js
export default {
 install(Vue){
 Object.keys(directives).forEach(key=>{
  Vue.directive(key,directives[key])
 })
 }
}

// main.js
import Directives from "./directive/index";
// Vue.use 通过注册插件的方式来注册指令 `Vue 插件中 install 函数接受 Vue构造函数作为第一入参`
Vue.use(Directives);
Vue.use 源码
// 接收一个 plugin 参数可以是 Function 也可以是 Object
 Vue.use = function (plugin: Function | Object) {
 // 如果传入的是对象,需要有一个install 方法,并执行该方法
 if (typeof plugin.install === 'function') {
  plugin.install.apply(plugin, args)
 // 如果传入的是是函数则立即执行
 } else if (typeof plugin === 'function') {
  plugin.apply(null, args)
 }
 }
将scroll 逻辑添加到 v-directive 中
如果子元素有多个,需要计算每个子元素的 height + padding + border + margin 所以为了方便使用,滚动目标的子元素有多个的情况下,用一个标签统一包裹
function isBottom(el){
 const child = el.children[0]
 if(el.clientHeight + el.scrollTop >= child.scrollHeight){
 console.log('触底了');
 }
}
Vue.directive('scroll',{
 bind(el){
 el.addEventListener('scroll',function(){
  isBottom(el)
 })
 },
 unbind(el){
 el.removeEventListener(isBottom)
 }
})
看完了这篇文章,相信你对“Vue.directive如何实现元素scroll逻辑复用”有了一定的了解,如果想了解更多相关知识,欢迎关注亿速云行业资讯频道,感谢各位的阅读!
免责声明:本站发布的内容(图片、视频和文字)以原创、转载和分享为主,文章观点不代表本网站立场,如果涉及侵权请联系站长邮箱:is@yisu.com进行举报,并提供相关证据,一经查实,将立刻删除涉嫌侵权内容。


