这篇文章将为大家详细讲解有关使用vue怎么实现一个全局Message组件,文章内容质量较高,因此小编分享给大家做个参考,希望大家阅读完这篇文章后对相关知识有一定的了解。
Vue是一套用于构建用户界面的渐进式JavaScript框架,Vue与其它大型框架的区别是,使用Vue可以自底向上逐层应用,其核心库只关注视图层,方便与第三方库和项目整合,且使用Vue可以采用单文件组件和Vue生态系统支持的库开发复杂的单页应用。
全局组件需要一个index.js文件去注册
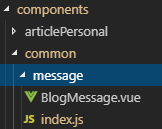
BlogMessage.vue
这里的script是用ts写的。大家只需将这里稍做修改就可以了
<template>
 <transition name="slide">
  <div class="message-wrap" :class="type" v-if="visible">
   <div class="content">{{content}}</div>
  </div>
 </transition>
</template>
<script lang='ts'>
import { Component, Vue, Watch, Prop } from "vue-property-decorator";
@Component({
 components: {}
})
export default class extends Vue {
 private content: string = "";
 private visible: boolean = false;
 private type: string = "info"; // 'success','error'
 private startTimer() {
  window.setTimeout(() => {
   this.visible = false;
  }, 3000);
 }
 private mounted() {
  this.startTimer();
 }
}
</script>
<style scoped lang="scss">
.message-wrap {
 position: fixed;
 background-color: #44b0f3;
 color: #ffffff;
 left: 40%;
 width: 20%;
 top: 25px;
 height: 40px;
 z-index: 1001;
 border-radius: 4px;
 text-align: center;
 border: 1px solid #ebeef5;
 .content {
  line-height: 40px;
 }
}
.error {
 background-color: #fef0f0;
 color: #f56c6c;
}
.success {
 background-color: #f0f9eb;
 color: #67c23a;
}
.slide-enter-active,
.slide-leave-active {
 transition: all 0.3s cubic-bezier(1, 0.5, 0.8, 1);
 transition: all 0.2s ease;
}
.slide-enter,
.slide-leave-to {
 transform: translateY(-20px);
 opacity: 0;
}
</style>
index.js
import Vue from 'vue'
import BlogMessage from './BlogMessage.vue'
const MessageBox = Vue.extend(BlogMessage) // 创建的是一个组件构造器,不是实例
const Message = {
 install: (options, type, duration) => {
  if (options === undefined || options === null) {
   options = {
    content: ''
   }
  } else if (typeof options === 'string' || typeof options === 'number') {
   options = {
    content: options
   }
   if (type != undefined && options != null) {
    options.type = type;
   }
  }
  let instance = new MessageBox({
   data: options
  }).$mount()
  document.body.appendChild(instance.$el) // 添加dom元素
  Vue.nextTick(() => { // dom元素渲染完成后执行回调
   instance.visible = true
  })
 }
}
Vue.prototype.$message = Message.install;
['success', 'error'].forEach(type => {
 Vue.prototype.$message[type] = (content) => {
  return Vue.prototype.$message(content, type)
 }
})
export default Message
使用组件
1.全局注册
import Vue from 'vue';
import Message from '@/components/common/message';
Vue.use(Message);
2.调用方法
 private test1() {
  this.$message("这是一条普通消息");
 }
 private test2() {
  this.$message.success("这是一条成功消息");
  // this.$message("这是一条成功消息", "success");
 }
 private test3() {
  this.$message.error("这是一条失败消息");
  // this.$message("这是一条失败消息", "error");
 }
关于使用vue怎么实现一个全局Message组件就分享到这里了,希望以上内容可以对大家有一定的帮助,可以学到更多知识。如果觉得文章不错,可以把它分享出去让更多的人看到。
免责声明:本站发布的内容(图片、视频和文字)以原创、转载和分享为主,文章观点不代表本网站立场,如果涉及侵权请联系站长邮箱:is@yisu.com进行举报,并提供相关证据,一经查实,将立刻删除涉嫌侵权内容。


