现在好多应用场景里会有一些需要给文章打标签等类似的操作,之前jquery用户是使用taginput来实现,使用VUE以后elementui有一个组件非常简单就是tag组件。

<el-tag
 :key="tag"
 v-for="tag in dynamicTags"
 closable
 :disable-transitions="false"
 @close="handleClose(tag)">
 {{tag}}
</el-tag>
<el-input
 class="input-new-tag"
 v-if="inputVisible"
 v-model="inputValue"
 ref="saveTagInput"
 size="small"
 @keyup.enter.native="handleInputConfirm"
 @blur="handleInputConfirm"
>
</el-input>
<el-button v-else class="button-new-tag" size="small" @click="showInput">+ New Tag</el-button>

<style>
 .el-tag + .el-tag {
  margin-left: 10px;
 }
 .button-new-tag {
  margin-left: 10px;
  height: 32px;
  line-height: 30px;
  padding-top: 0;
  padding-bottom: 0;
 }
 .input-new-tag {
  width: 90px;
  margin-left: 10px;
  vertical-align: bottom;
 }
</style>

<script>
 export default {
  data() {
   return {
    dynamicTags: ['标签一', '标签二', '标签三'],
    inputVisible: false,
    inputValue: ''
   };
  },
  methods: {
   handleClose(tag) {
    this.dynamicTags.splice(this.dynamicTags.indexOf(tag), 1);
   },

   showInput() {
    this.inputVisible = true;
    this.$nextTick(_ => {
     this.$refs.saveTagInput.$refs.input.focus();
    });
   },

   handleInputConfirm() {
    let inputValue = this.inputValue;
    if (inputValue) {
     this.dynamicTags.push(inputValue);
    }
    this.inputVisible = false;
    this.inputValue = '';
   }
  }
 }
</script>
这个是官方文档给的实例,这样可以解决单一标签输入。但是实际场景中,好多用户是通过ctrl+c,ctrl+v的方式输入的,有可能还会一起粘贴好多行的标签,更有可能从excel中复制出来。
那我一一解决一下这样一个场景
首先,先改一下样式,让文本框变长:
.el-tag{
 margin-right: 10px;
}
.el-tag + .el-tag {
  margin-right: 10px;
 }
 .button-new-tag {
  height: 32px;
  line-height: 30px;
  padding-top: 0;
  padding-bottom: 0;
 }
 .input-new-tag {
  vertical-align: bottom;
 }
接着,修改一下enter和blur事件:
handleInputConfirm() {
 let inputValue = this.inputValue;
  if (inputValue) {
   var values = inputValue.split(/[,, \n]/).filter(item=>{
    return item!='' && item!=undefined
   })
   values.forEach(element => {
    var index = this.dynamicTags.findIndex(i=>{
    return i==element
   })
   if(index<0){
    this.dynamicTags.push(element);
   }
  });
 }
 this.inputVisible = false;
 this.inputValue = '';
}
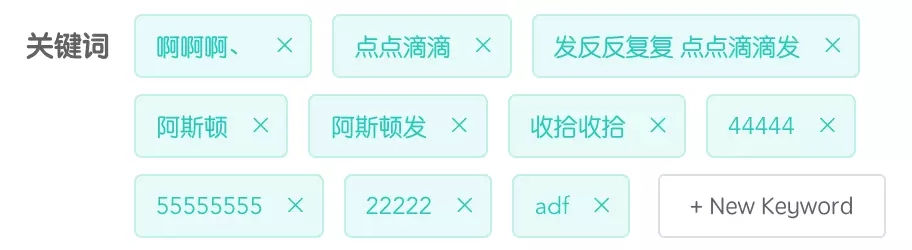
效果:
阿大发
asd三大发舒服,
阿斯顿发撒地方。
阿斯顿发,阿斯顿发,,阿斯顿发,,阿斯顿发安抚,阿斯顿发 是淡淡的 点点滴滴方法,阿斯顿发撒地方,adfasd
我们把以上文字复制粘贴进去


所有去重,拆分都OK,那们在试一下,从excel中复制
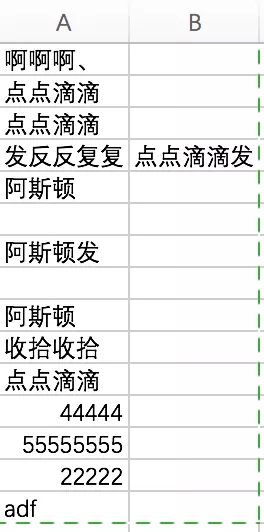
完成。希望能够帮到有需要的朋友。也希望大家多多支持亿速云。
免责声明:本站发布的内容(图片、视频和文字)以原创、转载和分享为主,文章观点不代表本网站立场,如果涉及侵权请联系站长邮箱:is@yisu.com进行举报,并提供相关证据,一经查实,将立刻删除涉嫌侵权内容。


