Pybind11算是目前最方便的Python调用C++的工具了, 介绍一下在vs2019上写Python的扩展的HelloWorld
1. 去下载pybind11 https://github.com/pybind/pybind11/releases/tag/v2.3.0
这个库只要include就可以了
2. 用vs新建一个空项目
2.1 调整输出类型为dll, 调整输出文件名为pyd


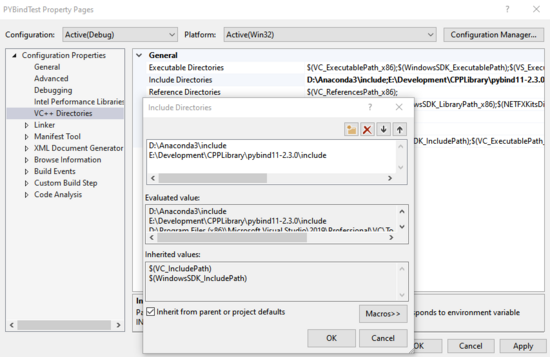
2.2 include python和pybind11的头文件, 我的python使用anaconda的全家桶
2.3 链接 python的lib
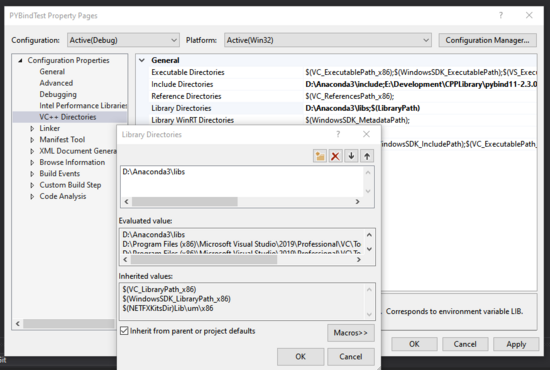
2.4 linker里添加python的lib

3. 代码示例:
有两种定义函数的方法, 一种是直接定义, 另一种比较简单就是 def("函数名",&函数的引用,"说明")
Pybind非常的简单, 几乎就不用修改C++的代码
#include <pybind11/pybind11.h>

namespace py = pybind11;

int chufa(int a, int b)
{
  return a / b;
}

PYBIND11_MODULE(example, m) {
  m.doc() = "....";
  m.def("foo", []() {
    return "Hello world!";
    });
  m.def("chufa", &chufa, "just chufa");
}
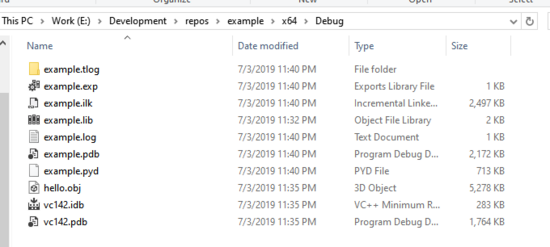
4. build 得到pyd文件
在python中直接import就可以了...
5. 坑:
1. 要注意编译出来的是64位还是32位的包, 建议全部在64位下编译, 否则可能会报错:
ImportError: DLL load failed: %1 is not a valid Win32 application. But the DLL's are there
2. pyd的文件名要和包名一致, 如果输出的pyd文件名称不对需要手动改过来, 否则会报错误:
ImportError: dynamic module does not define module export function
总结
以上所述是小编给大家介绍的pybind11在Windows下的使用教程,希望对大家有所帮助,如果大家有任何疑问请给我留言,小编会及时回复大家的。在此也非常感谢大家对亿速云网站的支持!
如果你觉得本文对你有帮助,欢迎转载,烦请注明出处,谢谢!
免责声明:本站发布的内容(图片、视频和文字)以原创、转载和分享为主,文章观点不代表本网站立场,如果涉及侵权请联系站长邮箱:is@yisu.com进行举报,并提供相关证据,一经查实,将立刻删除涉嫌侵权内容。


