本文仅供学习交流,请勿用于商业用途,并遵守新浪微博相关规定。
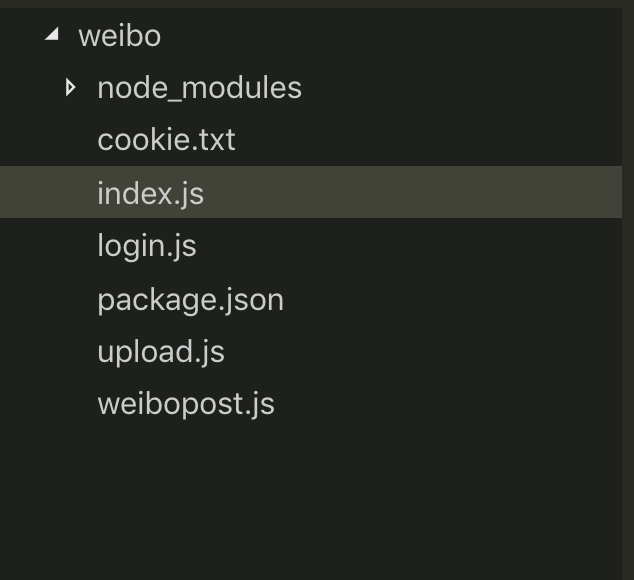
代码目录
此微博机器人的实现功能如下:
效果图
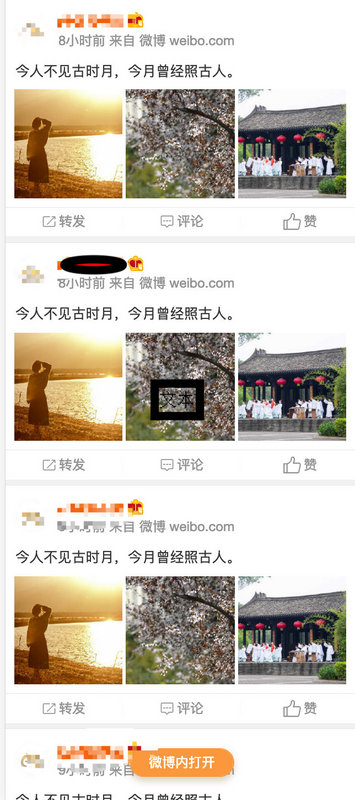
图文内容我固定了,可自行使用第三方api获取要发送的内容或爬取第三方内容发送。(偷个懒...
要实现发送图文微博可以分为三个步骤
登录
登录可以使用Puppeteer node库,很轻松的实现登录获取微博cookie,这里不多介绍,可以自行搜索Puppeteer学习。
Puppeteer是谷歌官方出品的一个通过DevTools协议控制headless Chrome的Node库。可以通过Puppeteer的提供的api直接控制Chrome模拟大部分用户操作来进行UI Test或者作为爬虫访问页面来收集数据。
async function login(username, password) {
  const browser = await puppeteer.launch({
    // headless: false,
    slowMo: 250,
    executablePath: ''
  });
  const page = (await browser.pages())[0];
  await page.setViewport({
    width: 1280,
    height: 800
  });

  await page.goto("https://weibo.com/");
  await page.waitForNavigation();
  await page.type("#loginname", username);
  await page.type("#pl_login_form > div > div:nth-child(3) > div.info_list.password > div > input", password);
  await page.click("#pl_login_form > div > div:nth-child(3) > div:nth-child(6)");
  await page.waitForNavigation().then(result => {
    return new Promise((resolve) => {
      page.cookies().then(async cookie => {
        fs.createWriteStream("cookie.txt").write(JSON.stringify(cookie), "UTF8");//存储cookie
        await browser.close();//关闭打开的浏览器
        resolve(cookie);
      });
    })
  }).catch(e => {
    page.screenshot({
      path: 'code.png',
      type: 'png',
      x: 800,
      y: 200,
      width: 100,
      height: 100
    });
    return new Promise((resolve, reject) => {
      readSyncByRl("请输入验证码").then(async (code) => {
        await page.type("#pl_login_form > div > div:nth-child(3) > div.info_list.verify.clearfix > div > input", code);
        await page.click("#pl_login_form > div > div:nth-child(3) > div:nth-child(6)");
        await page.waitForNavigation();
        page.cookies().then(async cookie => {
          fs.createWriteStream("cookie.txt").write(JSON.stringify(cookie), "UTF8");
          await browser.close();
          resolve(cookie);
        });

      })
    })
  })
}
图片上传至微博图床
上传到微博图床可以看这里 http://weibo.com/minipublish 抓包看上传的接口过程,可以看到上传的是base64图片信息。所以上传前把图片转换成base64编码,而本地图片的编码和互联网链接图片的编码又不一样,这里使用的是互联网链接的图片,node本地图片转换成base64编码更简单些。上传成功后返回微博图床图片的pid。记住这个pid,发微博用的就是这个pid。
发送微博
有了微博cookie和图片pid后就可以发微博了,多张图片时pid之间以|隔开的。
async function weibopost(text, pic_ids = '', cookie) { //发送微博内容(支持带图片)
  return new Promise(async (resolve, reject) => {
    if (cookie === '') {
      reject('Error: Cookie not set!');
    }
    let post_data = querystring.stringify({
      'location': 'v6_content_home',
      'text': text,
      'appkey': '',
      'style_type': '1',
      'pic_id': pic_ids,
      'tid': '',
      'pdetail': '',
      'mid': '',
      'isReEdit': 'false',
      'rank': '0',
      'rankid': '',
      'module': 'stissue',
      'pub_source': 'main_',
      'pub_type': 'dialog',
      'isPri': '0',
      '_t': '0'
    });

    let post_options = {
      'Accept': '*/*',
      'Accept-Encoding': 'gzip, deflate, br',
      'Accept-Language': 'zh-CN,zh;q=0.9,en;q=0.8,zh-TW;q=0.7',
      'Connection': 'keep-alive',
      'Content-Length': Buffer.byteLength(post_data),
      'Content-Type': 'application/x-www-form-urlencoded',
      'Cookie': cookie,
      'Host': 'weibo.com',
      'Origin': 'https://weibo.com',
      'Referer': 'https://weibo.com',
      'User-Agent': 'Mozilla/5.0 (Macintosh; Intel Mac OS X 10_13_3) AppleWebKit/537.36 (KHTML, like Gecko) Chrome/64.0.3282.167 Safari/537.36',
      'X-Requested-With': 'XMLHttpRequest'
    };


    let {
      data
    } = await axios.post('https://weibo.com/aj/mblog/add?ajwvr=6&__rnd=' + new Date().getTime(), post_data, {
      withCredentials: true,
      headers: post_options
    })
    if (data.code == 100000) {
      console.log('\n' + text + '-----Sent!' + '---' + new Date().toLocaleString());
      resolve(data);
    } else {
      console.log('post error');
      reject('post error');
    }

  });
}
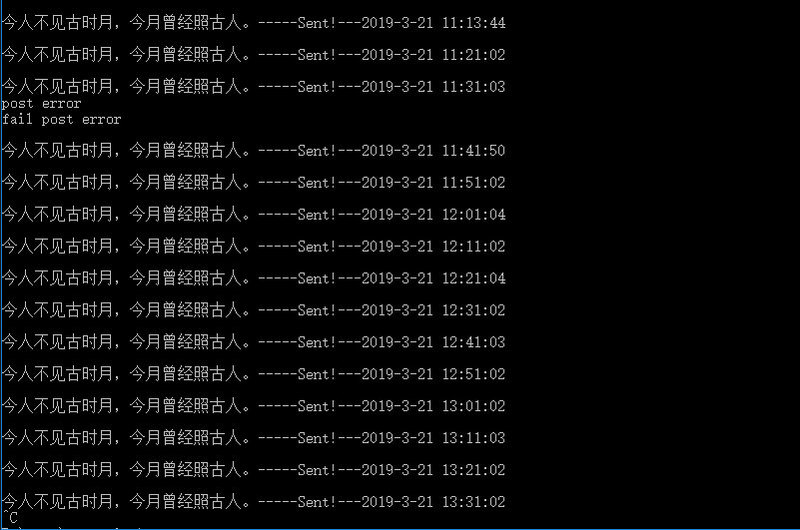
最后就是定时任务了,定时任务可以使用node-schedule node库,这里不多介绍,可以自行搜索学习。这里使用的是每隔10分钟发送一次。
function loginTo() {
  login(config.username, config.password).then(async () => {
    let rule = null;
    rule = new schedule.RecurrenceRule();
    rule.minute = [01, 11, 21, 31, 41, 51];
    try {
      let cookie = await getCookie();
      getContent(cookie);
    } catch (error) {
      console.log(error);
    }

    j = schedule.scheduleJob(rule, async () => { //定时任务
      try {
        let cookie = await getCookie();
        getContent(cookie);
      } catch (error) {
        console.log(error);
      }

    });
  })
}
代码地址: github地址
参考
https://github.com/itibbers/weibo-post
以上就是本文的全部内容,希望对大家的学习有所帮助,也希望大家多多支持亿速云。
免责声明:本站发布的内容(图片、视频和文字)以原创、转载和分享为主,文章观点不代表本网站立场,如果涉及侵权请联系站长邮箱:is@yisu.com进行举报,并提供相关证据,一经查实,将立刻删除涉嫌侵权内容。


