这篇文章将为大家详细讲解有关怎么在Tensorflow中通过tfrecord方式读取数据,文章内容质量较高,因此小编分享给大家做个参考,希望大家阅读完这篇文章后对相关知识有一定的了解。
1. tfrecord格式简介
这部分主要参考了另一篇博文,Tensorflow 训练自己的数据集(二)(TFRecord)
tfecord文件中的数据是通过tf.train.Example Protocol Buffer的格式存储的,下面是tf.train.Example的定义
message Example {
 Features features = 1;
};

message Features{
 map<string,Feature> featrue = 1;
};

message Feature{
  oneof kind{
    BytesList bytes_list = 1;
    FloatList float_list = 2;
    Int64List int64_list = 3;
  }
};
从上述代码可以看出,tf.train.Example 的数据结构很简单。tf.train.Example中包含了一个从属性名称到取值的字典,其中属性名称为一个字符串,属性的取值可以为字符串(BytesList ),浮点数列表(FloatList )或整数列表(Int64List )。例如我们可以将图片转换为字符串进行存储,图像对应的类别标号作为整数存储,而用于回归任务的ground-truth可以作为浮点数存储。通过后面的代码我们会对tfrecord的这种字典形式有更直观的认识。
2. 利用自己的数据生成tfrecord文件
先上一段代码,然后我再针对代码进行相关介绍。
import tensorflow as tf
import numpy as np
import matplotlib.pyplot as plt
from scipy import misc
import scipy.io as sio


def _bytes_feature(value):
  return tf.train.Feature(bytes_list = tf.train.BytesList(value=[value]))

def _int64_feature(value):
  return tf.train.Feature(int64_list = tf.train.Int64List(value=[value]))


root_path = '/mount/temp/WZG/Multitask/Data/'
tfrecords_filename = root_path + 'tfrecords/train.tfrecords'
writer = tf.python_io.TFRecordWriter(tfrecords_filename)


height = 300
width = 300
meanfile = sio.loadmat(root_path + 'mats/mean300.mat')
meanvalue = meanfile['mean']

txtfile = root_path + 'txt/train.txt'
fr = open(txtfile)

for i in fr.readlines():
  item = i.split()
  img = np.float64(misc.imread(root_path + '/images/train_images/' + item[0]))
  img = img - meanvalue
  maskmat = sio.loadmat(root_path + '/mats/train_mats/' + item[1])
  mask = np.float64(maskmat['seg_mask'])
  label = int(item[2])
  img_raw = img.tostring()
  mask_raw = mask.tostring()
  example = tf.train.Example(features=tf.train.Features(feature={
    'height': _int64_feature(height),
    'width': _int64_feature(width),
    'name': _bytes_feature(item[0]),
    'image_raw': _bytes_feature(img_raw),
    'mask_raw': _bytes_feature(mask_raw),
    'label': _int64_feature(label)}))

  writer.write(example.SerializeToString())

writer.close()
fr.close()
代码中前两个函数(_bytes_feature和_int64_feature)是将我们的原生数据进行转换用的,尤其是图片要转换成字符串再进行存储。这两个函数的定义来自官方的示例。
接下来,我定义了数据的(路径-label文件)txtfile,它大概长这个样子:
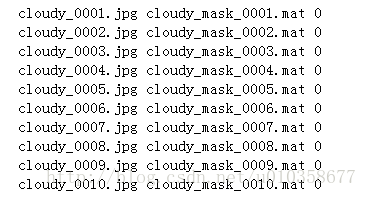
这里稍微啰嗦下,介绍一下我的实验内容。我做的是一个multi-task的实验,一支task做分割,一支task做分类。所以txtfile中每一行是一个样本,每个样本又包含3项,第一项为图片名称,第二项为相应的ground-truth segmentation mask的名称,第三项是图片的标签。(txtfile中内容形式无所谓,只要能读到想读的数据就可以)
接着回到主题继续讲代码,之后我又定义了即将生成的tfrecord的文件路径和名称,即tfrecord_filename,还有一个writer,这个writer是进行写操作用的。
接下来是图片的高度、宽度以及我事先在整个数据集上计算好的图像均值文件。高度、宽度其实完全没必要引入,这里只是为了说明tfrecord的生成而写的。而均值文件是为了对图像进行事先的去均值化操作而引入的,在大多数机器学习任务中,图像去均值化对提高算法的性能还是很有帮助的。
最后就是根据txtfile中的每一行进行相关数据的读取、转换以及tfrecord的生成了。首先是根据图片路径读取图片内容,然后图像减去之前读入的均值,接着根据segmentation mask的路径读取mask(如果只是图像分类任务,那么就不会有这些额外的mask),txtfile中的label读出来是string格式,这里要转换成int。然后图像和mask数据也要用相应的tosring函数转换成string。
真正的核心是下面这一小段代码:
example = tf.train.Example(features=tf.train.Features(feature={
    'height': _int64_feature(height),
    'width': _int64_feature(width),
    'name': _bytes_feature(item[0]),
    'image_raw': _bytes_feature(img_raw),
    'mask_raw': _bytes_feature(mask_raw),
    'label': _int64_feature(label)}))

writer.write(example.SerializeToString())
这里很好地体现了tfrecord的字典特性,tfrecord中每一个样本都是一个小字典,这个字典可以包含任意多个键值对。比如我这里就存储了图片的高度、宽度、图片名称、图片内容、mask内容以及图片的label。对于我的任务来说,其实height、width、name都不是必需的,这里仅仅是为了展示。键值对的键全都是字符串,键起什么名字都可以,只要能方便以后使用就可以。
定义好一个example后就可以用之前的writer来把它真正写入tfrecord文件了,这其实就跟把一行内容写入一个txt文件一样。代码的最后就是writer和txt文件对象的关闭了。
最后在指定文件夹下,就得到了指定名字的tfrecord文件,如下所示:

需要注意的是,生成的tfrecord文件比原生数据的大小还要大,这是正常现象。这种现象可能是因为图片一般都存储为jpg等压缩格式,而tfrecord文件存储的是解压后的数据。
3. 从tfrecord文件读取数据
还是代码先行。
from scipy import misc
import tensorflow as tf
import numpy as np
import scipy.io as sio
import matplotlib.pyplot as plt

root_path = '/mount/temp/WZG/Multitask/Data/'
tfrecord_filename = root_path + 'tfrecords/test.tfrecords'

def read_and_decode(filename_queue, random_crop=False, random_clip=False, shuffle_batch=True):
  reader = tf.TFRecordReader()
  _, serialized_example = reader.read(filename_queue)
  features = tf.parse_single_example(
   serialized_example,
   features={
     'height': tf.FixedLenFeature([], tf.int64),
     'width': tf.FixedLenFeature([], tf.int64),
     'name': tf.FixedLenFeature([], tf.string),
     'image_raw': tf.FixedLenFeature([], tf.string),
     'mask_raw': tf.FixedLenFeature([], tf.string),
     'label': tf.FixedLenFeature([], tf.int64)
   })

  image = tf.decode_raw(features['image_raw'], tf.float64)
  image = tf.reshape(image, [300,300,3])

  mask = tf.decode_raw(features['mask_raw'], tf.float64)
  mask = tf.reshape(mask, [300,300])

  name = features['name']

  label = features['label']
  width = features['width']
  height = features['height']

#  if random_crop:
#    image = tf.random_crop(image, [227, 227, 3])
#  else:
#    image = tf.image.resize_image_with_crop_or_pad(image, 227, 227)

#  if random_clip:
#    image = tf.image.random_flip_left_right(image)


  if shuffle_batch:
    images, masks, names, labels, widths, heights = tf.train.shuffle_batch([image, mask, name, label, width, height],
                        batch_size=4,
                        capacity=8000,
                        num_threads=4,
                        min_after_dequeue=2000)
  else:
    images, masks, names, labels, widths, heights = tf.train.batch([image, mask, name, label, width, height],
                    batch_size=4,
                    capacity=8000,
                    num_threads=4)
  return images, masks, names, labels, widths, heights
读取tfrecord文件中的数据主要是应用read_and_decode()这个函数,可以看到其中有个参数是filename_queue,其实我们并不是直接从tfrecord文件进行读取,而是要先利用tfrecord文件创建一个输入队列,如本文开头所述那样。关于这点,到后面真正的测试代码我再介绍。
在read_and_decode()中,一上来我们先定义一个reader对象,然后使用reader得到serialized_example,这是一个序列化的对象,接着使用tf.parse_single_example()函数对此对象进行初步解析。从代码中可以看到,解析时,我们要用到之前定义的那些键。对于图像、mask这种转换成字符串的数据,要进一步使用tf.decode_raw()函数进行解析,这里要特别注意函数里的第二个参数,也就是解析后的类型。之前图片在转成字符串之前是什么类型的数据,那么这里的参数就要填成对应的类型,否则会报错。对于name、label、width、height这样的数据就不用再解析了,我们得到的features对象就是个字典,利用键就可以拿到对应的值,如代码所示。
我注释掉的部分是用来做数据增强的,比如随机的裁剪与翻转,除了这两种,其他形式的数据增强也可以写在这里,读者可以根据自己的需要,决定是否使用各种数据增强方式。
函数最后就是使用解析出来的数据生成batch了。Tensorflow提供了两种方式,一种是shuffle_batch,这种主要是用在训练中,随机选取样本组成batch。另外一种就是按照数据在tfrecord中的先后顺序生成batch。对于生成batch的函数,建议读者去官网查看API文档进行细致了解。这里稍微做一下介绍,batch的大小,即batch_size就需要在生成batch的函数里指定。另外,capacity参数指定数据队列一次性能放多少个样本,此参数设置什么值需要视硬件环境而定。num_threads参数指定可以开启几个线程来向数据队列中填充数据,如果硬件性能不够强,最好设小一点,否则容易崩。
4. 实例测试
实际使用时先指定好我们需要使用的tfrecord文件:
root_path = '/mount/temp/WZG/Multitask/Data/'
tfrecord_filename = root_path + 'tfrecords/test.tfrecords'
然后用该tfrecord文件创建一个输入队列:
filename_queue = tf.train.string_input_producer([tfrecord_filename],
                          num_epochs=3)
这里有个参数是num_epochs,指定好之后,Tensorflow自然知道如何读取数据,保证在遍历数据集的一个epoch中样本不会重复,也知道数据读取何时应该停止。
下面我将完整的测试代码贴出:
def test_run(tfrecord_filename):
  filename_queue = tf.train.string_input_producer([tfrecord_filename],
                          num_epochs=3)
  images, masks, names, labels, widths, heights = read_and_decode(filename_queue)

  init_op = tf.group(tf.global_variables_initializer(),
            tf.local_variables_initializer())

  meanfile = sio.loadmat(root_path + 'mats/mean300.mat')
  meanvalue = meanfile['mean']


  with tf.Session() as sess:
    sess.run(init_op)
    coord = tf.train.Coordinator()
    threads = tf.train.start_queue_runners(coord=coord)

    for i in range(1):
      imgs, msks, nms, labs, wids, heis = sess.run([images, masks, names, labels, widths, heights])
      print 'batch' + str(i) + ': '
      #print type(imgs[0])

      for j in range(4):
        print nms[j] + ': ' + str(labs[j]) + ' ' + str(wids[j]) + ' ' + str(heis[j])
        img = np.uint8(imgs[j] + meanvalue)
        msk = np.uint8(msks[j])
        plt.subplot(4,2,j*2+1)
        plt.imshow(img)
        plt.subplot(4,2,j*2+2)
        plt.imshow(msk, vmin=0, vmax=5)
      plt.show()

    coord.request_stop()
    coord.join(threads)
函数中接下来就是利用之前定义的read_and_decode()来得到一个batch的数据,此后我又读入了均值文件,这是因为之前做了去均值处理,如果要正常显示图片需要再把均值加回来。
再之后就是建立一个Tensorflow session,然后初始化对象。这些是Tensorflow基本操作,不再赘述。下面的这两句代码非常重要,是读取数据必不可少的。
coord = tf.train.Coordinator()
threads = tf.train.start_queue_runners(coord=coord)
然后是运行sess.run()拿到实际数据,之前只是相当于定义好了,并没有得到真实数值。
关于怎么在Tensorflow中通过tfrecord方式读取数据就分享到这里了,希望以上内容可以对大家有一定的帮助,可以学到更多知识。如果觉得文章不错,可以把它分享出去让更多的人看到。
免责声明:本站发布的内容(图片、视频和文字)以原创、转载和分享为主,文章观点不代表本网站立场,如果涉及侵权请联系站长邮箱:is@yisu.com进行举报,并提供相关证据,一经查实,将立刻删除涉嫌侵权内容。


