1.Install Windows Server 2019 Core


Run sconfig.cmd to configure the server (in this order):
install on win2019 Server Core:
Install-WindowsFeature Server-Media-Foundation, NET-Framework-45-Features, RPC-over-HTTP-proxy, RSAT-Clustering, RSAT-Clustering-CmdInterface, RSAT-Clustering-PowerShell, WAS-Process-Model, Web-Asp-Net45, Web-Basic-Auth, Web-Client-Auth, Web-Digest-Auth, Web-Dir-Browsing, Web-Dyn-Compression, Web-Http-Errors, Web-Http-Logging, Web-Http-Redirect, Web-Http-Tracing, Web-ISAPI-Ext, Web-ISAPI-Filter, Web-Metabase, Web-Mgmt-Service, Web-Net-Ext45, Web-Request-Monitor, Web-Server, Web-Stat-Compression, Web-Static-Content, Web-Windows-Auth, Web-WMI, RSAT-ADDS

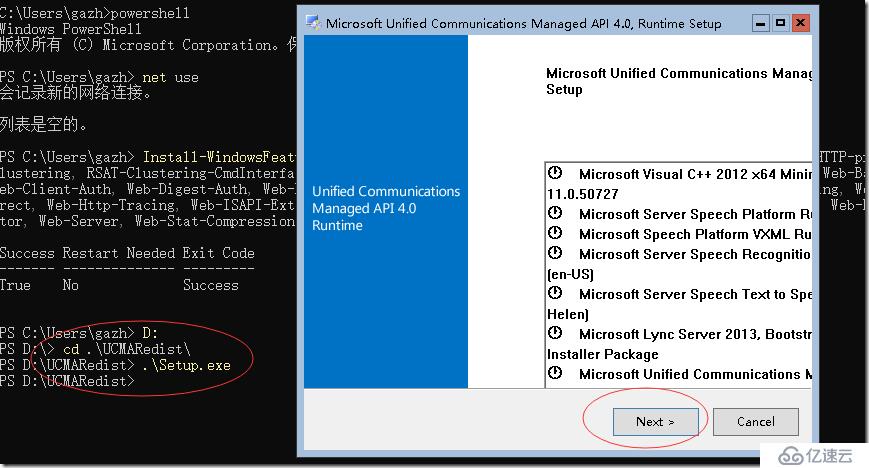
Setup will tell you to download UCMA 4.0 from a URL, but that setup won't work on Server Core. Instead, install the version included in the Exchange Server 2019 ISO in the UCMARedist folder.


1)扩展 AD
.\Setup.exe /PrepareSchema /IAcceptExchangeServerLicenseTerms
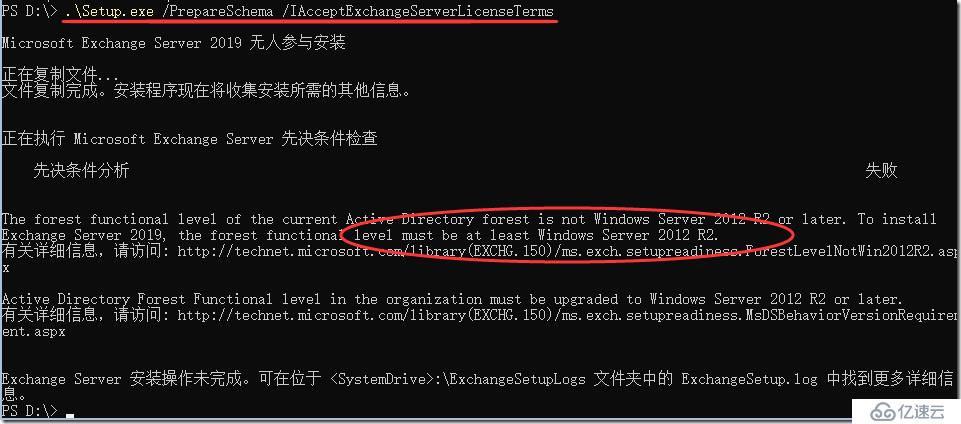
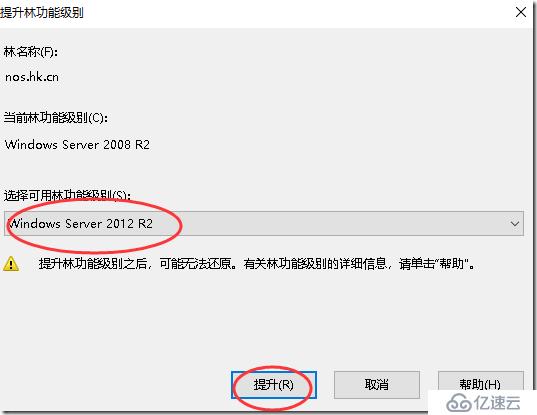
失败的原因是forest level 要win 2012 r2 以上:
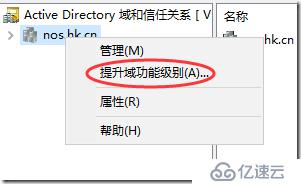
下面去提升森林和域的级别:

重新运行扩展:
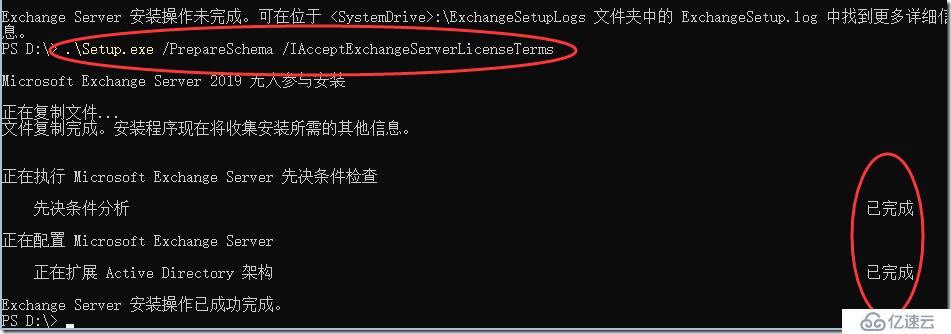
AD架构扩展完成。
.\Setup.exe /PrepareAD /OrganizationName:"NOS" /IAcceptExchangeServerLicenseTerms

组织准备完成后,就可以安装了:
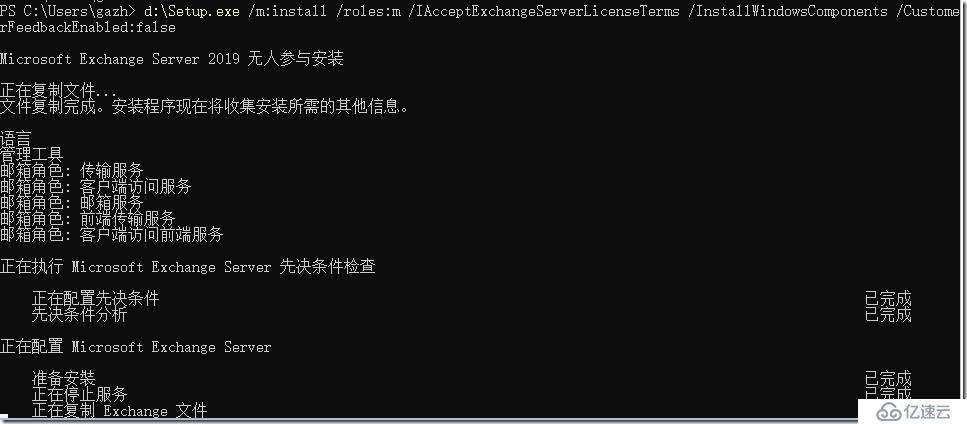
d:\Setup.exe /m:install /roles:m /IAcceptExchangeServerLicenseTerms /InstallWindowsComponents /CustomerFeedbackEnabled:false
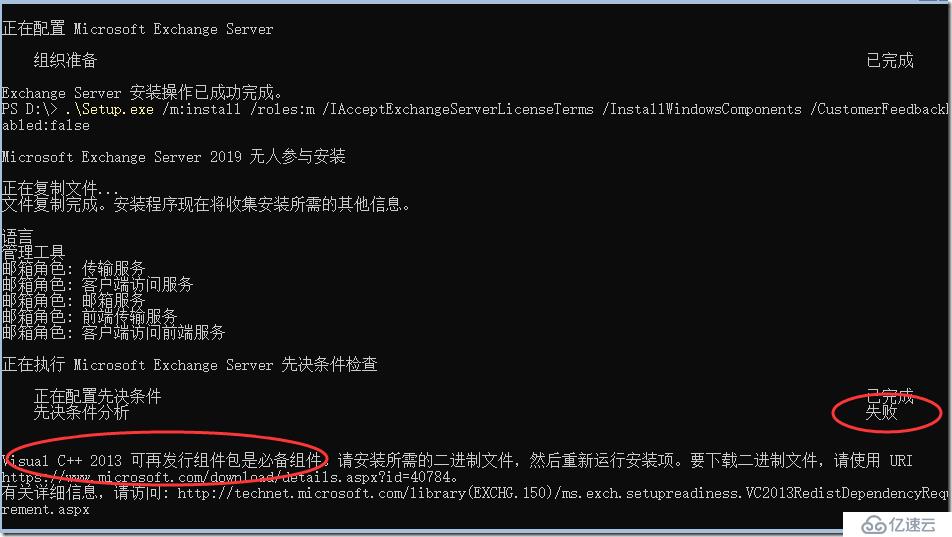
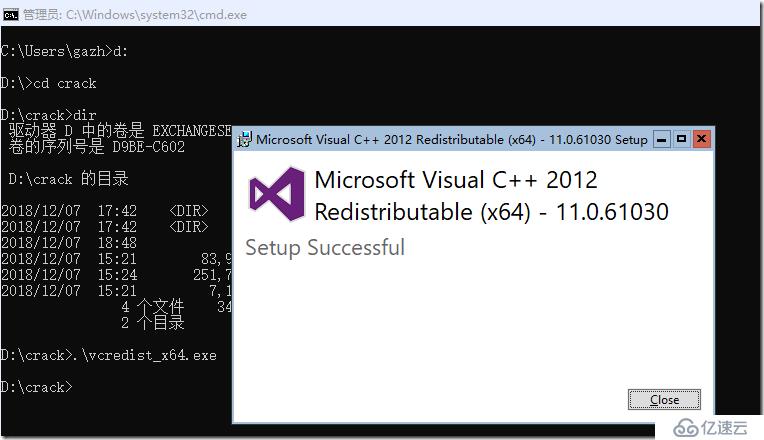
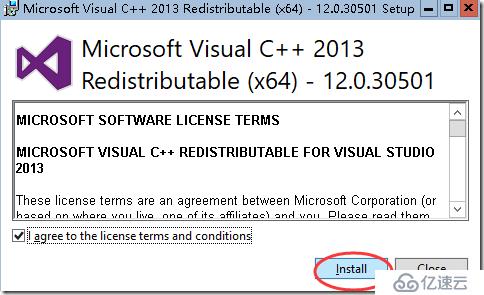
没有安装 visual c++ 2013:https://www.microsoft.com/download/details.aspx?id=40784
Start-BitsTransfer -Source https://download.microsoft.com/download/2/E/6/2E61CFA4-993B-4DD4-91DA-3737CD5CD6E3/vcredist_x64.exe -Destination c:\vcredist_x64.exe
c:\vcredist_x64.exe

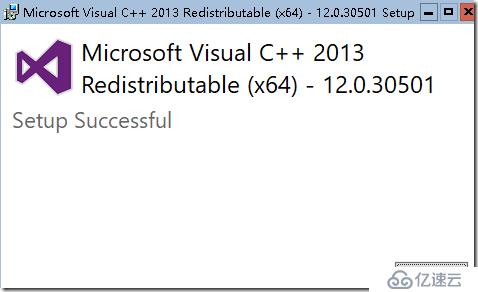
重新运行安装Exchange 2019

重新启动服务器:
shutdown –r –t 0
再次重新运行安装:d:\Setup.exe /m:install /roles:m /IAcceptExchangeServerLicenseTerms /InstallWindowsComponents /CustomerFeedbackEnabled:false
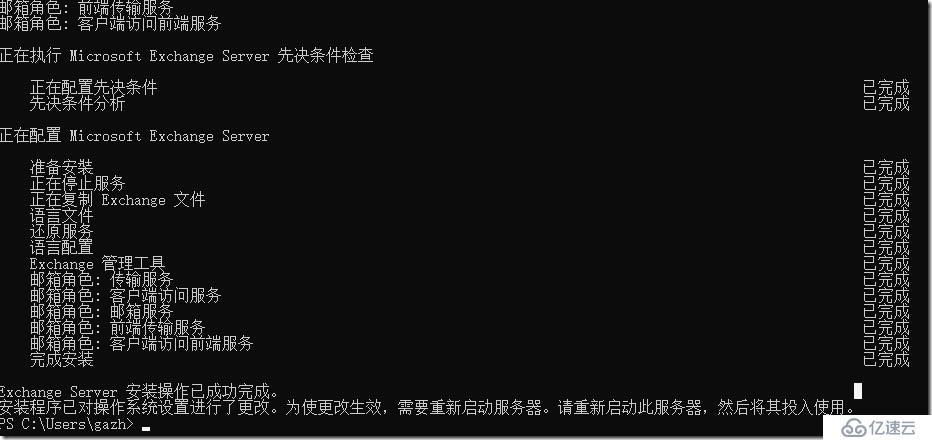
经过漫长的等待,安装完成。按要求重启。
Before you can run Exchange Powershell commands from a regular Powershell console, you need to do the following:
The command to import the Exchange modules is different for each version – use the appropriate command below:
Exchange 2007
Add-PSSnapin Microsoft.Exchange.Management.PowerShell.Admin;
Exchange 2010
Add-PSSnapin Microsoft.Exchange.Management.PowerShell.E2010;
Exchange 2013 & 2016&2019
Add-PSSnapin Microsoft.Exchange.Management.PowerShell.SnapIn;
. Post-Installation Tasks:
Add-PSSnapin Microsoft.Exchange.Management.PowerShell.SnapIn;Set-ExchangeServer veeam-ex19 -ProductKey G3FMN-FGW6B-MQ9VW-YVFV8-292KP
Restart-Service MSExchangeIS
免责声明:本站发布的内容(图片、视频和文字)以原创、转载和分享为主,文章观点不代表本网站立场,如果涉及侵权请联系站长邮箱:is@yisu.com进行举报,并提供相关证据,一经查实,将立刻删除涉嫌侵权内容。


