本文实例为大家分享了Android九宫格图片展示的具体代码,供大家参考,具体内容如下
github地址: https://github.com/surmon-china/vue-awesome-swiper.git
1.进入项目目录,安装swiper
npm install vue-awesome-swiper --save
2.引入资源
//vue滑块
import VueAwesomeSwiper from 'vue-awesome-swiper'
Vue.use(VueAwesomeSwiper)
3.编辑组件
<template>
<swiper :options="swiperOption" ref="mySwiper">
<!-- slides -->
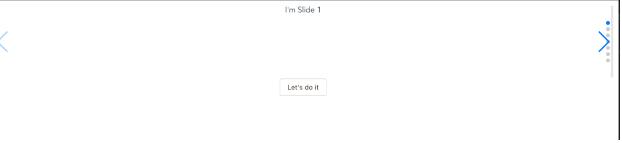
<swiper-slide>I'm Slide 1</swiper-slide>
<swiper-slide>I'm Slide 2</swiper-slide>
<swiper-slide>I'm Slide 3</swiper-slide>
<swiper-slide>I'm Slide 4</swiper-slide>
<swiper-slide>I'm Slide 5</swiper-slide>
<swiper-slide>I'm Slide 6</swiper-slide>
<swiper-slide>I'm Slide 7</swiper-slide>
<!-- Optional controls -->
<div class="swiper-pagination" slot="pagination"></div>
<div class="swiper-button-prev" slot="button-prev"></div>
<div class="swiper-button-next" slot="button-next"></div>
<div class="swiper-scrollbar" slot="scrollbar"></div>
</swiper>
</template>
<script>
import { swiper, swiperSlide } from 'vue-awesome-swiper'
export default {
name: 'carrousel',
data() {
return {
swiperOption: {
// NotNextTick is a component's own property, and if notNextTick is set to true, the component will not instantiate the swiper through NextTick, which means you can get the swiper object the first time (if you need to use the get swiper object to do what Things, then this property must be true)
// notNextTick是一个组件自有属性,如果notNextTick设置为true,组件则不会通过NextTick来实例化swiper,也就意味着你可以在第一时间获取到swiper对象,假如你需要刚加载遍使用获取swiper对象来做什么事,那么这个属性一定要是true
notNextTick: true,
// swiper configs 所有的配置同swiper官方api配置
autoplay: 3000,
// direction : 'vertical',
effect:"coverflow",
grabCursor : true,
setWrapperSize :true,
// autoHeight: true,
// paginationType:"bullets",
pagination : '.swiper-pagination',
paginationClickable :true,
prevButton:'.swiper-button-prev',
nextButton:'.swiper-button-next',
// scrollbar:'.swiper-scrollbar',
mousewheelControl : true,
observeParents:true,
// if you need use plugins in the swiper, you can config in here like this
// 如果自行设计了插件,那么插件的一些配置相关参数,也应该出现在这个对象中,如下debugger
// debugger: true,
// swiper callbacks
// swiper的各种回调函数也可以出现在这个对象中,和swiper官方一样
// onTransitionStart(swiper){
// console.log(swiper)
// },
// more Swiper configs and callbacks...
// ...
}
}
},components: {
swiper,
swiperSlide
},
// you can find current swiper instance object like this, while the notNextTick property value must be true
// 如果你需要得到当前的swiper对象来做一些事情,你可以像下面这样定义一个方法属性来获取当前的swiper对象,同时notNextTick必须为true
computed: {
swiper() {
return this.$refs.mySwiper.swiper
}
},
mounted() {
// you can use current swiper instance object to do something(swiper methods)
// 然后你就可以使用当前上下文内的swiper对象去做你想做的事了
// console.log('this is current swiper instance object', this.swiper)
// this.swiper.slideTo(3, 1000, false)
}
}
</script>
根据官方api进行调整
http://www.swiper.com.cn/api/pagination/2016/0126/299.html
我的git demo可以参考 :https://github.com/ssdpj/mk/tree/vue-admine
以上就是本文的全部内容,希望对大家的学习有所帮助,也希望大家多多支持亿速云。
免责声明:本站发布的内容(图片、视频和文字)以原创、转载和分享为主,文章观点不代表本网站立场,如果涉及侵权请联系站长邮箱:is@yisu.com进行举报,并提供相关证据,一经查实,将立刻删除涉嫌侵权内容。


