这篇文章主要为大家展示了“OpenCV图像几何变换之透视变换的示例分析”,内容简而易懂,条理清晰,希望能够帮助大家解决疑惑,下面让小编带领大家一起研究并学习一下“OpenCV图像几何变换之透视变换的示例分析”这篇文章吧。
本文实例为大家分享了OpenCV图像几何变换之透视变换的具体代码,供大家参考,具体内容如下
1. 基本原理
透视变换(Perspective Transformation)的本质是将图像投影到一个新的视平面,其通用变换公式为:

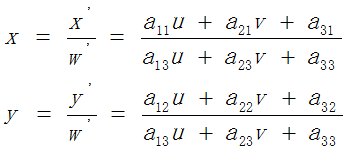
(u,v)为原始图像像素坐标,(x=x'/w',y=y'/w')为变换之后的图像像素坐标。透视变换矩阵图解如下:
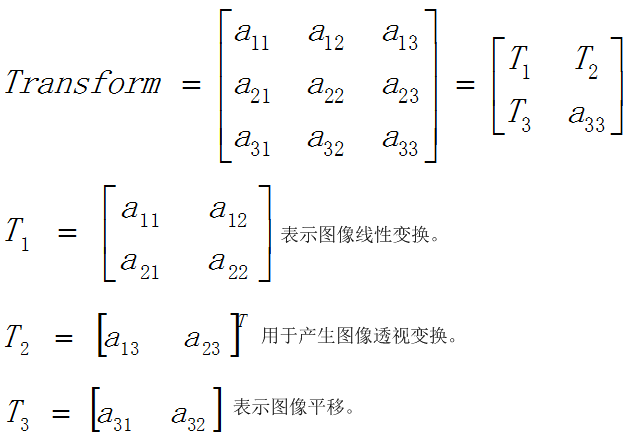
仿射变换(Affine Transformation)可以理解为透视变换的特殊形式。透视变换的数学表达式为:
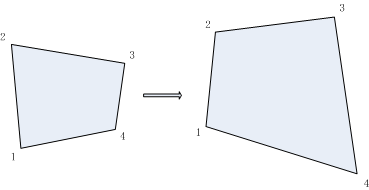
所以,给定透视变换对应的四对像素点坐标,即可求得透视变换矩阵;反之,给定透视变换矩阵,即可对图像或像素点坐标完成透视变换,如下图所示:
2. OpenCV透视变换函数
Mat getPerspectiveTransform(const Point2f* src, const Point2f* dst) // Calculate a perspective transform from four pairs of the corresponding points. // src – Coordinates of quadrangle vertices in the source image. // dst – Coordinates of the corresponding quadrangle vertices in the destination image. void warpPerspective(InputArray src, OutputArray dst, InputArray M, Size dsize, int flags=INTER_LINEAR, int borderMode=BORDER_CONSTANT, const Scalar& borderValue=Scalar()) // Apply a perspective transform to an image. // src – Source image. // dst – Destination image that has the size dsize and the same type as src. // M – 3*3 transformation matrix. // dsize – Size of the destination image. // flags – Combination of interpolation methods and the optional flag WARP_INVERSE_MAP that means that M is the inverse transformation (dstsrc). // borderMode – Pixel extrapolation method. When borderMode=BORDER_TRANSPARENT, it means that the pixels in the destination image that corresponds to the “outliers” in the source image are not modified by the function. // borderValue – Value used in case of a constant border. By default, it is 0.
3. 程序
#include <iostream>
#include "highgui.h"
#include "opencv2/imgproc/imgproc.hpp"
int main()
{
// get original image.
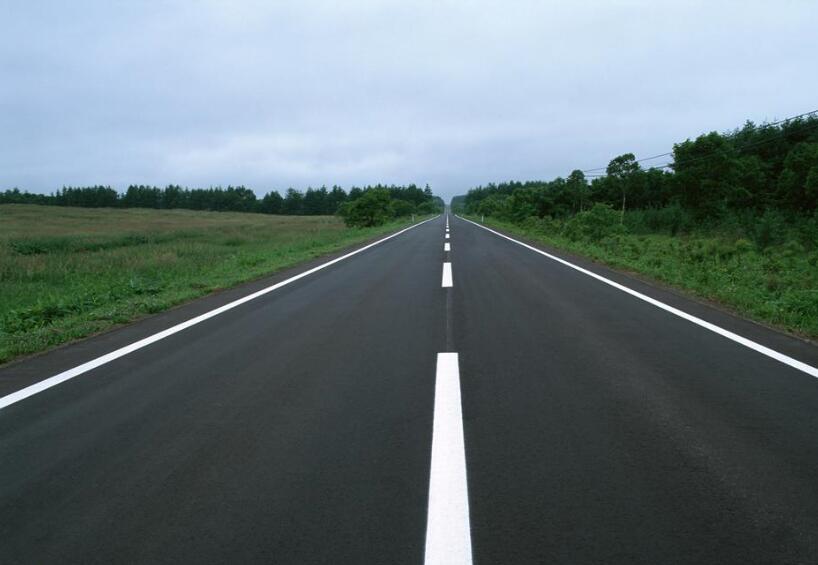
cv::Mat originalImage = cv::imread("road.png");
// perspective image.
cv::Mat perspectiveImage;
// perspective transform
cv::Point2f objectivePoints[4], imagePoints[4];
// original image points.
imagePoints[0].x = 10.0; imagePoints[0].y = 457.0;
imagePoints[1].x = 395.0; imagePoints[1].y = 291.0;
imagePoints[2].x = 624.0; imagePoints[2].y = 291.0;
imagePoints[3].x = 1000.0; imagePoints[3].y = 457.0;
// objective points of perspective image.
// move up the perspective image : objectivePoints.y - value .
// move left the perspective image : objectivePoints.x - value.
double moveValueX = 0.0;
double moveValueY = 0.0;
objectivePoints[0].x = 46.0 + moveValueX; objectivePoints[0].y = 920.0 + moveValueY;
objectivePoints[1].x = 46.0 + moveValueX; objectivePoints[1].y = 100.0 + moveValueY;
objectivePoints[2].x = 600.0 + moveValueX; objectivePoints[2].y = 100.0 + moveValueY;
objectivePoints[3].x = 600.0 + moveValueX; objectivePoints[3].y = 920.0 + moveValueY;
cv::Mat transform = cv::getPerspectiveTransform(objectivePoints, imagePoints);
// perspective.
cv::warpPerspective(originalImage,
perspectiveImage,
transform,
cv::Size(originalImage.rows, originalImage.cols),
cv::INTER_LINEAR | cv::WARP_INVERSE_MAP);
// cv::imshow("perspective image", perspectiveImage);
// cvWaitKey(0);
cv::imwrite("perspectiveImage.png", perspectiveImage);
return 0;
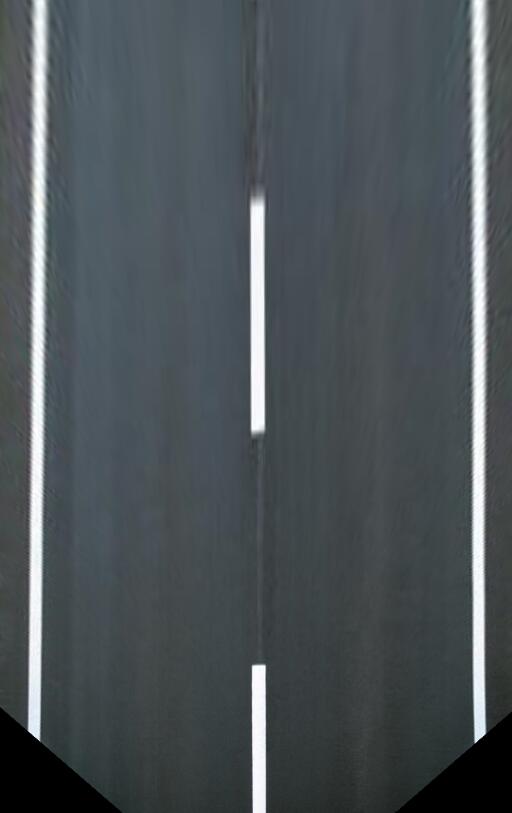
}原始图像及其透视变换结果:
以上是“OpenCV图像几何变换之透视变换的示例分析”这篇文章的所有内容,感谢各位的阅读!相信大家都有了一定的了解,希望分享的内容对大家有所帮助,如果还想学习更多知识,欢迎关注亿速云行业资讯频道!
免责声明:本站发布的内容(图片、视频和文字)以原创、转载和分享为主,文章观点不代表本网站立场,如果涉及侵权请联系站长邮箱:is@yisu.com进行举报,并提供相关证据,一经查实,将立刻删除涉嫌侵权内容。


