一、下载Windows版本的pthread
目前最新版本是:pthreads-w32-2-9-1-release.zip。
二、解压pthread到指定目录
我选择的目录是:E:\DEV-CPP\Pthread
完成后,该目录会多出三个文件夹:Pre-built.2,pthreads.2,QueueUserAPCEx。
三、配置Dev-C++编译选项
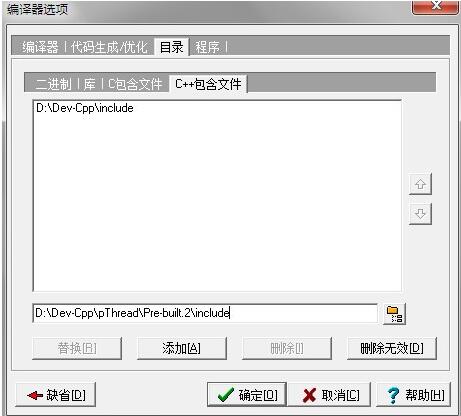
1)点击“工具”→“编译选项”→“目录”→“c++包含文件”,浏览到刚才解压的pthread目录,选择E:\DEV-CPP\Pthread\Pre-built.2\include,添加。
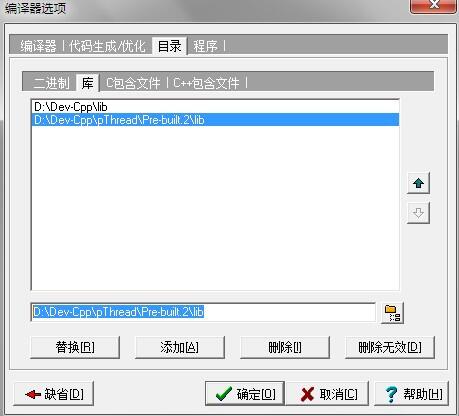
2)点击“工具”→“编译选项”→“目录”→“库”,浏览到刚才解压的pthread目录,选择E:\DEV-CPP\Pthread\Pre-built.2\lib,添加。
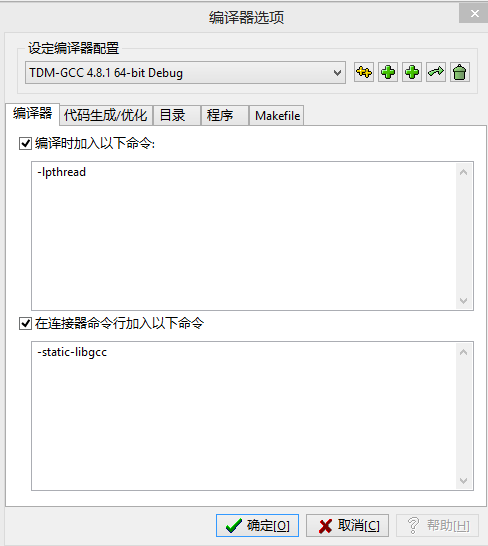
四、如果出现“undefined reference to 'pthread_create”的错误,在编译器选项中要加 -lpthread参数
五、最后附上一个简单的多线程的例子
#include <iostream>
#include <pthread.h>
#include<cstdio>
using namespace std;

void* hjzgg(void* arg)
{
  while(1){
    cout<<"Hello, everyone! I am hjzgg!"<<endl;
    getchar();
  }
  return NULL;
}

int main(int args, char* argv[])
{
  pthread_t tid;
  pthread_create(&tid, NULL, hjzgg, NULL);
  while(1);//主线程不要提前结束
  return 0;
}
以上这篇Windows下使用Dev-C++开发基于pthread.h的多线程程序实例就是小编分享给大家的全部内容了,希望能给大家一个参考,也希望大家多多支持亿速云。
免责声明:本站发布的内容(图片、视频和文字)以原创、转载和分享为主,文章观点不代表本网站立场,如果涉及侵权请联系站长邮箱:is@yisu.com进行举报,并提供相关证据,一经查实,将立刻删除涉嫌侵权内容。


