下文皆使用Client表示操作的App,Server表示需要被唤起的远端App,Server的包名为“com.jxx.server”
1. ComponentName
使用ComponentName唤起Server步骤很简单,需要注意的是Server的Activity需要在manifest配置种设置exported为true
Server的配置如下:
<activity android:name="com.jxx.server.ServerActivity"
 android:exported="true"/>
Client调用如下:
Intent intent1 = new Intent();
ComponentName componentName = new ComponentName("com.jxx.server", "com.jxx.server.ServerActivity");
intent1.setComponent(componentName);
intent1.setFlags(Intent.FLAG_ACTIVITY_NEW_TASK);
startActivity(intent1);
Intent中添加ComponentName还有另外一种写法
Intent intent2 = new Intent();
intent2.setClassName("jxx.com.server", "jxx.com.server.MainActivity");
intent2.setFlags(Intent.FLAG_ACTIVITY_NEW_TASK);
startActivity(intent1);
只不过setClassName内部帮我们new ComponentName的实例
public @NonNull Intent setClassName(@NonNull String packageName, @NonNull String className) {
 mComponent = new ComponentName(packageName, className);
 return this;
}
既然是用Intent来唤起Activity,那就能使用Intent的特性,例如使用Bundle传递数据
Intent intent1 = new Intent();
ComponentName componentName = new ComponentName("com.jxx.server", "com.jxx.server.ServerActivity");
intent1.setComponent(componentName);

Bundle bundle1 = new Bundle();
bundle1.putString("remote_invoke", "from_client");
intent1.putExtras(bundle1);

intent1.setFlags(Intent.FLAG_ACTIVITY_NEW_TASK);
startActivity(intent1);
在Server端提取数据也很简单
Bundle bundle = getIntent().getExtras();
2. 隐式跳转,Uri
Android中唤起拨号页面是这样的
Intent intent = new Intent(Intent.ACTION_CALL,Uri.parse("tel:" + phoneNumber));
startActivity(intent);
其实就是用Uri的形式唤起Server,并传递数据,我们来自己实现一下。 这种方式下,Server端的配置如下,必须添加要有action、data以及category:
<activity android:name=".SecondActivity">

 <intent-filter>
  <action android:name="com.jxx.server.ServerActivity" />
  <data
   android:host="com.jxx.server"
   android:scheme="ServerActivity" />
  <category android:name="android.intent.category.DEFAULT" />
 </intent-filter>            </activity>
Client调用:
Intent intent2 = new Intent("com.jxx.server.ServerActivity");
Uri uri = Uri.parse("ServerActivity://com.jxx.server?remote_invoke=from_client");
intent2.setData(uri);
startActivity(intent2);
我们看到uri中?后面还加了"remote_invoke=from_client",这其实是用来给Server传递数据用的,我们可以在Server中解析出来
Uri uri = getIntent().getData();
String from = uri.getQueryParameter("remote_invoke");
//from = "from_client"
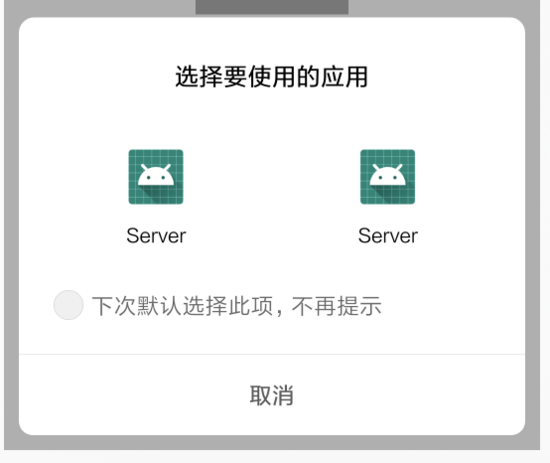
这里还有一个需要注意的点是,如果Client在调用时没有指定Action,同时Server中又有多个Activity注册了相同的scheme和host,那么在页面跳转时,系统会弹框让我们选择跳转到哪个页面,如下图所示:

3. 通过PackageManager唤起
只需要知道Server的包名即可
PackageManager packageManager = getPackageManager();
Intent intent3 = packageManager.getLaunchIntentForPackage("com.jxx.server");
if (intent3 != null) {
 startActivity(intent3);
}
4. 静态广播接收者
只需要Server端注册一个静态广播接收者,在广播接收者中跳转Activity即可,客户端只需要发送一个广播。
Server定义广播接收者:
public class ServerBroadCastReceiver extends BroadcastReceiver {

 @Override
 public void onReceive(Context context, Intent intent) {
  Intent intent1 = new Intent(context, MainActivity.class);
  //注意,这里必须要添加这个flag,
  //原因在于这里的context并不是一个Activity类型的context,无法直接开启activity
  intent1.setFlags(Intent.FLAG_ACTIVITY_NEW_TASK);
  context.startActivity(intent1);
 }
}
并在manifest中注册为静态广播接收者,并定义action
<receiver
 android:name=".ServerBroadCastReceiver"
 android:enabled="true"
 android:exported="true">
 <intent-filter>
  <action android:name="server.ServerBroadCastReceiver" />
 </intent-filter>
</receiver>
Client中发送广播即可
Intent intent4 = new Intent("server.ServerBroadCastReceiver");
//这里加上componentName用于解决8.0以上不能唤起的问题
ComponentName componentName = new ComponentName("com.jxx.server", "com.jxx.server.ServerBroadCastReceiver");
intent4.setComponent(componentName);
sendBroadcast(intent4);
5. Service
在Android Service详解(二) 中我们介绍了如何通过Service实现IPC通信,这当然也能用来唤起App,这里就不再过多介绍了,有兴趣的同学可以点击查看。
以上就是本文的全部内容,希望对大家的学习有所帮助,也希望大家多多支持亿速云。
免责声明:本站发布的内容(图片、视频和文字)以原创、转载和分享为主,文章观点不代表本网站立场,如果涉及侵权请联系站长邮箱:is@yisu.com进行举报,并提供相关证据,一经查实,将立刻删除涉嫌侵权内容。