本篇文章为大家展示了如何在Spring Boot中利用JWT进行接口认证,内容简明扼要并且容易理解,绝对能使你眼前一亮,通过这篇文章的详细介绍希望你能有所收获。
jwt(json web token)
用户发送按照约定,向服务端发送 Header、Payload 和 Signature,并包含认证信息(密码),验证通过后服务端返回一个token,之后用户使用该token作为登录凭证,适合于移动端和api
jwt使用流程

1、添加依赖库jjwt,本文中构造jwt及解析jwt都使用了jjwt库
<dependency>
  <groupId>io.jsonwebtoken</groupId>
  <artifactId>jjwt</artifactId>
  <version>0.6.0</version>
</dependency>
2、添加登录获取token时,所需要的认证信息类LoginPara.Java
package com.xiaofangtech.sunt.jwt;

public class LoginPara {
  private String clientId;
  private String userName;
  private String password;
  private String captchaCode;
  private String captchaValue;

  public String getClientId() {
    return clientId;
  }
  public void setClientId(String clientId) {
    this.clientId = clientId;
  }
  public String getUserName() {
    return userName;
  }
  public void setUserName(String userName) {
    this.userName = userName;
  }
  public String getPassword() {
    return password;
  }
  public void setPassword(String password) {
    this.password = password;
  }
  public String getCaptchaCode() {
    return captchaCode;
  }
  public void setCaptchaCode(String captchaCode) {
    this.captchaCode = captchaCode;
  }
  public String getCaptchaValue() {
    return captchaValue;
  }
  public void setCaptchaValue(String captchaValue) {
    this.captchaValue = captchaValue;
  }
}
3、添加构造jwt及解析jwt的帮助类JwtHelper.java
package com.xiaofangtech.sunt.jwt;

import java.security.Key;
import java.util.Date;

import javax.crypto.spec.SecretKeySpec;
import javax.xml.bind.DatatypeConverter;

import io.jsonwebtoken.Claims;
import io.jsonwebtoken.JwtBuilder;
import io.jsonwebtoken.Jwts;
import io.jsonwebtoken.SignatureAlgorithm;

public class JwtHelper {
  public static Claims parseJWT(String jsonWebToken, String base64Security){
    try
    {
      Claims claims = Jwts.parser()
            .setSigningKey(DatatypeConverter.parseBase64Binary(base64Security))
            .parseClaimsJws(jsonWebToken).getBody();
      return claims;
    }
    catch(Exception ex)
    {
      return null;
    }
  }

  public static String createJWT(String name, String userId, String role,
      String audience, String issuer, long TTLMillis, String base64Security)
  {
    SignatureAlgorithm signatureAlgorithm = SignatureAlgorithm.HS256;

    long nowMillis = System.currentTimeMillis();
    Date now = new Date(nowMillis);

    //生成签名密钥
    byte[] apiKeySecretBytes = DatatypeConverter.parseBase64Binary(base64Security);
    Key signingKey = new SecretKeySpec(apiKeySecretBytes, signatureAlgorithm.getJcaName());

     //添加构成JWT的参数
    JwtBuilder builder = Jwts.builder().setHeaderParam("typ", "JWT")
                    .claim("role", role)
                    .claim("unique_name", name)
                    .claim("userid", userId)
                    .setIssuer(issuer)
                    .setAudience(audience)
                    .signWith(signatureAlgorithm, signingKey);
     //添加Token过期时间
    if (TTLMillis >= 0) {
      long expMillis = nowMillis + TTLMillis;
      Date exp = new Date(expMillis);
      builder.setExpiration(exp).setNotBefore(now);
    }

     //生成JWT
    return builder.compact();
  }
}
4、添加token返回结果类AccessToken.java
package com.xiaofangtech.sunt.jwt;

public class AccessToken {
  private String access_token;
  private String token_type;
  private long expires_in;
  public String getAccess_token() {
    return access_token;
  }
  public void setAccess_token(String access_token) {
    this.access_token = access_token;
  }
  public String getToken_type() {
    return token_type;
  }
  public void setToken_type(String token_type) {
    this.token_type = token_type;
  }
  public long getExpires_in() {
    return expires_in;
  }
  public void setExpires_in(long expires_in) {
    this.expires_in = expires_in;
  }
}
5、添加获取token的接口,通过传入用户认证信息(用户名、密码)进行认证获取
package com.xiaofangtech.sunt.jwt;

import org.springframework.beans.factory.annotation.Autowired;
import org.springframework.web.bind.annotation.RequestBody;
import org.springframework.web.bind.annotation.RequestMapping;
import org.springframework.web.bind.annotation.RestController;

import com.xiaofangtech.sunt.bean.UserInfo;
import com.xiaofangtech.sunt.repository.UserInfoRepository;
import com.xiaofangtech.sunt.utils.MyUtils;
import com.xiaofangtech.sunt.utils.ResultMsg;
import com.xiaofangtech.sunt.utils.ResultStatusCode;

@RestController
public class JsonWebToken {
  @Autowired
  private UserInfoRepository userRepositoy;

  @Autowired
  private Audience audienceEntity;

  @RequestMapping("oauth/token")
  public Object getAccessToken(@RequestBody LoginPara loginPara)
  {
    ResultMsg resultMsg;
    try
    {
      if(loginPara.getClientId() == null
          || (loginPara.getClientId().compareTo(audienceEntity.getClientId()) != 0))
      {
        resultMsg = new ResultMsg(ResultStatusCode.INVALID_CLIENTID.getErrcode(),
            ResultStatusCode.INVALID_CLIENTID.getErrmsg(), null);
        return resultMsg;
      }

      //验证码校验在后面章节添加


      //验证用户名密码
      UserInfo user = userRepositoy.findUserInfoByName(loginPara.getUserName());
      if (user == null)
      {
        resultMsg = new ResultMsg(ResultStatusCode.INVALID_PASSWORD.getErrcode(),
            ResultStatusCode.INVALID_PASSWORD.getErrmsg(), null);
        return resultMsg;
      }
      else
      {
        String md5Password = MyUtils.getMD5(loginPara.getPassword()+user.getSalt());

        if (md5Password.compareTo(user.getPassword()) != 0)
        {
          resultMsg = new ResultMsg(ResultStatusCode.INVALID_PASSWORD.getErrcode(),
              ResultStatusCode.INVALID_PASSWORD.getErrmsg(), null);
          return resultMsg;
        }
      }

      //拼装accessToken
      String accessToken = JwtHelper.createJWT(loginPara.getUserName(), String.valueOf(user.getName()),
          user.getRole(), audienceEntity.getClientId(), audienceEntity.getName(),
          audienceEntity.getExpiresSecond() * 1000, audienceEntity.getBase64Secret());

      //返回accessToken
      AccessToken accessTokenEntity = new AccessToken();
      accessTokenEntity.setAccess_token(accessToken);
      accessTokenEntity.setExpires_in(audienceEntity.getExpiresSecond());
      accessTokenEntity.setToken_type("bearer");
      resultMsg = new ResultMsg(ResultStatusCode.OK.getErrcode(),
          ResultStatusCode.OK.getErrmsg(), accessTokenEntity);
      return resultMsg;

    }
    catch(Exception ex)
    {
      resultMsg = new ResultMsg(ResultStatusCode.SYSTEM_ERR.getErrcode(),
          ResultStatusCode.SYSTEM_ERR.getErrmsg(), null);
      return resultMsg;
    }
  }
}
6、添加使用jwt认证的filter
package com.xiaofangtech.sunt.filter;

import java.io.IOException;

import javax.servlet.Filter;
import javax.servlet.FilterChain;
import javax.servlet.FilterConfig;
import javax.servlet.ServletException;
import javax.servlet.ServletRequest;
import javax.servlet.ServletResponse;
import javax.servlet.http.HttpServletRequest;
import javax.servlet.http.HttpServletResponse;

import org.springframework.beans.factory.annotation.Autowired;
import org.springframework.web.context.support.SpringBeanAutowiringSupport;

import com.fasterxml.jackson.databind.ObjectMapper;
import com.xiaofangtech.sunt.jwt.Audience;
import com.xiaofangtech.sunt.jwt.JwtHelper;
import com.xiaofangtech.sunt.utils.ResultMsg;
import com.xiaofangtech.sunt.utils.ResultStatusCode;

public class HTTPBearerAuthorizeAttribute implements Filter{
  @Autowired
  private Audience audienceEntity;

  @Override
  public void init(FilterConfig filterConfig) throws ServletException {
    // TODO Auto-generated method stub
    SpringBeanAutowiringSupport.processInjectionBasedOnServletContext(this,
        filterConfig.getServletContext());

  }

  @Override
  public void doFilter(ServletRequest request, ServletResponse response, FilterChain chain)
      throws IOException, ServletException {
    // TODO Auto-generated method stub

    ResultMsg resultMsg;
    HttpServletRequest httpRequest = (HttpServletRequest)request;
    String auth = httpRequest.getHeader("Authorization");
    if ((auth != null) && (auth.length() > 7))
    {
      String HeadStr = auth.substring(0, 6).toLowerCase();
      if (HeadStr.compareTo("bearer") == 0)
      {

        auth = auth.substring(7, auth.length());
        if (JwtHelper.parseJWT(auth, audienceEntity.getBase64Secret()) != null)
        {
          chain.doFilter(request, response);
          return;
        }
      }
    }

    HttpServletResponse httpResponse = (HttpServletResponse) response;
    httpResponse.setCharacterEncoding("UTF-8");
    httpResponse.setContentType("application/json; charset=utf-8");
    httpResponse.setStatus(HttpServletResponse.SC_UNAUTHORIZED);

    ObjectMapper mapper = new ObjectMapper();

    resultMsg = new ResultMsg(ResultStatusCode.INVALID_TOKEN.getErrcode(), ResultStatusCode.INVALID_TOKEN.getErrmsg(), null);
    httpResponse.getWriter().write(mapper.writeValueAsString(resultMsg));
    return;
  }

  @Override
  public void destroy() {
    // TODO Auto-generated method stub

  }
}
7、在入口处注册filter
package com.xiaofangtech.sunt;

import java.util.ArrayList;
import java.util.List;

import org.springframework.boot.SpringApplication;
import org.springframework.boot.autoconfigure.SpringBootApplication;
import org.springframework.boot.context.embedded.FilterRegistrationBean;
import org.springframework.boot.context.properties.EnableConfigurationProperties;
import org.springframework.context.annotation.Bean;

import com.xiaofangtech.sunt.filter.HTTPBasicAuthorizeAttribute;
import com.xiaofangtech.sunt.filter.HTTPBearerAuthorizeAttribute;
import com.xiaofangtech.sunt.jwt.Audience;

@SpringBootApplication
@EnableConfigurationProperties(Audience.class)
public class SpringRestApplication {

  public static void main(String[] args) {
    SpringApplication.run(SpringRestApplication.class, args);
  }

  @Bean
  public FilterRegistrationBean basicFilterRegistrationBean() {
    FilterRegistrationBean registrationBean = new FilterRegistrationBean();
    HTTPBasicAuthorizeAttribute httpBasicFilter = new HTTPBasicAuthorizeAttribute();
    registrationBean.setFilter(httpBasicFilter);
    List<String> urlPatterns = new ArrayList<String>();
    urlPatterns.add("/user/getuser");
    registrationBean.setUrlPatterns(urlPatterns);
    return registrationBean;
  }

  @Bean
  public FilterRegistrationBean jwtFilterRegistrationBean(){
    FilterRegistrationBean registrationBean = new FilterRegistrationBean();
    HTTPBearerAuthorizeAttribute httpBearerFilter = new HTTPBearerAuthorizeAttribute();
    registrationBean.setFilter(httpBearerFilter);
    List<String> urlPatterns = new ArrayList<String>();
    urlPatterns.add("/user/getusers");
    registrationBean.setUrlPatterns(urlPatterns);
    return registrationBean;
  }
}
8、添加获取md5的方法类MyUtils
package com.xiaofangtech.sunt.utils;

import java.security.MessageDigest;

public class MyUtils {
  public static String getMD5(String inStr) {
    MessageDigest md5 = null;
    try {
      md5 = MessageDigest.getInstance("MD5");
    } catch (Exception e) {

      e.printStackTrace();
      return "";
    }
    char[] charArray = inStr.toCharArray();
    byte[] byteArray = new byte[charArray.length];

    for (int i = 0; i < charArray.length; i++)
      byteArray[i] = (byte) charArray[i];

    byte[] md5Bytes = md5.digest(byteArray);

    StringBuffer hexValue = new StringBuffer();

    for (int i = 0; i < md5Bytes.length; i++) {
      int val = ((int) md5Bytes[i]) & 0xff;
      if (val < 16)
        hexValue.append("0");
      hexValue.append(Integer.toHexString(val));
    }

    return hexValue.toString();
  }
}
9、在返回信息类中补充添加错误码
INVALID_CLIENTID(30003, "Invalid clientid"),
INVALID_PASSWORD(30004, "User name or password is incorrect"),
INVALID_CAPTCHA(30005, "Invalid captcha or captcha overdue"),
INVALID_TOKEN(30006, "Invalid token");
10、代码中涉及的Audience类,在上一篇文章中定义,本文不再重复说明
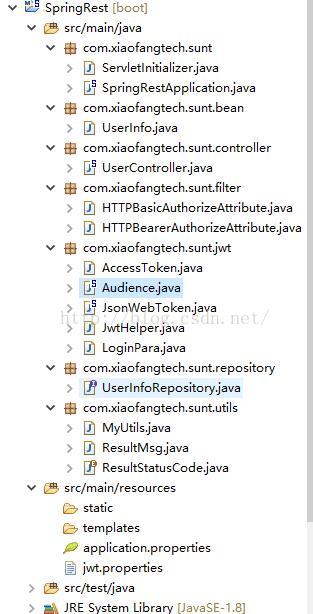
11、代码整体结构
上述内容就是如何在Spring Boot中利用JWT进行接口认证,你们学到知识或技能了吗?如果还想学到更多技能或者丰富自己的知识储备,欢迎关注亿速云行业资讯频道。
免责声明:本站发布的内容(图片、视频和文字)以原创、转载和分享为主,文章观点不代表本网站立场,如果涉及侵权请联系站长邮箱:is@yisu.com进行举报,并提供相关证据,一经查实,将立刻删除涉嫌侵权内容。


