在Android项目中使用RemoteViews实现跨进程更新界面?相信很多没有经验的人对此束手无策,为此本文总结了问题出现的原因和解决方法,通过这篇文章希望你能解决这个问题。
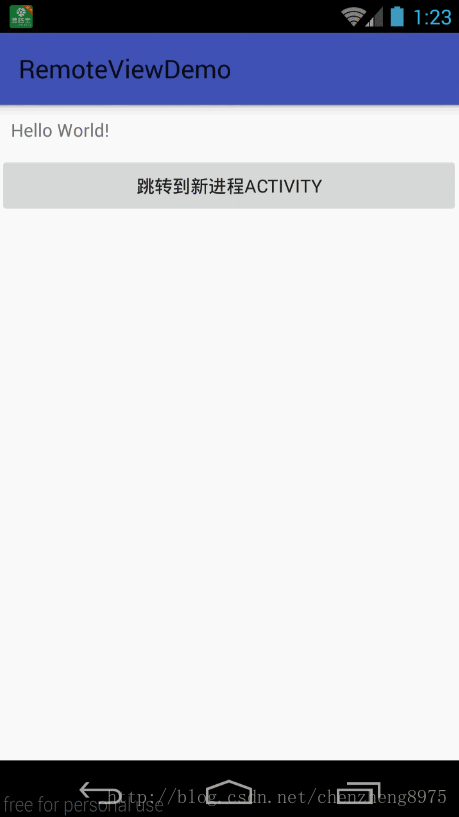
实现效果图
在同一个应用中有两个Activity,MainActivity和Temp2Activity,这两个Activity不在同一个进程中。

现在需要通过Temp2Activity来改变MainActivity中的视图,即在MainActivity中添加两个Button,也就是实现跨进程更新UI这么一个功能。
在MainActivity里点击“跳转到新进程ACTIVITY”按钮,会启动一个新进程的Temp2Activity,我们先点击“绑定服务”,这样我们就启动了服务,再点击“AIDL更新”按钮,通过调用handler来实现跨进程更新UI,点击返回,我们发现MainActivity页面中新添加了两个按钮,并且按钮还具有点击事件。
三、核心代码
IremoteViewsManager.aidl
里面提供了两个方法,一个是根据id更新TextView里面的内容,一个是根据id添加view视图
// IremoteViewsManager.aidl.aidl
package com.czhappy.remoteviewdemo;

interface IremoteViewsManager {
  void addRemoteView(in RemoteViews remoteViews);
}
RemoteViewsAIDLService.Java
package com.czhappy.remoteviewdemo.service;

import android.app.Service;
import android.content.Intent;
import android.os.Binder;
import android.os.Bundle;
import android.os.IBinder;
import android.os.Message;
import android.os.RemoteException;
import android.widget.RemoteViews;

import com.czhappy.remoteviewdemo.IremoteViewsManager;
import com.czhappy.remoteviewdemo.activity.MainActivity;

/**
 * Description:
 * User: chenzheng
 * Date: 2017/2/10 0010
 * Time: 10:56
 */
public class RemoteViewsAIDLService extends Service {
  private static final String TAG = "RemoteViewsAIDLService";

  private Binder remoteViewsBinder = new IremoteViewsManager.Stub(){
    @Override
    public void addRemoteView(RemoteViews remoteViews) throws RemoteException {
      Message message = new Message();
      message.what = 1;
      Bundle bundle = new Bundle();
      bundle.putParcelable("remoteViews",remoteViews);
      message.setData(bundle);
      new MainActivity.MyHandler(RemoteViewsAIDLService.this,getMainLooper()).sendMessage(message);
    }
  };

  public RemoteViewsAIDLService() {

  }

  @Override
  public IBinder onBind(Intent intent) {
    return remoteViewsBinder;
  }

}
MainActivity.java
package com.czhappy.remoteviewdemo.activity;

import android.content.Context;
import android.content.Intent;
import android.os.Bundle;
import android.os.Handler;
import android.os.Looper;
import android.os.Message;
import android.support.v7.app.AppCompatActivity;
import android.util.Log;
import android.view.LayoutInflater;
import android.view.View;
import android.widget.LinearLayout;
import android.widget.RemoteViews;
import android.widget.TextView;

import com.czhappy.remoteviewdemo.R;

import java.lang.ref.WeakReference;

public class MainActivity extends AppCompatActivity {

  private static String TAG = "MainActivity";
  private static LinearLayout mLinearLayout;

  @Override
  protected void onCreate(Bundle savedInstanceState) {
    super.onCreate(savedInstanceState);
    setContentView(R.layout.activity_main);

    mLinearLayout = (LinearLayout) this.findViewById(R.id.mylayout);
  }

  public static class MyHandler extends Handler {
    WeakReference<Context> weakReference;
    public MyHandler(Context context, Looper looper) {
      super(looper);
      weakReference = new WeakReference<>(context);
    }
    @Override
    public void handleMessage(Message msg) {
      super.handleMessage(msg);
      Log.i(TAG, "handleMessage");
      switch (msg.what) {
        case 1: //RemoteViews的AIDL实现
          RemoteViews remoteViews = msg.getData().getParcelable("remoteViews");
          if (remoteViews != null) {
            Log.i(TAG, "updateUI");

            View view = remoteViews.apply(weakReference.get(), mLinearLayout);
            mLinearLayout.addView(view);
          }
          break;
        default:
          break;
      }
    }

  };

  public void readyGo(View view){
    Intent intent = new Intent(MainActivity.this, Temp2Activity.class);
    startActivity(intent);
  }

}
Temp2Activity.java
package com.czhappy.remoteviewdemo.activity;

import android.app.PendingIntent;
import android.content.ComponentName;
import android.content.Context;
import android.content.Intent;
import android.content.ServiceConnection;
import android.os.Bundle;
import android.os.IBinder;
import android.os.RemoteException;
import android.support.annotation.Nullable;
import android.support.v7.app.AppCompatActivity;
import android.util.Log;
import android.view.View;
import android.widget.RemoteViews;

import com.czhappy.remoteviewdemo.IremoteViewsManager;
import com.czhappy.remoteviewdemo.R;
import com.czhappy.remoteviewdemo.service.RemoteViewsAIDLService;

/**
 * Description:
 * User: chenzheng
 * Date: 2017/2/9 0009
 * Time: 16:05
 */
public class Temp2Activity extends AppCompatActivity {

  private String TAG = "Temp2Activity";

  private IremoteViewsManager remoteViewsManager;
  private boolean isBind = false;


  private ServiceConnection remoteViewServiceConnection = new ServiceConnection() {
    @Override
    public void onServiceConnected(ComponentName name, IBinder service) {
      Log.i(TAG,"onServiceConnected");
      remoteViewsManager = IremoteViewsManager.Stub.asInterface(service);

    }

    @Override
    public void onServiceDisconnected(ComponentName name) {
      //回收
      remoteViewsManager = null;
    }
  };

  @Override
  protected void onCreate(@Nullable Bundle savedInstanceState) {
    super.onCreate(savedInstanceState);
    this.setContentView(R.layout.activity_temp);
  }

  /**
   * 绑定服务
   */
  public void bindService(View view) {
    Intent viewServiceIntent = new Intent(this,RemoteViewsAIDLService.class);
    isBind = bindService(viewServiceIntent,remoteViewServiceConnection, Context.BIND_AUTO_CREATE);
  }

  /**
   * 更新UI
   */
  public void UpdateUI(View view){
    RemoteViews remoteViews = new RemoteViews(Temp2Activity.this.getPackageName(),R.layout.button_layout);

    Intent intentClick = new Intent(Temp2Activity.this,FirstActivity.class);
    PendingIntent openFirstActivity = PendingIntent.getActivity(Temp2Activity.this,0,intentClick,0);
    remoteViews.setOnClickPendingIntent(R.id.firstButton,openFirstActivity);

    Intent secondClick = new Intent(Temp2Activity.this,SecondActivity.class);
    PendingIntent openSecondActivity = PendingIntent.getActivity(Temp2Activity.this,0,secondClick,0);
    remoteViews.setOnClickPendingIntent(R.id.secondButton,openSecondActivity);

    remoteViews.setCharSequence(R.id.secondButton,"setText","想改就改");
    try {
      remoteViewsManager.addRemoteView(remoteViews);
    } catch (RemoteException e) {
      e.printStackTrace();
    }
  }

  @Override
  protected void onDestroy() {
    super.onDestroy();
    if(isBind){
      unbindService(remoteViewServiceConnection);
      isBind = false;
    }

  }

}
AndroidManifest.xml
<?xml version="1.0" encoding="utf-8"?>
<manifest xmlns:android="http://schemas.android.com/apk/res/android"
package="com.czhappy.remoteviewdemo">
<application
android:allowBackup="true"
android:icon="@mipmap/ic_launcher"
android:label="@string/app_name"
android:supportsRtl="true"
android:theme="@style/AppTheme">
<activity android:name=".activity.MainActivity">
<intent-filter>
<action android:name="android.intent.action.MAIN" />
<category android:name="android.intent.category.LAUNCHER" />
</intent-filter>
</activity>
<activity android:name=".activity.FirstActivity" />
<activity android:name=".activity.SecondActivity" />
<activity
android:name=".activity.Temp2Activity"
android:process=":remote2" />
<service android:name="com.czhappy.remoteviewdemo.service.RemoteViewsAIDLService" />
</application>
</manifest>四、总结
RemoteViews就是为跨进程更新UI而生的,内部封装了很多方法用来实现跨进程更新UI。但这并不代表RemoteViews是就是万能的了,它也有不足之处,目前支持的布局和View有限
layout:
FrameLayout LinearLayout RelativeLayout GridLayout
View:
AnalogClock button Chronometer ImageButton ImageView ProgressBar TextView ViewFlipper ListView GridView StackView AdapterViewFlipper ViewStub
不支持自定义View 所以具体使用RemoteViews还是aidl或者BroadCastReceiver还得看实际的需求。
看完上述内容,你们掌握在Android项目中使用RemoteViews实现跨进程更新界面的方法了吗?如果还想学到更多技能或想了解更多相关内容,欢迎关注亿速云行业资讯频道,感谢各位的阅读!
免责声明:本站发布的内容(图片、视频和文字)以原创、转载和分享为主,文章观点不代表本网站立场,如果涉及侵权请联系站长邮箱:is@yisu.com进行举报,并提供相关证据,一经查实,将立刻删除涉嫌侵权内容。


