这篇文章主要介绍JWT实现SSO单点登录的流程步骤,文中示例代码介绍的非常详细,具有一定的参考价值,感兴趣的小伙伴们一定要看完!
一、基于JWT实现SSO单点登录原理
1、什么是单点登录
所谓单点登录就是有多个应用部署在不同的服务器上,只需登录一次就可以互相访问不同服务器上的资源。
2、单点登录流程
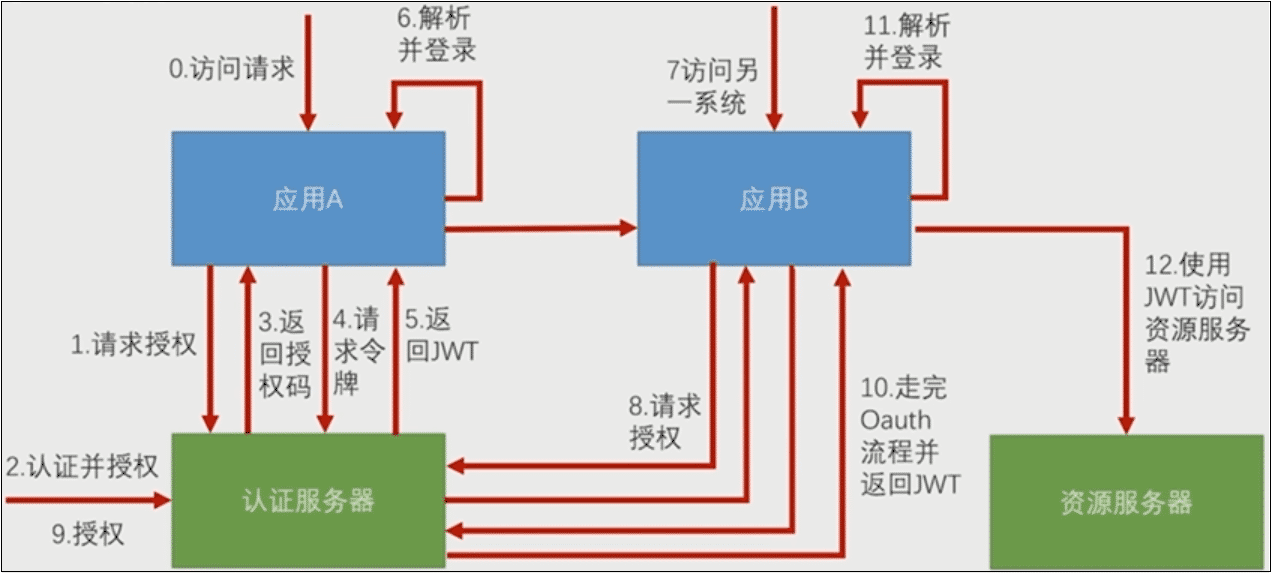
当一个访问请求发给应用A,如果这个请求需要登录以后才能访问,那么应用A就会向认证服务器请求授权,这时候就把用户引导到认证服务器上。用户在认证服务器上完成认证并授权。认证授权完成后,认证服务器返回给应用A一个授权码,应用A携带授权码到认证服务器请求令牌,认证服务器返回应用A一个JWT,应用A解析JWT里面的信息,完成登录。这是一个标准的OAuth3的授权码流程。
走完认证流程后,给出去的JWT实际上里面包含的就是当前用户在认证服务器上登录以后用户的认证信息,应用A解析JWT后,自己生成一个经过认证的Authentication放到它的SpringSecurity和SecurityContext里面。
当访问应用服务器B的时候,同样引导用户去认证服务器请求授权(不需要登录),用户授权可以用登录的信息去访问应用B,后面同样是授权码流程,返回JWT给应用B。两个应用返回不同的JWT,但是解析出的信息是一样的。
二、实现单点登录
1、父工程(sso-demo)
1)pom.xml
<dependencyManagement>
  <dependencies>
    <dependency>
      <groupId>org.springframework.boot</groupId>
      <artifactId>spring-boot-dependencies</artifactId>
      <version>2.0.4.RELEASE</version>
      <type>pom</type>
      <scope>import</scope>
    </dependency>
    <dependency>
      <groupId>org.springframework.security.oauth.boot</groupId>
      <artifactId>spring-security-oauth3-autoconfigure</artifactId>
      <version>2.1.3.RELEASE</version>
    </dependency>
    <dependency>
      <groupId>org.springframework.security</groupId>
      <artifactId>spring-security-jwt</artifactId>
      <version>1.0.10.RELEASE</version>
    </dependency>
  </dependencies>
</dependencyManagement>
2、认证服务(sso-server)
1)pom.xml
<dependency>
  <groupId>org.springframework.boot</groupId>
  <artifactId>spring-boot-starter-web</artifactId>
</dependency>
<dependency>
  <groupId>org.springframework.boot</groupId>
  <artifactId>spring-boot-starter-security</artifactId>
</dependency>
<dependency>
  <groupId>org.springframework.security.oauth.boot</groupId>
  <artifactId>spring-security-oauth3-autoconfigure</artifactId>
</dependency>
<dependency>
  <groupId>org.springframework.security</groupId>
  <artifactId>spring-security-jwt</artifactId>
</dependency>
2)application.properties
server.port = 9999
server.servlet.context-path = /server
3)WebSecurityConfig.java
@EnableWebSecurity
@Configuration
public class WebSecurityConfig extends WebSecurityConfigurerAdapter{

  @Override
  protected void configure(HttpSecurity http) throws Exception {
    http.httpBasic().and().csrf().disable();
  }
  @Bean
  public PasswordEncoder passwordEncoder() {
    return new BCryptPasswordEncoder();
  }
}
4)MyUserDetailsService.java
@Component
public class MyUserDetailsService implements UserDetailsService{

  @Autowired
  private PasswordEncoder passwordEncoder;

  @Override
  public UserDetails loadUserByUsername(String username) throws UsernameNotFoundException {
    System.out.println("登录用户名:"+username);
    String password = passwordEncoder.encode("123456");
    return new User(username,password,true,true,true,true,
        AuthorityUtils.commaSeparatedStringToAuthorityList("all"));
  }
}
5)SsoAuthorizationServerConfig.java
@Configuration
@EnableAuthorizationServer
public class SsoAuthorizationServerConfig extends AuthorizationServerConfigurerAdapter {
@Autowired
private PasswordEncoder passwordEncoder;
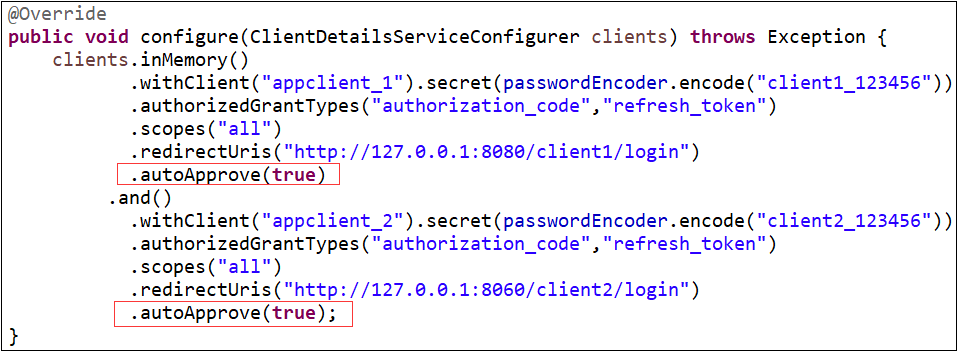
@Override
public void configure(ClientDetailsServiceConfigurer clients) throws Exception {
clients.inMemory()
.withClient("appclient_1").secret(passwordEncoder.encode("client1_123456"))
.authorizedGrantTypes("authorization_code","refresh_token")
.scopes("all")
.redirectUris("http://127.0.0.1:8080/client1/login")
.and()
.withClient("appclient_2").secret(passwordEncoder.encode("client2_123456"))
.authorizedGrantTypes("authorization_code","refresh_token")
.scopes("all")
.redirectUris("http://127.0.0.1:8060/client2/login");
}
@Override
public void configure(AuthorizationServerEndpointsConfigurer endpoints) throws Exception {
endpoints.tokenStore(jwtTokenStore()).accessTokenConverter(jwtAccessTokenConverter());
}
@Override
public void configure(AuthorizationServerSecurityConfigurer security) throws Exception {
security.tokenKeyAccess("isAuthenticated()");//访问tokenKey(秘钥shxiang)的时候需要身份认证
}
@Bean
public TokenStore jwtTokenStore() {
return new JwtTokenStore(jwtAccessTokenConverter());
}
@Bean
public JwtAccessTokenConverter jwtAccessTokenConverter() {
JwtAccessTokenConverter accessTokenConverter = new JwtAccessTokenConverter();
accessTokenConverter.setSigningKey("shxiang");//设置秘钥
return accessTokenConverter;
}
}6)SsoServerApplication.java
@SpringBootApplication
public class SsoServerApplication {
  public static void main(String[] args) {
    SpringApplication.run(SsoServerApplication.class, args);
  }
}
3、应用1(sso-client1)
1)pom.xml,同上
2)application.properties
security.oauth3.client.client-id = appclient_1
security.oauth3.client.client-secret = client1_123456
security.oauth3.client.user-authorization-uri = http://127.0.0.1:9999/server/oauth/authorize

security.oauth3.client.access-token-uri = http://127.0.0.1:9999/server/oauth/token
security.oauth3.resource.jwt.key-uri = http://127.0.0.1:9999/server/oauth/token_key

server.port=8080
server.servlet.context-path =/client1
3)index.html
<!DOCTYPE html>
<html>
<head>
<meta charset="UTF-8">
<title>SSO Client1</title>
</head>
<body>
  <h2>SSO Demo Client1</h2>
  <a href="http://127.0.0.1:8060/client2/index.html" rel="external nofollow" >访问Client2</a>
</body>
</html>
4)SsoClient1Application.java
@SpringBootApplication
@RestController
@EnableOAuth3Sso
public class SsoClient1Application {
  public static void main(String[] args) {
    SpringApplication.run(SsoClient1Application.class, args);
  }
  @GetMapping("/user")
  public Authentication user(Authentication user) {
    return user;
  }
}
4、应用2(sso-client2)
1)pom.xml,同上
2)application.properties,类比应用1修改
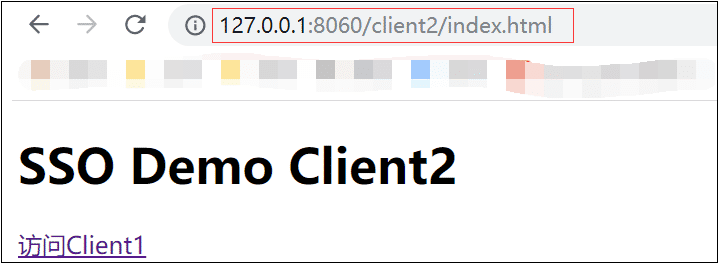
3)index.html,类比应用1修改
4)SsoClient2Application.java,同上
5、测试
1)浏览器输入:127.0.0.1:8080/client1/index.html

2)用户名随便输入,密码输入123456
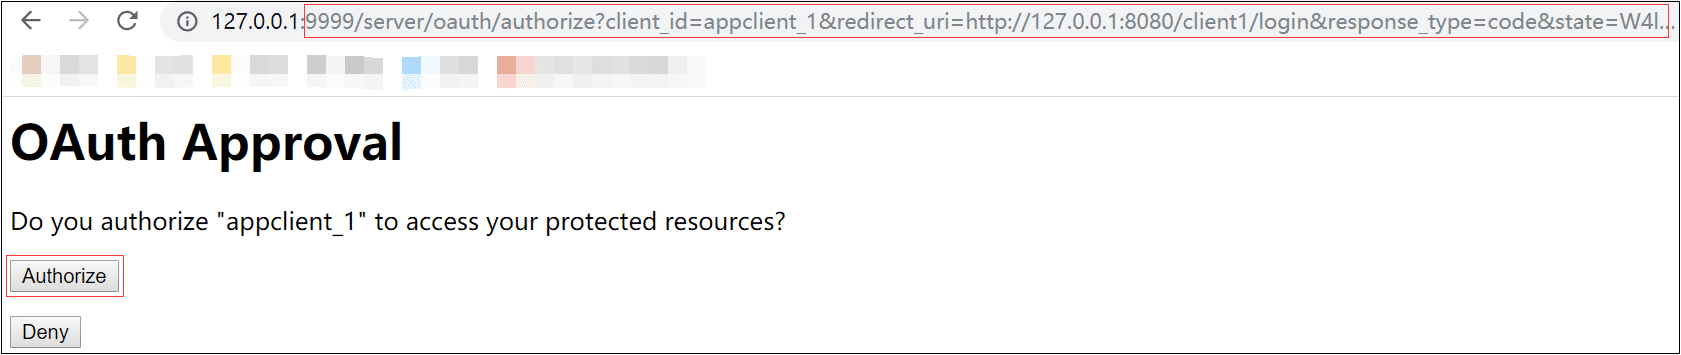
3)点击Authorize
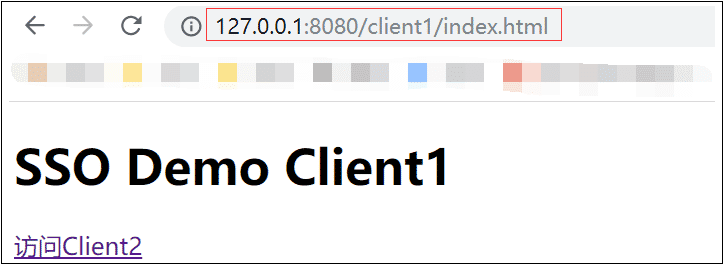
4)点击超级链接访问Client2
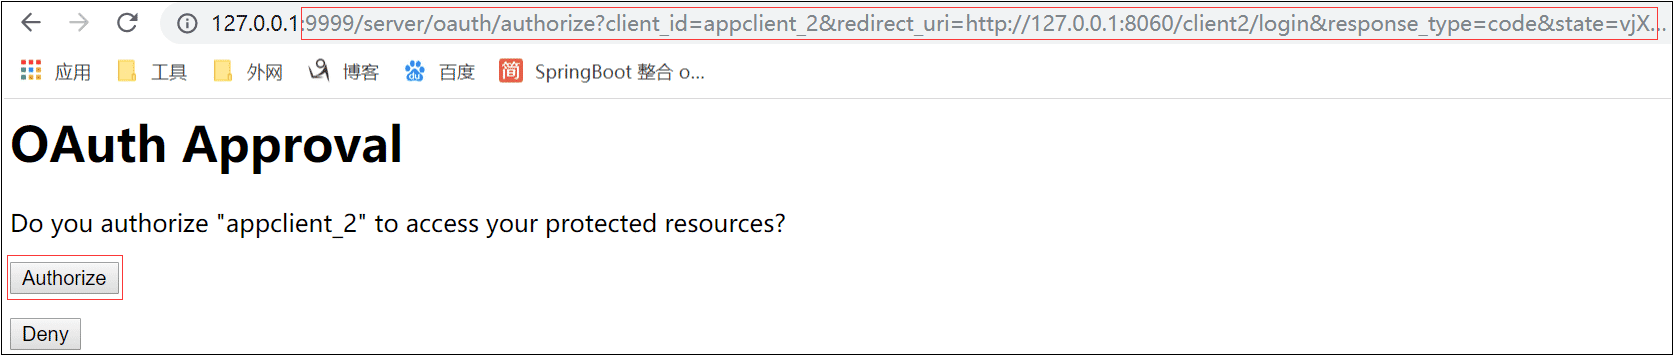
5)点击Authorize
认证成功,后面点击两个超级链接可以任意访问,无需登录 、无需点击Authorize。
注意:
1)虽是同一用户,但是访问http://127.0.0.1:8080/client1/user和http://127.0.0.1:8060/client2/user获取的Token值不一样。
2)实现跳过授权,登录后直接访问,修改如下代码:
3)表单登录与httpBasic登录,修改WebSecurityConfig.java中configure方法
httpBasic登录:http.httpBasic().and().csrf().disable();
表单登录:http.formLogin().and().authorizeRequests().anyRequest().authenticated();
4)重点:浏览器访问要用127.0.0.1不要用localhost。要设置应用路径server.servlet.context-path =/xxxx,不能直接到端口号。
以上是JWT实现SSO单点登录的流程步骤的所有内容,感谢各位的阅读!希望分享的内容对大家有帮助,更多相关知识,欢迎关注亿速云行业资讯频道!
免责声明:本站发布的内容(图片、视频和文字)以原创、转载和分享为主,文章观点不代表本网站立场,如果涉及侵权请联系站长邮箱:is@yisu.com进行举报,并提供相关证据,一经查实,将立刻删除涉嫌侵权内容。


