使用vmware workstation新建虚拟机


选择install Proxmox VE

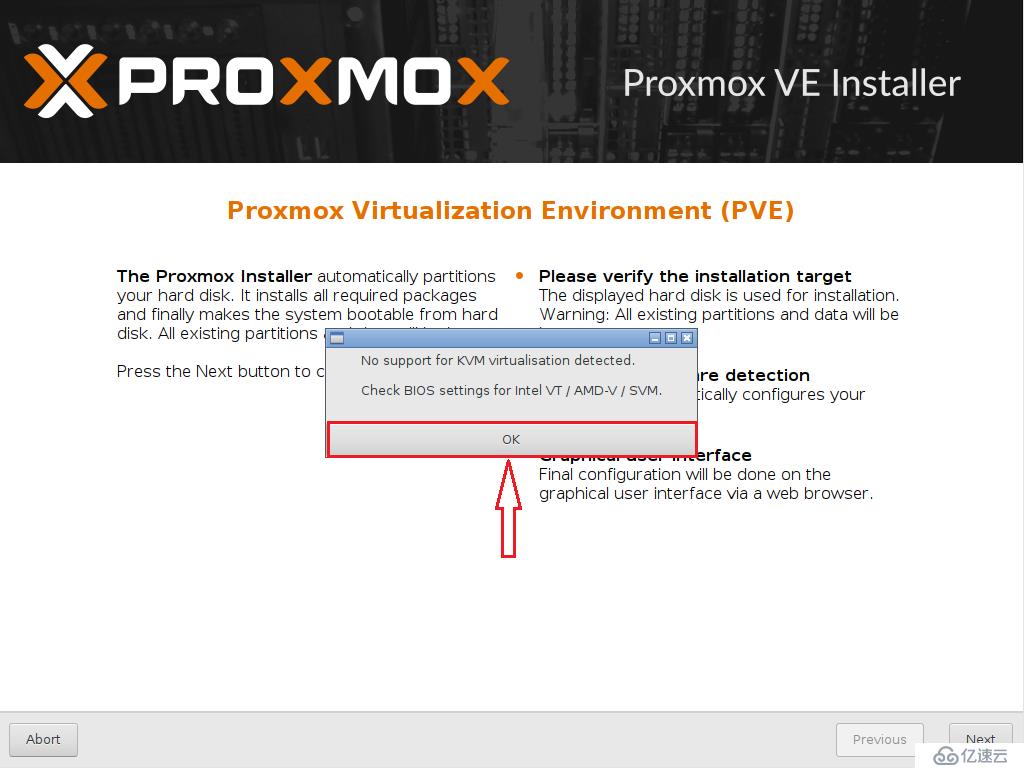
选择【ok】
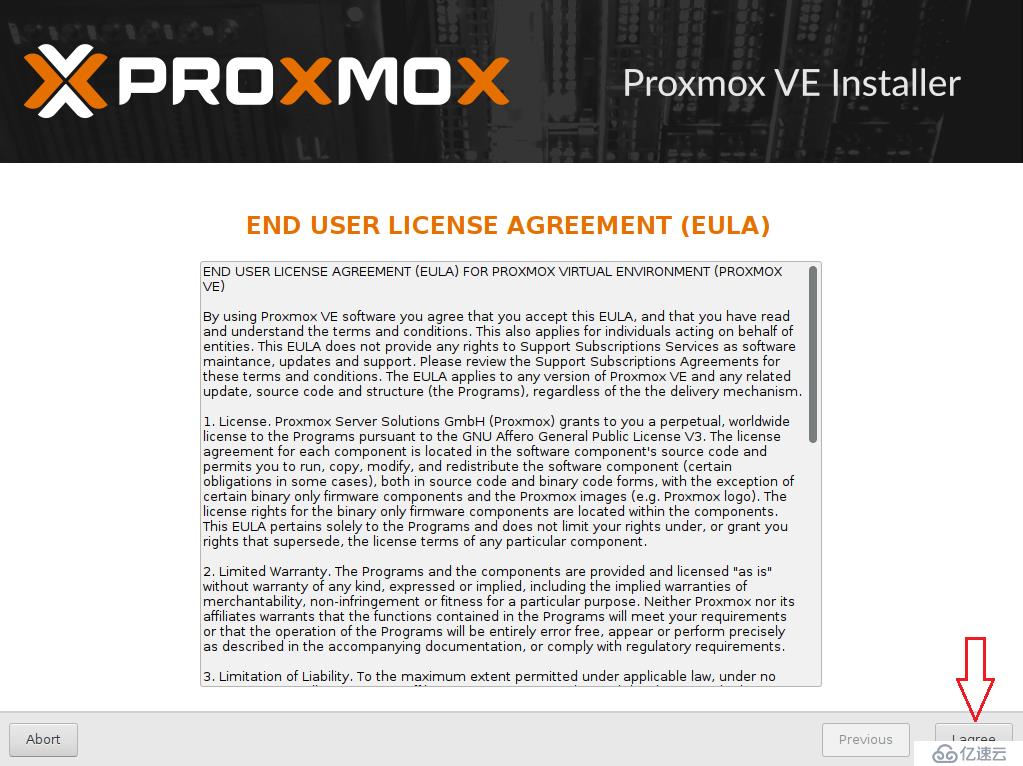
选择【iagree】
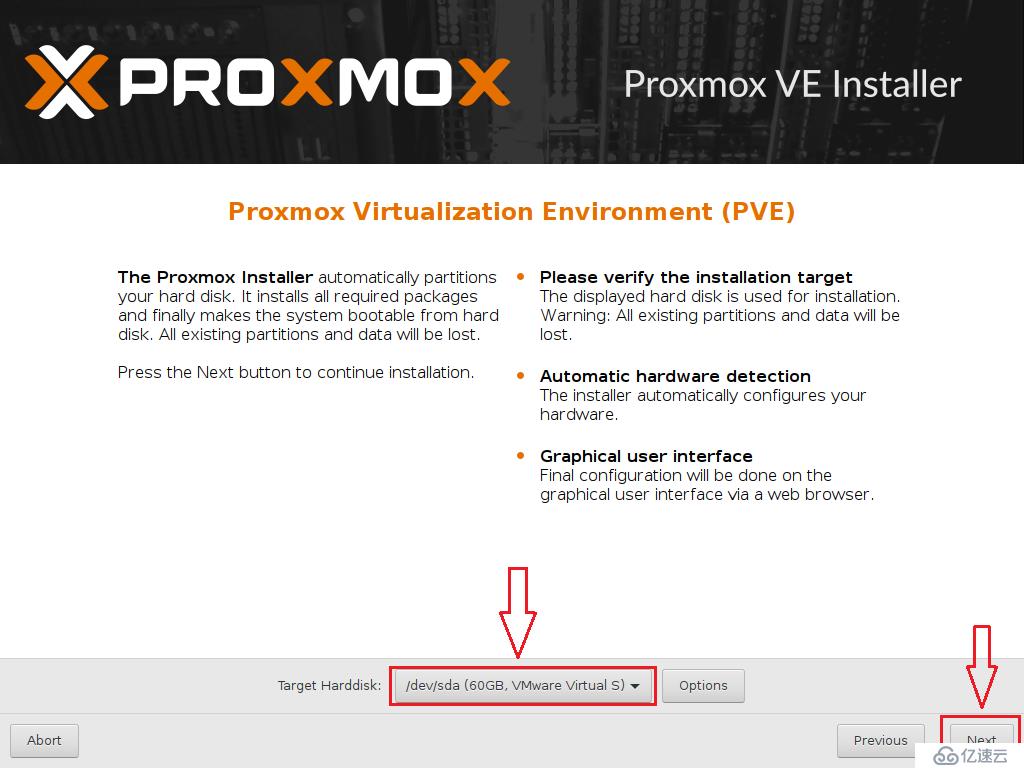
选择系统安装的磁盘,可以选择【option】分区,新手不建议。
修改时区,然后选择【Next】

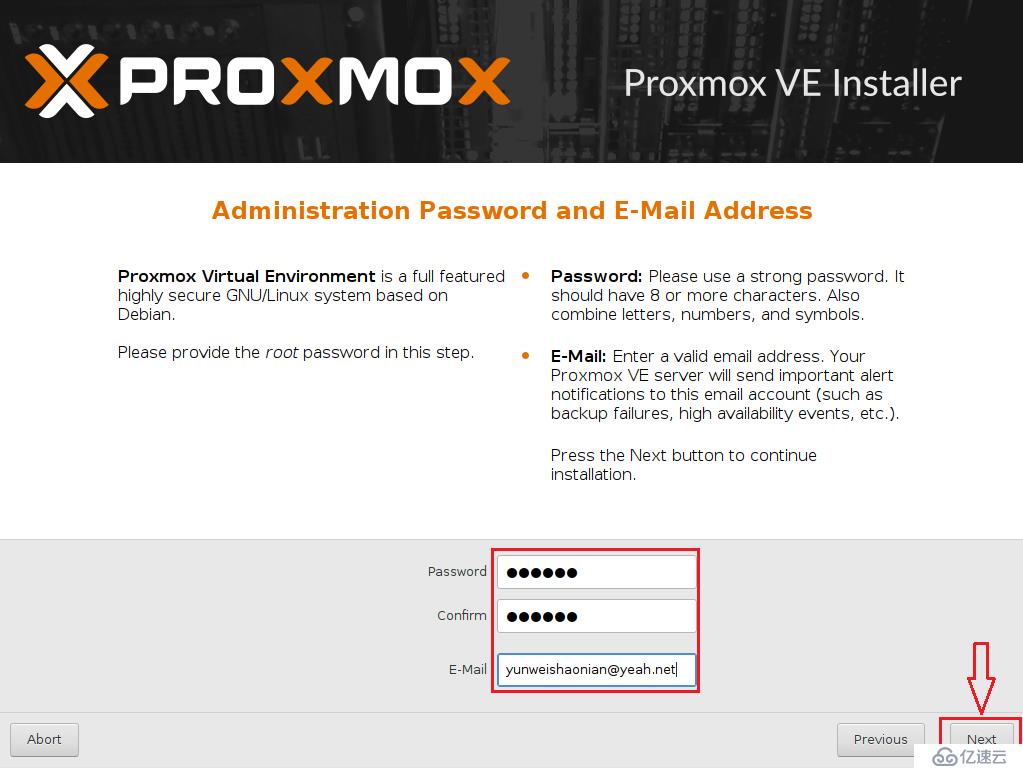
输入密码和邮箱,选择【Next】
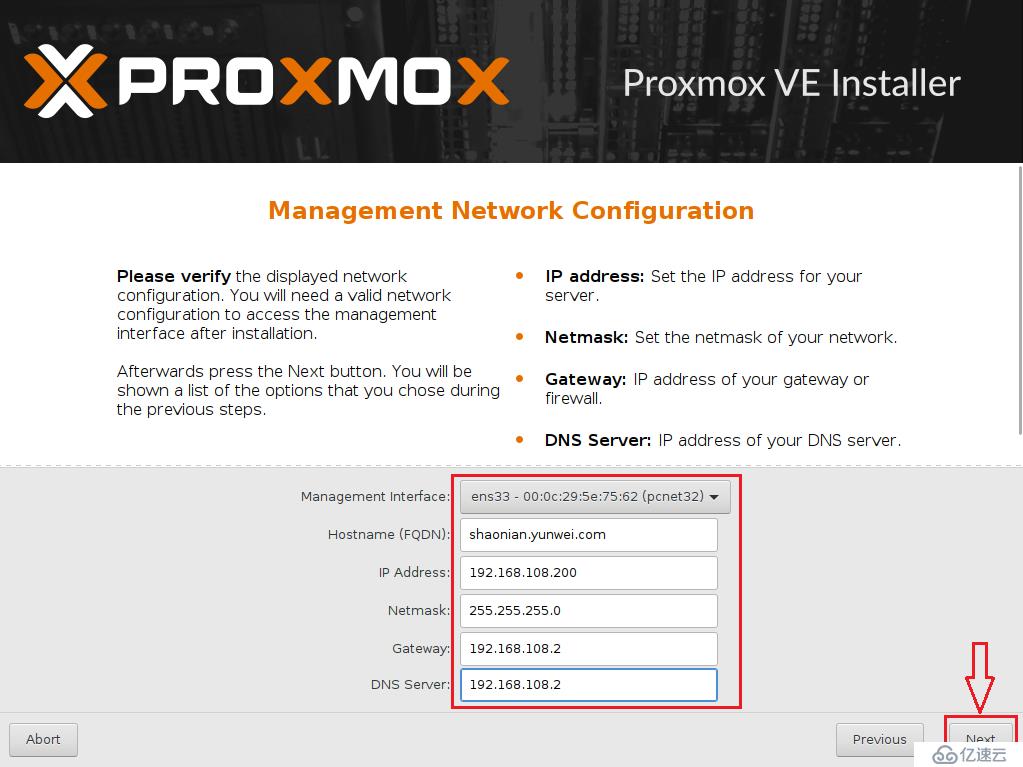
设置网络信息,选择【Next】
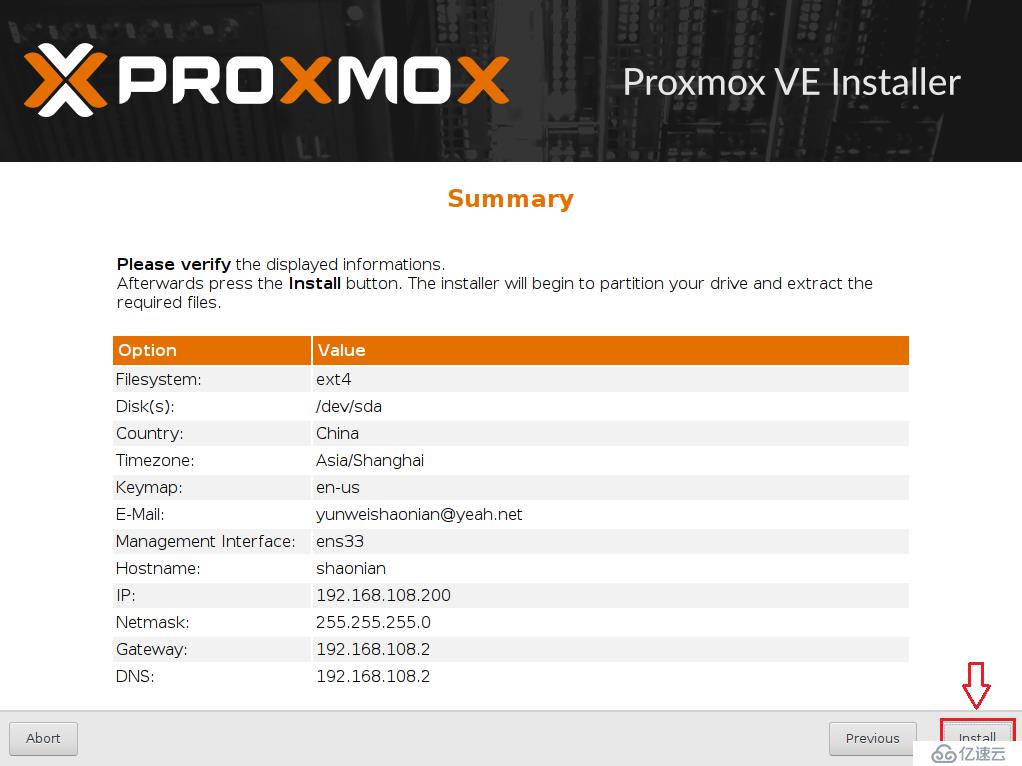
确认信息,然后选择【install】
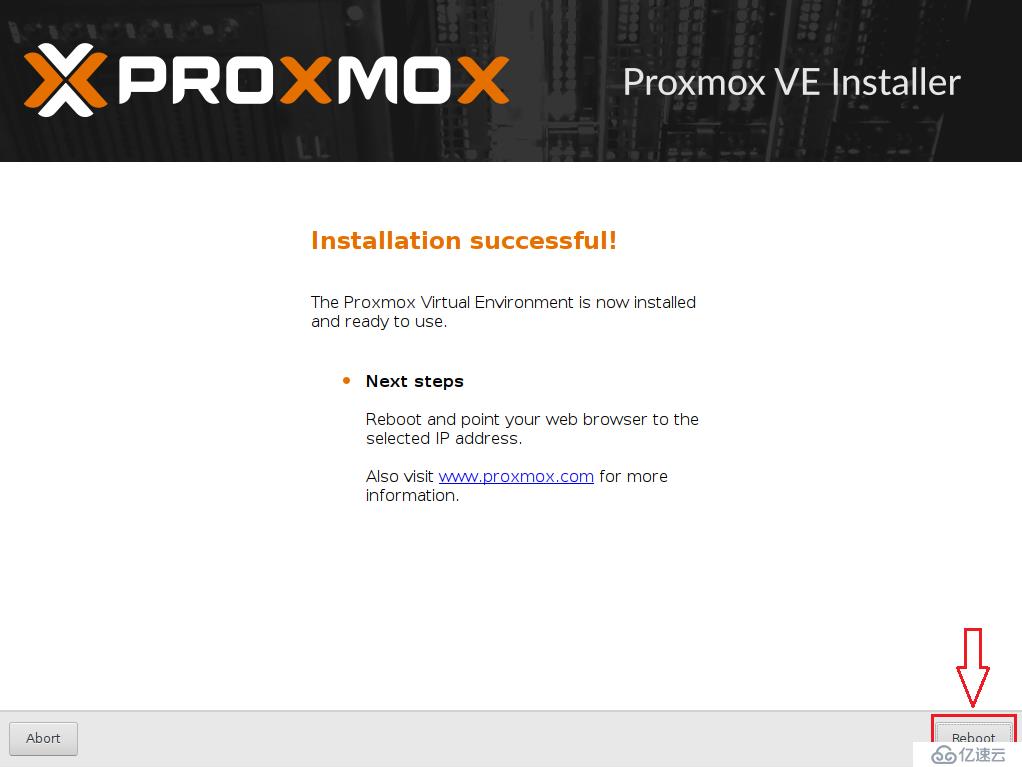
安装完成后,选择【reboot】
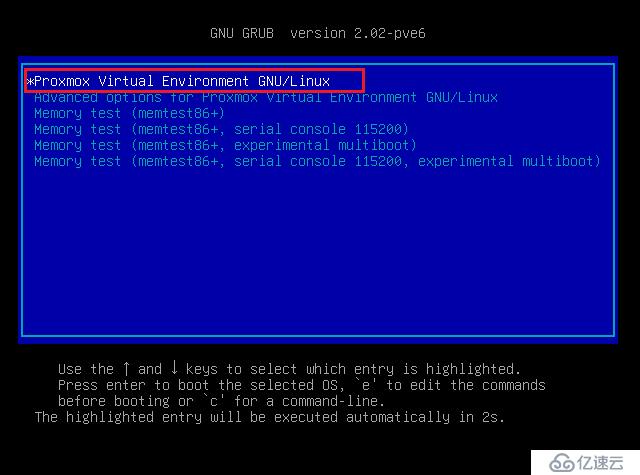
选择第一个选项引导
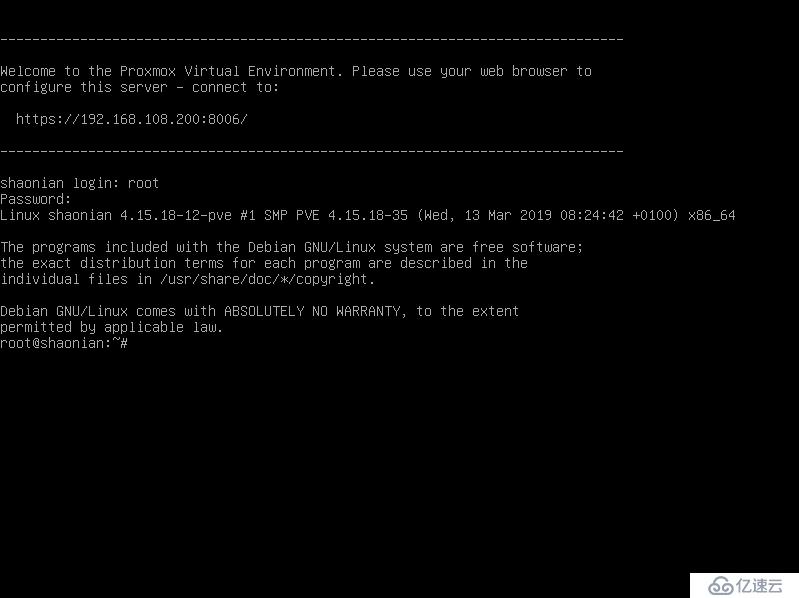
输入用户名密码登录
创建一个集群
root@shaonian:~# pvecm  create yunwei-cluster
Corosync Cluster Engine Authentication key generator.
Gathering 1024 bits for key from /dev/urandom.
Writing corosync key to /etc/corosync/authkey.
Writing corosync config to /etc/pve/corosync.conf
Restart corosync and cluster filesystem
root@shaonian:~#
查看集群状态
root@shaonian:~# pvecm status
Quorum information
------------------
Date:             Mon May 20 16:23:08 2019
Quorum provider:  corosync_votequorum
Nodes:            1
Node ID:          0x00000001
Ring ID:          1/8
Quorate:          Yes

Votequorum information
----------------------
Expected votes:   1
Highest expected: 1
Total votes:      1
Quorum:           1
Flags:            Quorate

Membership information
----------------------
    Nodeid      Votes Name
0x00000001          1 192.168.108.200 (local)
root@shaonian:~#
查看集群节点
root@shaonian:~# pvecm nodes

Membership information
----------------------
    Nodeid      Votes Name
         1          1 192.168.108.200 (local)
root@shaonian:~#
修改apt源
vi /etc/apt/source.list
deb http://mirrors.163.com/debian/ stretch main non-free contrib
deb http://mirrors.163.com/debian/ stretch-updates main non-free contrib
deb http://mirrors.163.com/debian/ stretch-backports main non-free contrib
deb-src http://mirrors.163.com/debian/ stretch main non-free contrib
deb-src http://mirrors.163.com/debian/ stretch-updates main non-free contrib
deb-src http://mirrors.163.com/debian/ stretch-backports main non-free contrib
deb http://mirrors.163.com/debian-security/ stretch/updates main non-free contrib
deb-src http://mirrors.163.com/debian-security/ stretch/updates main non-free contrib
更新apt源
root@shaonian:/etc/apt# apt-get -y update
安装net-tools
apt-get install net-tools -y
打开网页(注意是https),然后输入用户名密码(用户名root,密码是安装时设置的)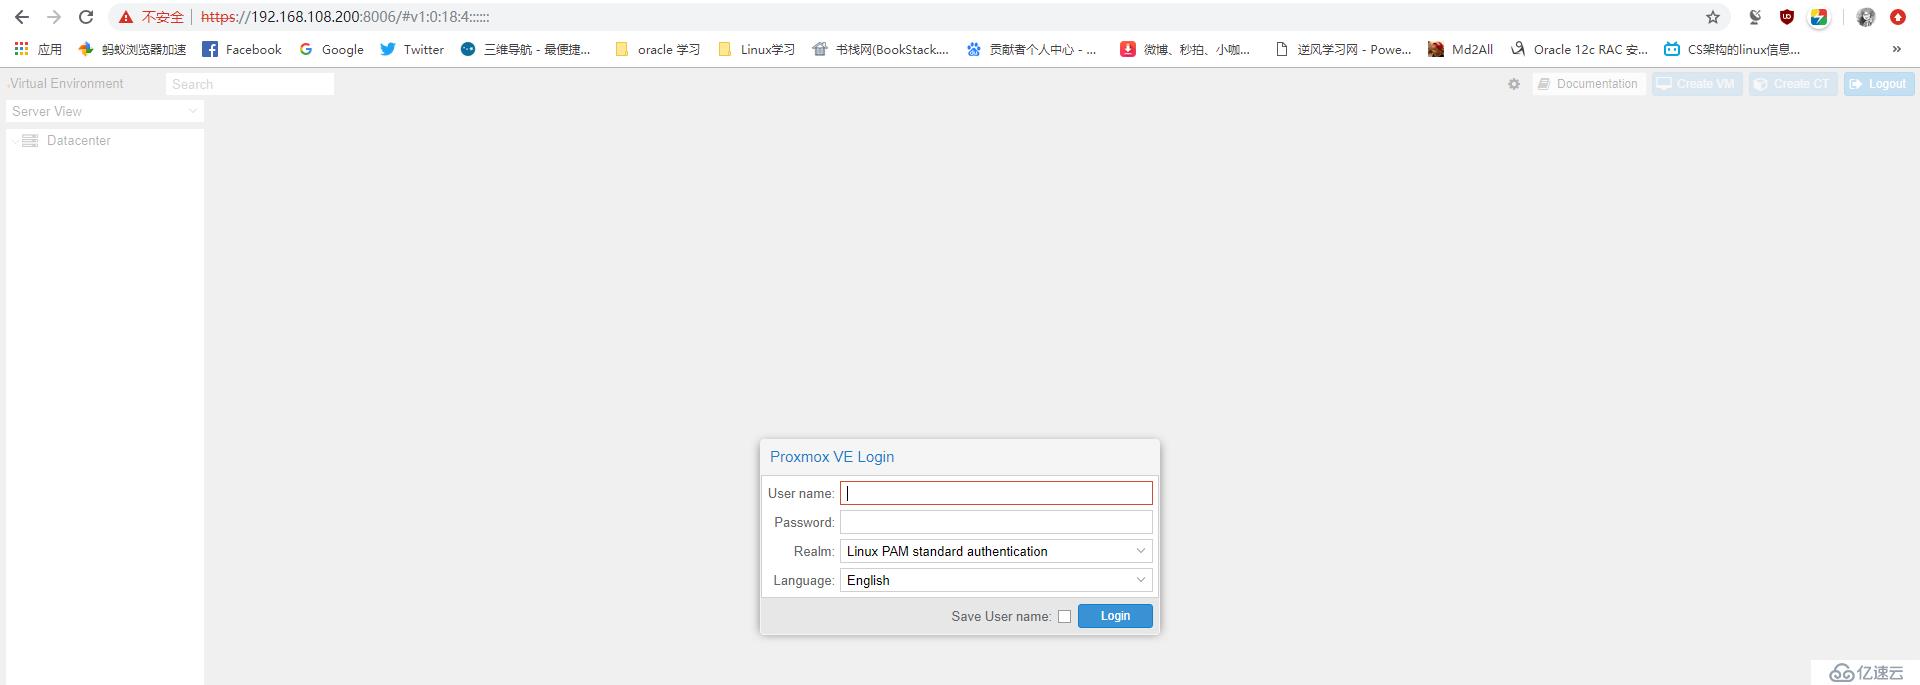
登录后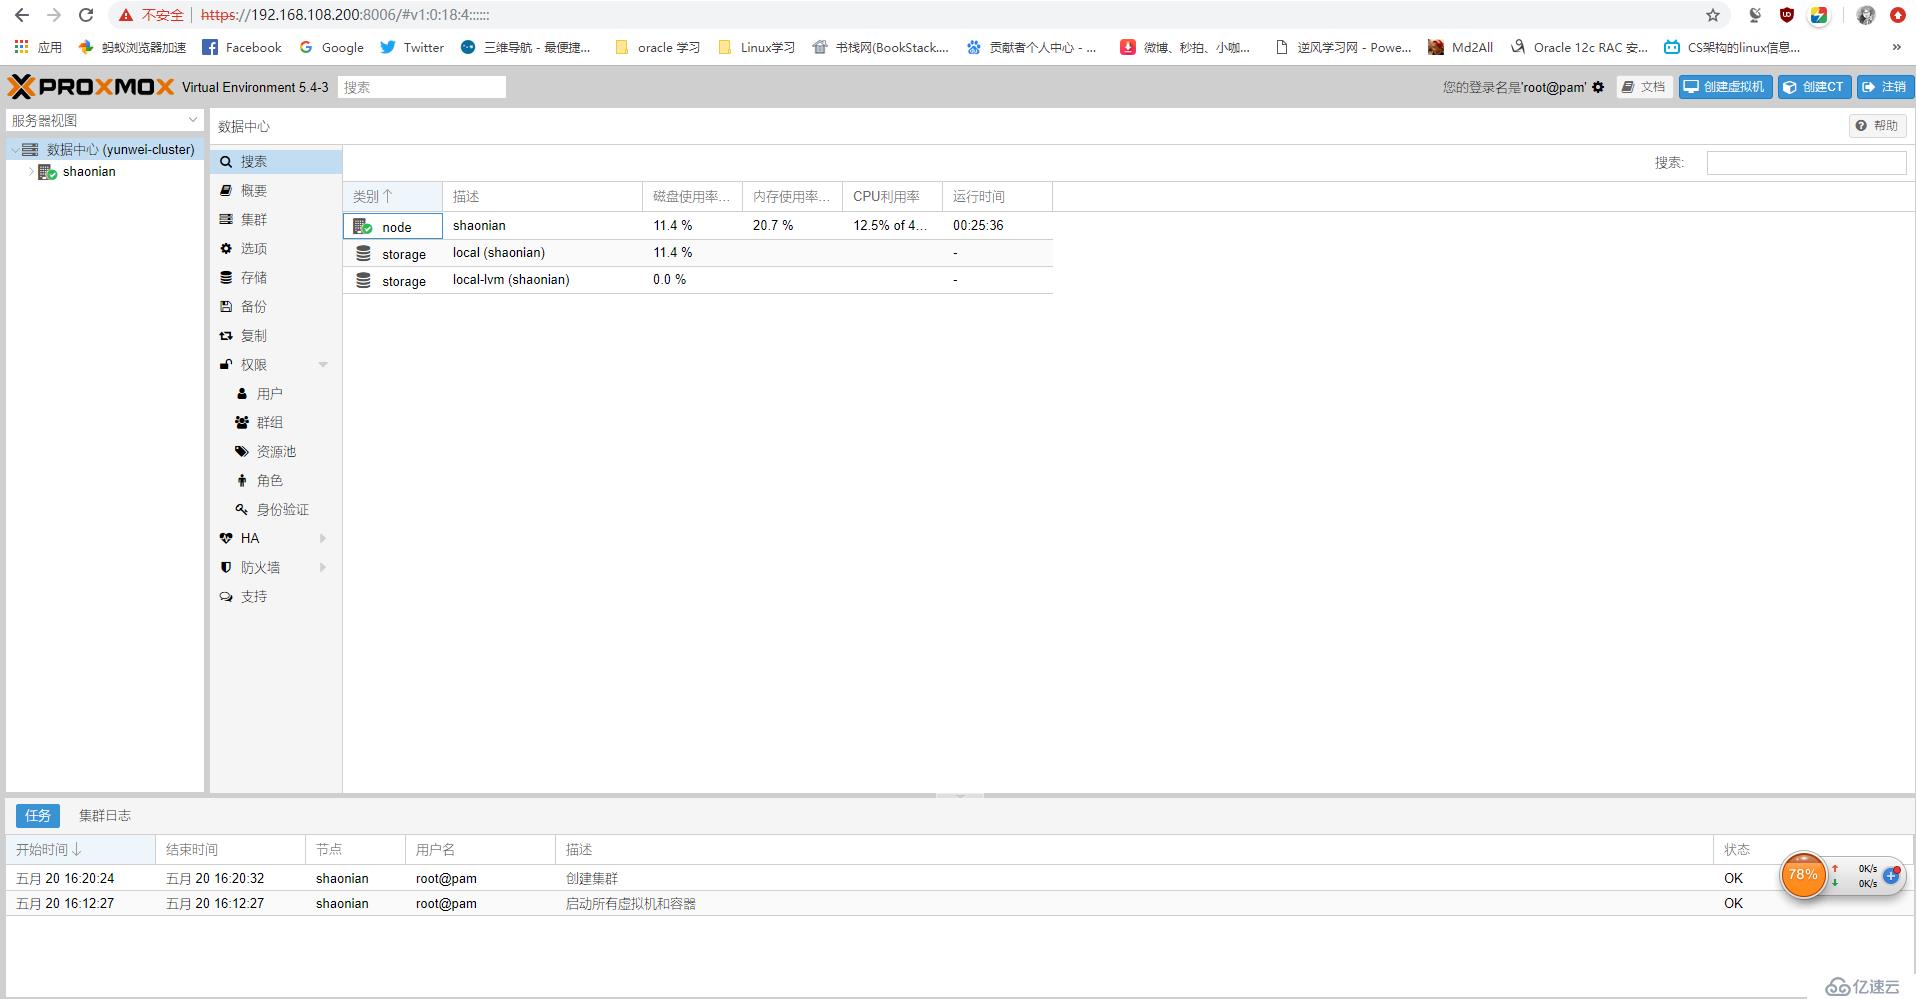
微信公众号《运维少年》
免责声明:本站发布的内容(图片、视频和文字)以原创、转载和分享为主,文章观点不代表本网站立场,如果涉及侵权请联系站长邮箱:is@yisu.com进行举报,并提供相关证据,一经查实,将立刻删除涉嫌侵权内容。


