1、配置yum源
[root@mgr1 ~]# cat /etc/yum.repos.d/signal18.repo

[signal18]
name=Signal18 repositories
baseurl=http://repo.signal18.io/centos/$releasever/$basearch/
gpgcheck=0
enabled=1
2、yum安装过程
[root@mgr1 ~]# yum install replication-manager-osc
Loaded plugins: fastestmirror
Loading mirror speeds from cached hostfile
 * base: mirror.dal.nexril.net
 * epel: mirrors.yun-idc.com
 * extras: mirrors.huaweicloud.com
 * updates: mirrors.tuna.tsinghua.edu.cn
github_orchestrator/x86_64/signature                                                                                                                                      |  833 B  00:00:00
github_orchestrator/x86_64/signature                                                                                                                                      | 1.0 kB  00:00:00 !!!
github_orchestrator-source/signature                                                                                                                                      |  819 B  00:00:00
github_orchestrator-source/signature                                                                                                                                      |  951 B  00:00:00 !!!
signal18                                                                                                                                                                  | 2.9 kB  00:00:00
signal18/7/x86_64/primary_db                                                                                                                                              | 5.8 kB  00:00:01
Resolving Dependencies
--> Running transaction check
---> Package replication-manager-osc.x86_64 1560253855:2.0.1_28_gf072-1 will be installed
--> Finished Dependency Resolution

Dependencies Resolved

=================================================================================================================================================================================================
 Package                                              Arch                                Version                                                    Repository                             Size
=================================================================================================================================================================================================
Installing:
 replication-manager-osc                              x86_64                              1560253855:2.0.1_28_gf072-1                                signal18                               26 M

Transaction Summary
=================================================================================================================================================================================================
Install  1 Package

Total download size: 26 M
Installed size: 192 M
Is this ok [y/d/N]: y
Downloading packages:
replication-manager-osc-2.0.1_28_gf072-1.x86_64.rpm                                                                                                                       |  26 MB  00:22:57
Running transaction check
Running transaction test
Transaction test succeeded
Running transaction
  Installing : 1560253855:replication-manager-osc-2.0.1_28_gf072-1.x86_64                                                                                                                    1/1
  Verifying  : 1560253855:replication-manager-osc-2.0.1_28_gf072-1.x86_64                                                                                                                    1/1

Installed:
  replication-manager-osc.x86_64 1560253855:2.0.1_28_gf072-1

Complete!
3、配置文件修改
[root@mgr1 ~]# find / -name *.toml
/etc/replication-manager/cluster.d/cluster01.toml
/etc/replication-manager/cluster.d/cluster02.toml
[root@mgr1 ~]# vim /etc/replication-manager/cluster.d/cluster01.toml
[root@mgr1 ~]# mkdir -p /data/replication-manager
[root@mgr1 ~]# mkdir -p /data/share_replication-manager
[root@mgr1 ~]# vim /etc/replication-manager/config.toml
[root@mgr1 ~]# cat /etc/replication-manager/config.toml
[Cluster01]
title = "Cluster01"
db-servers-hosts = "192.168.56.14:3306,192.168.56.15:3306,192.168.56.16:3306"
db-servers-prefered-master = "192.168.56.15:3306"
db-servers-credential = "orchestrator:123456"
db-servers-connect-timeout = 1
replication-credential = "orchestrator:123456"
failover-mode = "automatic"


[Default]
monitoring-datadir = "/data/replication-manager"
monitoring-sharedir = "/data/share_replication-manager"
log-level=1
log-file = "/var/log/replication-manager.log"
replication-multi-master = false
replication-multi-tier-slave = false
failover-readonly-state = true
http-server = true
http-bind-address = "0.0.0.0"
http-port = "10001"
4、启动
[root@mgr1 ~]# /etc/init.d/replication-manager restart
Restarting replication-manager (via systemctl):            [  OK  ]
[root@mgr1 ~]#
5、切换测试
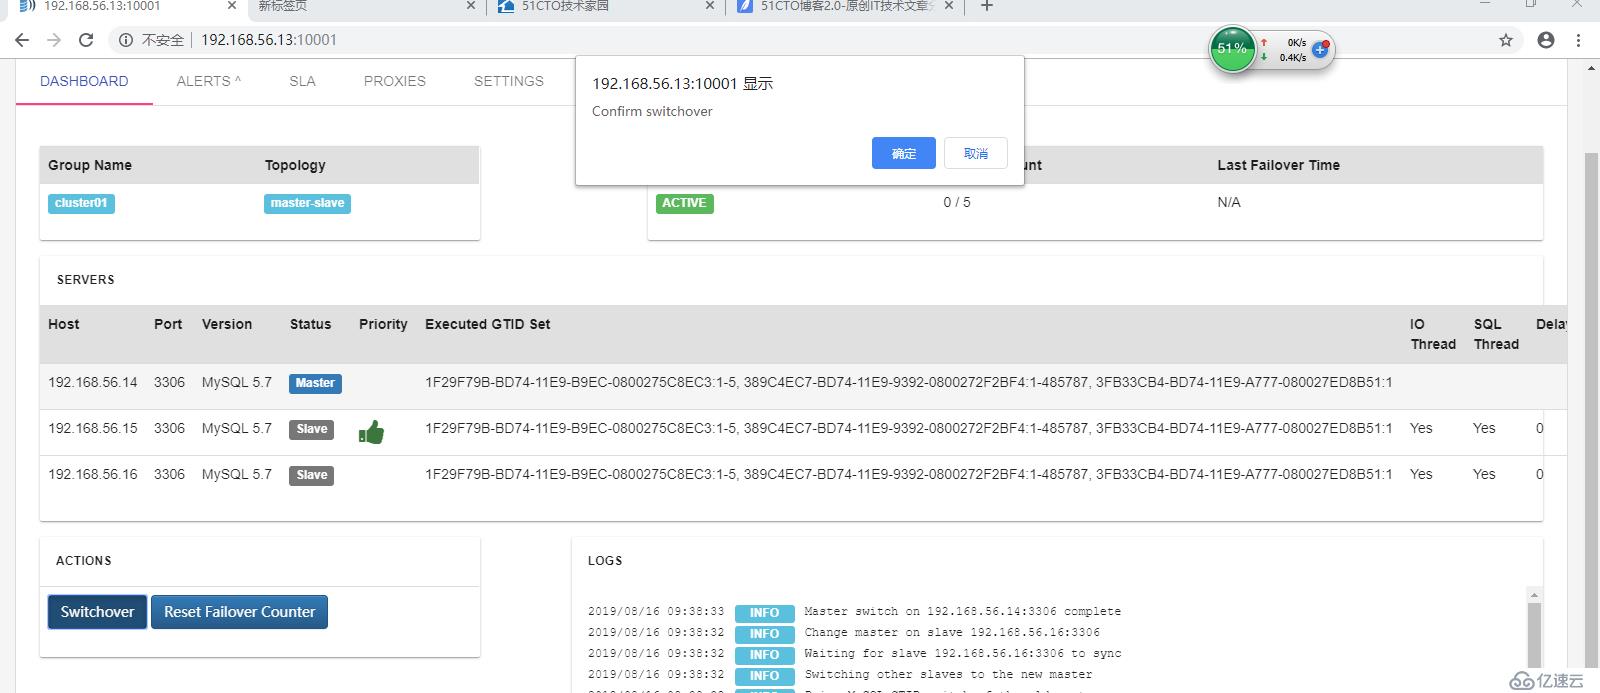
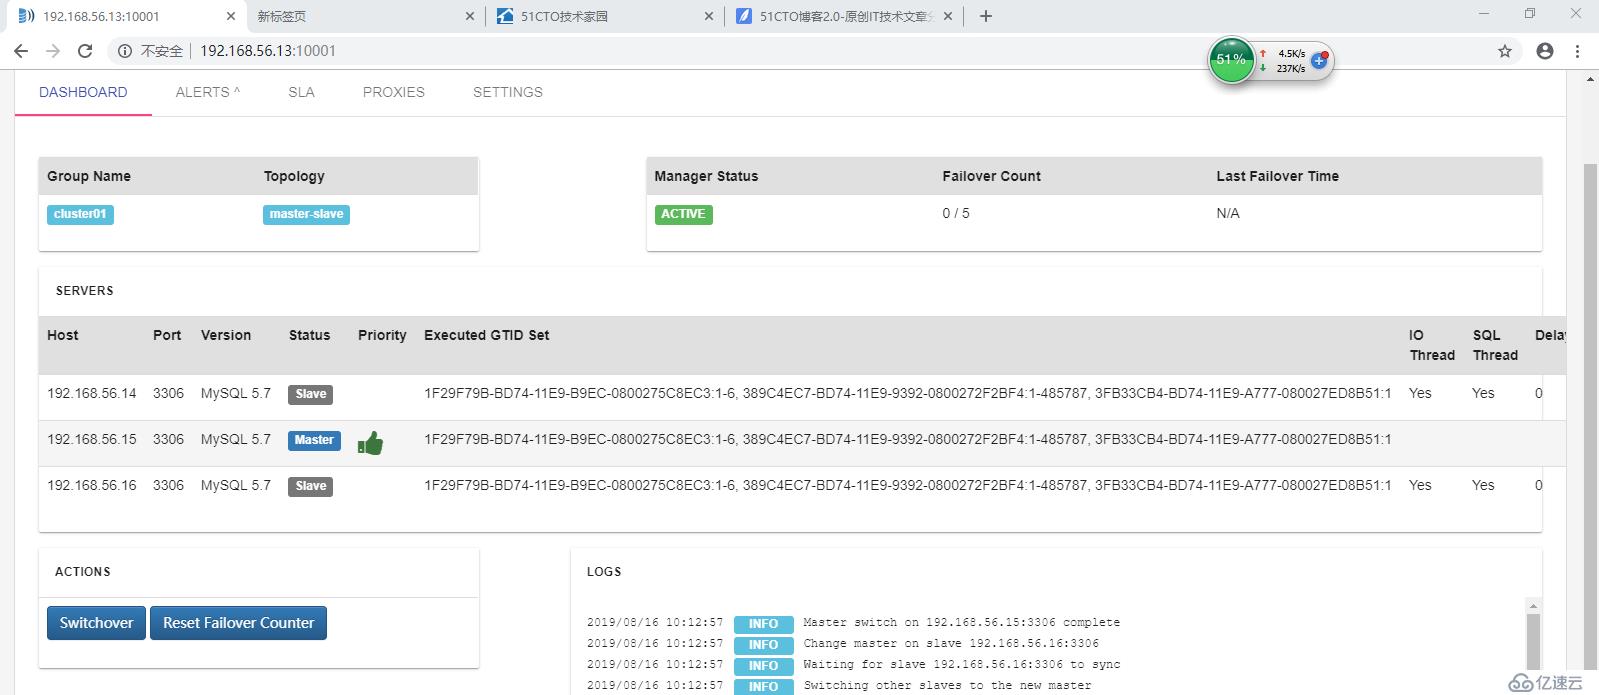
6、结合中间件maxscale,proxysql
maxscale,proxysql负责读写分离,因为这两个中间件本身就有识别发现主的功能,所以replication-manager负责管理主从failover的主库选举和从库指向新主。
发现replication-manager可以对maxscale,proxysql管理,我觉得这个两个中间件主动发现模式已经够用了,不需要被动接收replication-manager发送信息。
7、特别说明:
shutdown的主节点上线后,replication-manager会自动把其加入集群。
replication-manager不需要在MySQL节点安装客户端
8、我的环境:
mgr安装的是replication-manager

es1-3安装的是MySQL5.7 gtid主从
[root@mgr1 maxscale]# cat /etc/hosts
127.0.0.1   localhost localhost.localdomain localhost4 localhost4.localdomain4
::1         localhost localhost.localdomain localhost6 localhost6.localdomain6

192.168.56.13 mgr

192.168.56.14 es1
192.168.56.15 es2
192.168.56.16 es3
[root@mgr1 maxscale]#

[root@es3 bin]# cat /etc/my.cnf |grep -v ^#[mysqld]datadir=/var/lib/mysql
socket=/var/lib/mysql/mysql.sock

symbolic-links=0

log-error=/var/log/mysqld.log
pid-file=/var/run/mysqld/mysqld.pid

gtid-mode = ON
enforce-gtid-consistency = ON
log-slave-updates = ON
log-bin=mysqlbin
server-id=3
report_host=es3[root@es3 bin]#
免责声明:本站发布的内容(图片、视频和文字)以原创、转载和分享为主,文章观点不代表本网站立场,如果涉及侵权请联系站长邮箱:is@yisu.com进行举报,并提供相关证据,一经查实,将立刻删除涉嫌侵权内容。


